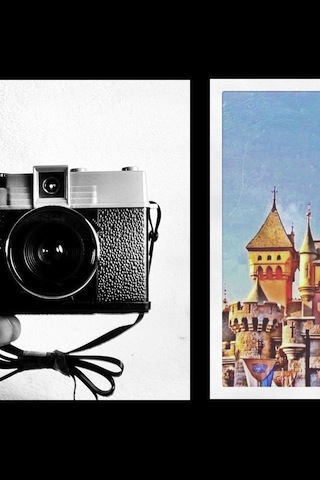
Hipstamatic camera for the iPhone, on sale for Holiday weekend 50% off

Fence sitters for the retro camera Hipstamatic app, it’s a pretty good time to jump in. Regular readers know I have covered the app through all of it’s updates and many of it’s film / lens pack additions. Today, the developers announced that they are offering the app for 50% off now through the holiday weekend. All of the basic included lens and films are included, ready for some fun photo shooting while your out and about.

Also, for the holiday weekend is the return of all of the previous packs that have come and gone. Many of the holiday packs appear for a few months then go away. If you didn’t grab the effects, it was no longer possible to buy them. Non of the packs seems to be discounted like the actual Hipstamatic app is this weekend, but it’s nice to have back a few that I had been slow to grab and didn’t in-app purchase. Now, off to mix and match while doing the faire this weekend.

More graphics and less text, 500px Stackr for the iPhone updated

You may remember my earlier mention of 500px Stackr. It is not only for viewing photos but the app also lets you upload to your 500px account directly from your iPhone. The uploading feature cut a few steps out of my busy day, yea!

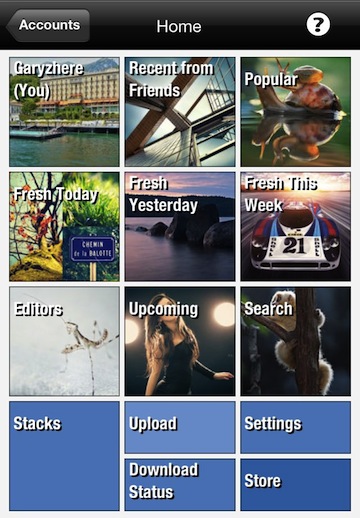
The app popped up as being updated so I took a quick end to end pass through the new version. The developers have taken a app dealing with visually impacting images and made it’s self visually pleasing. Gone are the screens of lists of text. Gone is the multi taps to get to the ‘Upload’ option. Launching 500px Stackr takes you right to an overview of top images in the different group as well to easy to use buttons for actions you may also need to perform. The options are the same (except Upload being easier to get to) as the previous version’s text list, now though the options are divided into boxes/buttons with images even before you dive into the different areas.

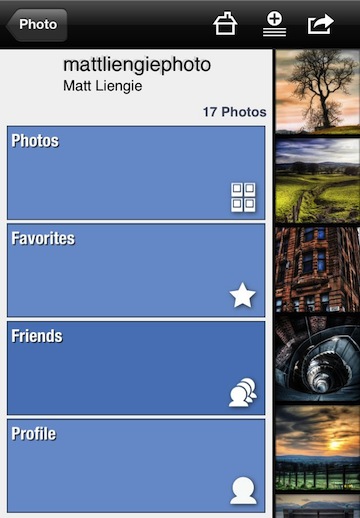
Also changes in the overview of an individual’s image area. 500px Stackr still has their name across the top and the quick overview thumbnails down the side. Now the options have moved from thin text lines, challenging for big fingers, to larger buttons, much easier to read and touch.

Finally a Fish Eye lens for my iPhone that I can actually use!

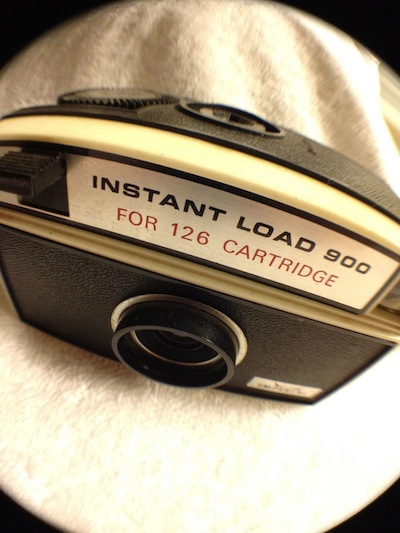
Watch out… the tunnel walk ways, bridges, old buildings and dense forests will never been the same. At lease, not the same through the eye of my iPhone camera.

I have gone through fish eye options both software and physical hardware. There is some acceptable software available and that is what I have had to be using. The problem with the Fish Eye lenses I have tested on my iPhone (yes, I bought all of them, ugh!) has presented me with a variety of issues. Mostly the problem is because I have a thin vinyl protective skin on the back of my iPhone. It protects the iPhone glass face and it has a fun design I did that makes my iPhone mine in a crowd of millions of iPhones.

The hardware played with so far has included lenses that attached via a small magnetic ring that stuck to the iPhone… which covered up the flash all of the time. There was the full case version that would have been ‘okish’ if the lens could be removed from the case, instead it was full case on/off. One of my favorite is the Olloclip… very nicely made with three lens options to use… issue being is that it is a precision fit around a bare iPhone with too close of tolerances to allow a fit over the back skin. I actually made a template to use for cutting out the corner of the iPhone skin just so I could use the Olloclip, I’ll post that up shortly for you to use if you have the same challenge.

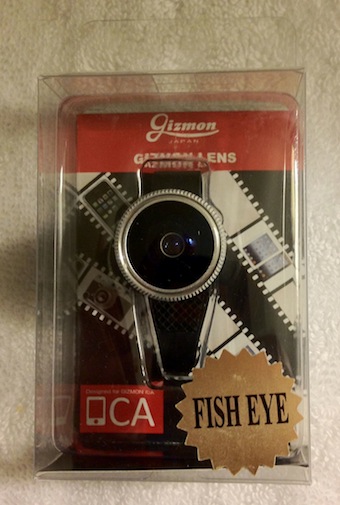
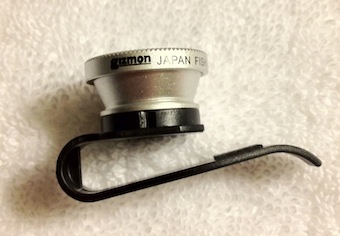
Enter, the  Gizmon Clip-On Fish Eye. Simple design, why didn’t I think of it?!! The folks at the Four Corner Store Web site offer three versions. The Fish Eye, I’m covering here… The Polarizer, which I will review after I play enough to know it for a review, and the 3 Image Mirage… not my sort of thing.

Each of the Gizmon Clip-On lenses come individually packaged. The lenses are attached to the clip so you will be carrying as many full units as you need with you, not just a clip and lenses. That is fine, the lens/clip is reasonably small enough to toss into any bag. The clip slides easily over the iPhone edge, judging by the extra area in the loop, it should work over the edge of most tighter fitting cases. The pressure ‘finger’ of the clip does rest on the iPhone’s screen but since it is plastic, it doesn’t confuse the screen thinking it’s a finger. The design means that it will work on my iPhone 4s, along with my iPad and my friend’s older iPhone 3Gs too.

The lens is easy on/off. I found that for best alignment of the lens over the camera, rather than looking through the iPhone screen, I flip the iPhone over and look through the lens to encircle the camera. The larger outside diameter of the lens is working well for clearer images than I experienced with other options. I’ll do a head:head between this and the Olloclip and report back. Meanwhile, pretty happy with my purchase for easy of use.

Fotor CameraBag brings many iPhone Photo Apps into one

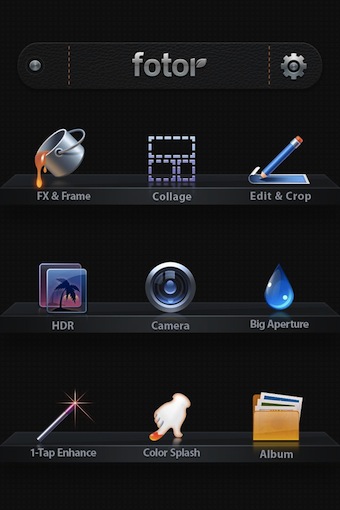
I have covered a couple apps written by the developers EverImaging LTD. One in particular was their HDR app. Now, get the power of their many apps into on with Fotor CameraBag. Launching Fotor CameraBag gives you many options to highly customize your iPhone images.

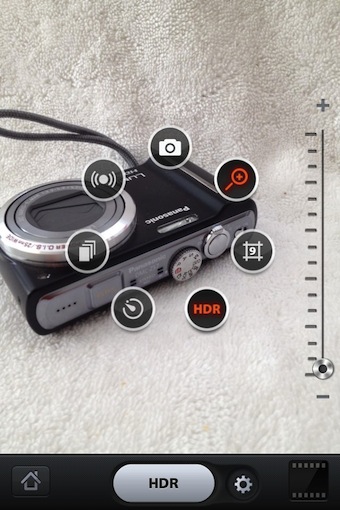
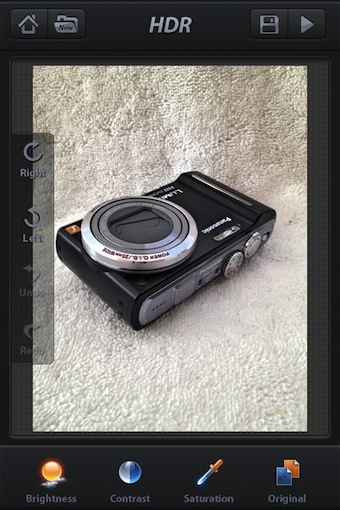
One of the key apps brought into the Fotor CameraBag is the HDR features that is one of the developer’s most popular stand alone apps. There is many adjustments to the way the multi images are taken that make up the HDR, including a step to check the dark/bright images prior to merging the two. Anti-Shake, timer, zoom and on-screen grid are a few of the options through the gear icon next to the shutter button.

After taking your photo, HDR or other, Fotor CameraBag takes you to many fine tuning options. Rotate, Crop, Brightness, Saturation and Contrast are a few. There is not need to save the photo off to another app, adjust the image then move onto other enhancements all within the same app.

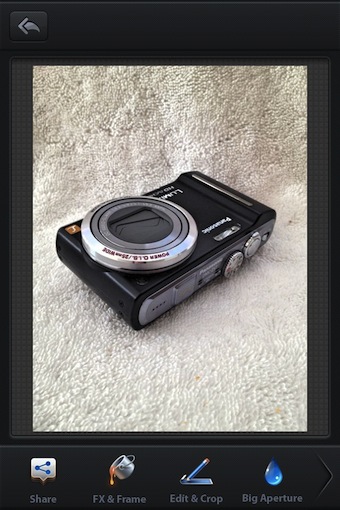
After you have completed all of the fine tuning of the HDR photo, save to go out to the list of image tuning like ColorSplash, FX, Frames and Collages.

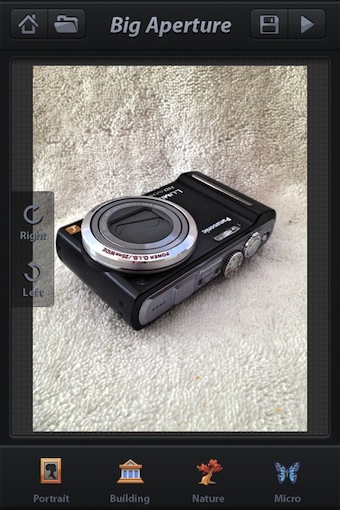
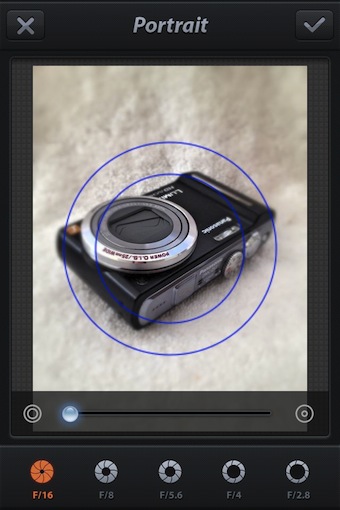
Each of those ‘included’ photo enhancements can be found in individual apps, rather Fotor CameraBag bundles all into one iPhone app. Like below, ‘Big Aperture’.

Similar to Tilt Shift effect, the depth adding by using a set lens aperture will change the way a person focuses on the image. We used to buzz around town with a set lens to challenge the world around us to have a single item distance set to be in focus. Rather than offering the adjust the percent of blur found in other apps, Fotor CameraBag has you choose the lens opening similar to a physical lens, then adjust the location and transition circle outside of the main focus object.


Growing concerns about iPhone Photo app ‘free’ bait and switch!

Some iPhone photography apps have features I really want to use with my iPhone camera and will gladly part with my hard earned dollars. Others, are light versions of professional apps that I don’t see using more than once to explore the developers way of attacking a problem. In between are the apps that I may not be convinced of  buying, but if I could play a while would most often update to a ‘pro’ version.

Some developers have found they can offer their app for a day or week at no charge. Enough fence sitters and blogs will pick it up and talk about it in more detail that when it goes back to full price the public will be better informed to purchase.

There is a group of developers that offer their app for free-for-a-day as often as once a month. This does lead to possible purchasers waiting till the app goes on ‘sale’ and then purchase. Meaning the ‘full price’ purchases start to go way down for the developer.

Enter, the game playing few developers. They offer their app for free, just long enough to get the special to hit the main stream sites, then they pull the ‘free’ pricing. That can be a matter of an hour or two. They don’t say that the sale price is for an hour or a day, so they aren’t being dishonest. But, what happens is that blogs mention the app with a review and the free price, people make the jump and then end up having to pay. Most people will continue with a 99 cent to a dollar ninety nine purchase without backing out since they are either committed or didn’t notice the price is back to full.

This quick changing price caught me out twice with the image enhancement app Large Aperture Pro. I mentioned the app a couple times before as on sale, this time thought I got a lot of emails and pulled my news item. There are many other apps doing this same quick sale removal, I am not singling out the one. It just happened to be the one that got several of my readers this morning. This means that going forward, I won’t mention any apps on sale for Free unless they specifically say for how long or I have personally seen them on sale for at least a half day.

There will be other sites still mentioning the apps playing the quick switching price game. I hope my valued readers will feel a bit better about the deals they read about here going forward (like the DMD Panorama I posted a couple hours ago, still free). Thanks!!

Getting ultra wide shots with the iPhone and DMD Panorama

I’m guilty of it as many people are, thinking of Panorama apps as software to use on the iPhone to get images that go all around… a big circle image. Actually, they are great to get very wide images too, and DMD Panorama on the iPhone makes the process quick and easy.

For a period of time, there was a group of camera from the major makers that used APS (advanced photo system) film cartridges. With these camera, three image formats where possible (from Wikipedia):

– H for “High Definition” (30.2 × 16.7 mm; aspect ratio 16:9; 4×7″ print)
– C for “Classic” (25.1 × 16.7 mm; aspect ratio 3:2; 4×6″ print)
– P for “Panoramic” (30.2 × 9.5 mm; aspect ratio 3:1; 4×11″ print)

The camera and film came available about the time I was building a house that would be the first in the area of many houses. Every couple days, I could snap a shot out a corner window and get a wide image of the houses being built around me. It was much better than taking a bunch of images and trying to keep things in order over time.

For the iPhone, I have covered DMD Panorama before, the need came up for an inlet shot that one or several images wouldn’t do a good job with. The beauty of this particular app is the little Ying/Yang parts that come together as you turn so you know when the automatic shot will be taken. There is no ghost image that you have to line up the edges of the previous/next shot to. Just launch the app, aim the iPhone, click ‘Start’, and turn as a relatively quick speed (I generally slow a bit as the half circles are just coming together), then hit the finish button when you have the whole wide image captured. All done, wide angle image is sent to your iPhone photo library directly from DMD Panorama and you can move onto the next shot. No visit to the film developing shop needed. The image can actually be automatically pushed up to a hosted Web site to share with friends so there is no need to email the big image, just a link.

This is the bay, done automatically with DMD Panorama, which took three shots. The original export show was over 3200 pixels wide.

Reminder of how that ying/yang interface looks and works: Quick and easy panorama photos with the iPhone

PicShop iPhone Photo Editor 2.0 – with “Tons of Editing”

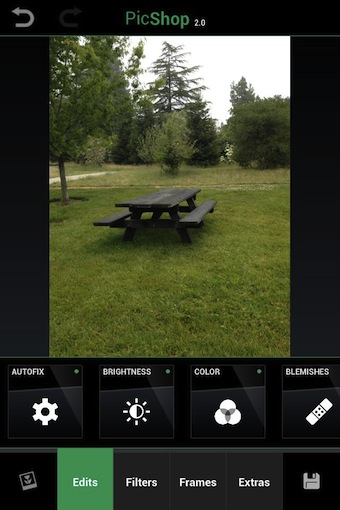
When I first saw PicShop iPhone Photo Editor claim to do ‘Tons of Editing”, I had to chuckle. I actually went on past the app, but then returned to take a look later. This must of course be a light weight filters application app… happy to report that it is much more. While the app offer a few common found filters, the actual more detailed tuning options are nice with their enhancement sliders and pickers. That is to say, you can customize your photos pretty quickly without getting into a full photo editor like Laminar.

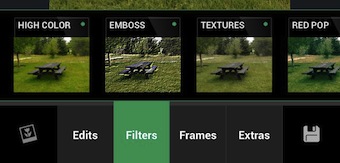
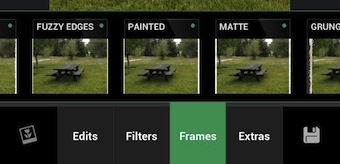
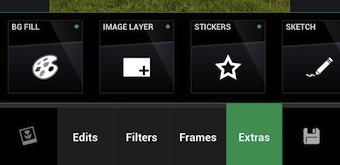
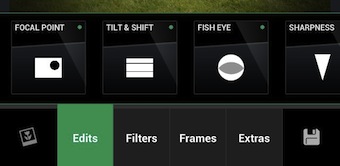
After importing a photo, the areas of turning are buttons across the bottom of the screen. Each will show it’s group of effects applied to the image in the thumbnail for quick reference. The Picshop 2.0 groups include: Edits, Filters, Frames and ‘Extras’.

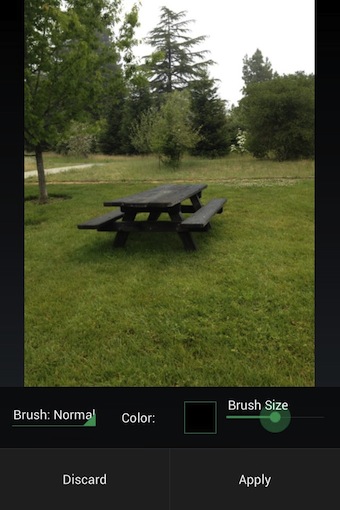
Like in the screen shot below for writing on the photo, PicShop offers sliders to fine tune each effect and enhancement. The changes are shown in real time then they can be applied or discarded. This allows for many different tuning effects to be used without saving and reloading an image.

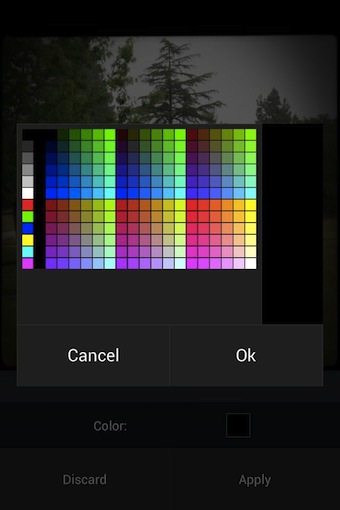
Color pickers are supplied by PicShop when the choices are needed.

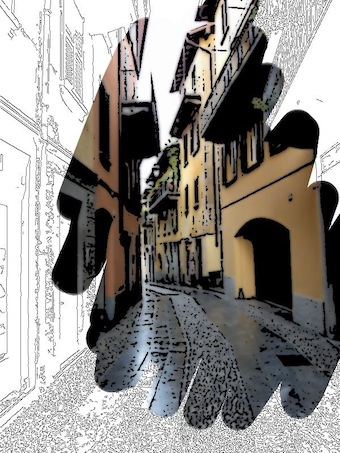
The variety of focus options is nice as a quick way to pull an object out or create depth.

On the ‘cute’ side, there are stickers, writing, meme, and other photo customization options that are beyond the normal filters found elsewhere. Sharing with PicShop is through email, twitter or Facebook. Saving to the iPhone’s photo library in a variety of resolutions is also supported.

iPhone photo editor, Photo Power, updated to 3.0

Some iPhone photo editors start out looking the same, then you dive in deeper and find your first impression was right, it’s the same ol bunch of filters wrapped in a different name.

A free (doesn’t say how long it will be free) solution I was playing with this week is Photo Power. It is very much not the ‘norm’. There are very few simple filters to add, everything else is adjustable and the final result is full resolution even on the 4s!
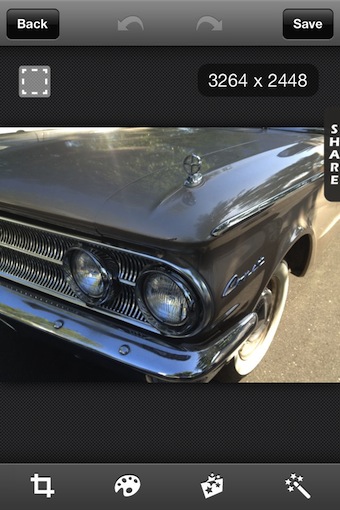
Across the bottom of the window is Crop/Resize/Rotate, then three scrollable lists of tuning options to use with the photo. Photo Power lets you apply and undo as many as you like so you can spend a lot of time getting just the right effect or clean-up the particular photo is in need of.
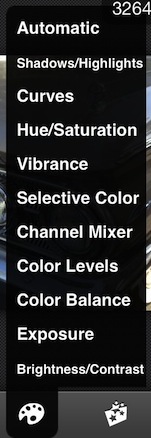
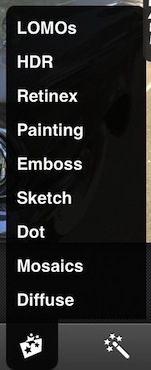
      

In this case, there are a few ‘filter’ options given to apply. Choosing one applies the effect right away. Photo Power lets you tune the amount of the filter applied by sliding your finger left/right across the image. Note the ‘%’ for the effect being used in the upper right of the screen.
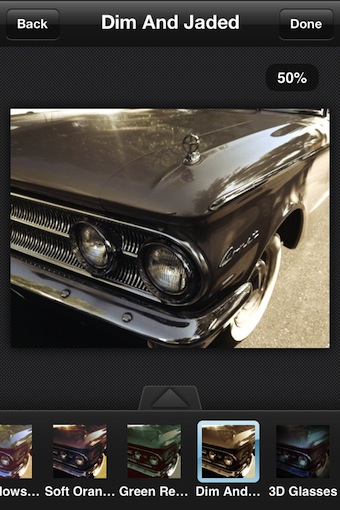
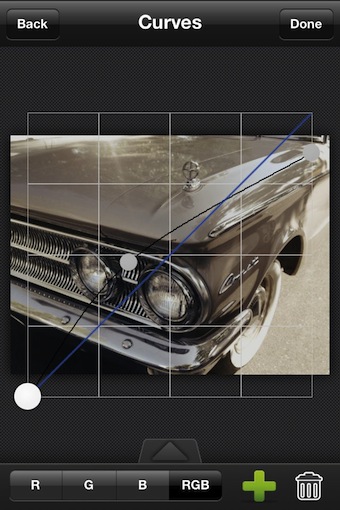
Where needed, Photo Power offers sliders to tune the enhancement application to your photo.
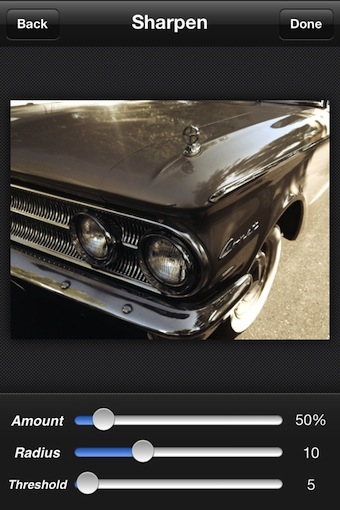
Yes, I am applying many different filters and adjustments to the photo without having to stop and save a copy of the image along the way.
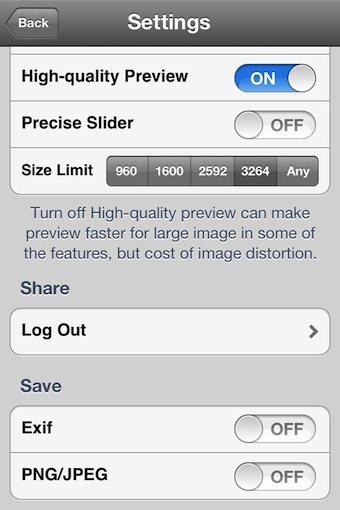
If you know you don’t need a full size image at the end, why take the time for an app to pound through the process of working against a high resolution image. But, your output need isn’t always the same from one photo to the next. Photo Power gives you the option when starting off your editing to choose what size you will need at the end so you work with the image in that dimensions from the beginning. The small, the faster the adjustments are applied, letting you move onto the next tuning option.

The Settings is all about getting the finished product your looking for. Usually this area in other apps is filled with how to tune the camera for taking the picture. With Photo Power, the adjustments are in the area of what you expect out of the app when done. Preset your resolution as well the file type. EXIF has to be chosen if your concerned about keeping all of the meta data with the image. I used JPEG so I didn’t have to convert the image later when posting to 500px.
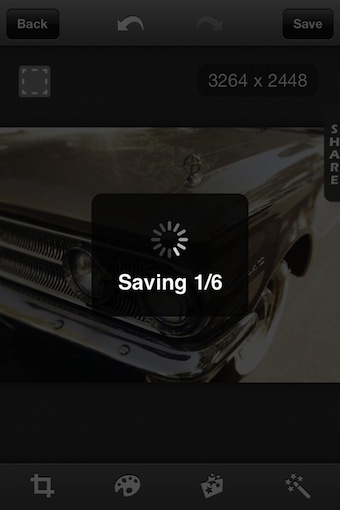
When the ‘save’ button is hit in Power Photo, the app sets out and applies all of the adjustments you made to create a final image. I had chosen to save the final as a JPEG using the above setting. This meant that the finished creation didn’t show up right away when I exited the app, but it did show up on full resolution after a short time.
 

Applying multiple painting and drawing effects to iPhone Photos

I have played with a few apps that let me convert a iPhone photo to what looks like it was a drawing or painting. Today I started playing with the free app Photist.

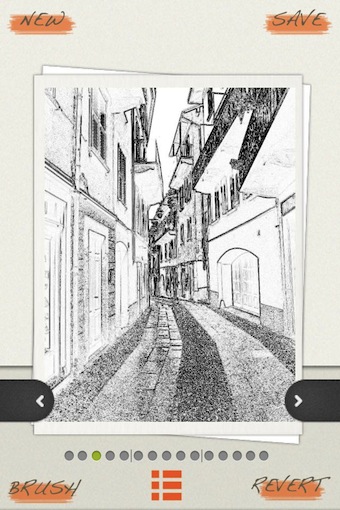
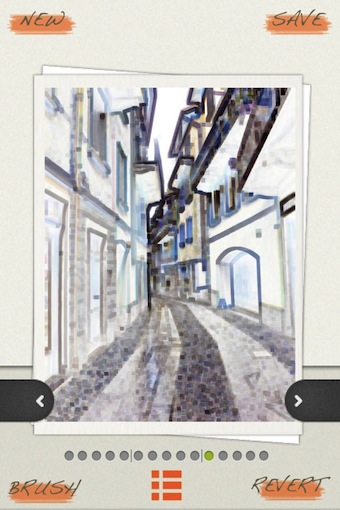
Take a picture or import from your iPhone Photo library. The arrows along the bottom of the image lets you cycle through the Photist effects options.

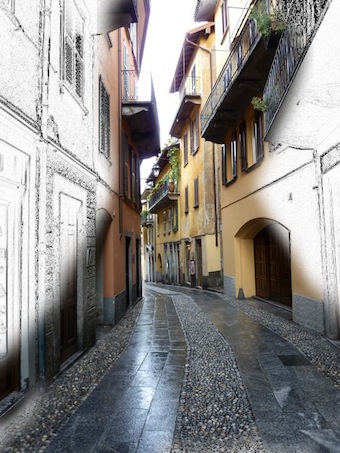
Photist does offer 14 different effect to use as the base (notice the dots across the bottom). They go from a few simple sketch types to some rather interesting effects that defiantly work better on some pictures than others.

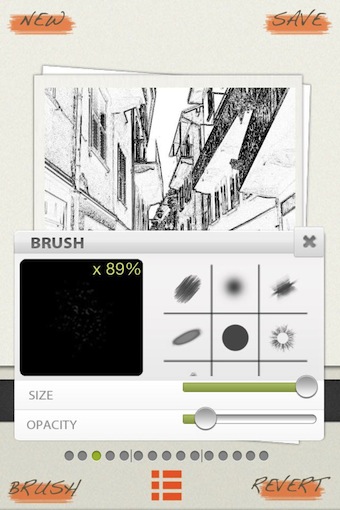
Applying the second effect to the photo is done with ‘Brushes’. These are adjustable through the button at the lower left corner.

Pick an effect and paint another effect over the image. Photist is proving to be a lot more fun than just converting a image to what looks like a drawing or colorizing a area of the iPhone photos. The only negative so far is the app will save your finished photo to the iPhone photo library or send through an email. Both, only 600 pixels wide… the original is over 3000 wide!
 

Was Google’s graphical update to Google+ for the iPhone enough for you to jump in?

Google has been trying, trying very hard, to get you to jump on board with their Google+ social sharing. A lot of the big names in just about every industry have dipped a toe into the Google+ waters. A quick search will result in names you will know. Digging a bit deeper, you may find very little quantity of posts behind that quality of names.

The biggest change to the iPhone app for Google+ was making the string of posts from folks in your ‘Circles’ more graphical. Gone is the headline text, small icon, and teaser text on a plain white background. Now, the posting person’s name and image appear larger, with the headline or teaser text over the top of the key image of the post. This means that searching visually for text your interested in is more difficult, but swiping through the posts and seeing related images is quicker. It’s a interesting path change from a company that has the simplest of Search starting and listing pages to now a almost completely graphical UI in their mobile social app.

In the update prior to this one, a occasional issue was introduced where uploading photos in a post wasn’t always successful. Photos can also be uploaded to libraries on Google+ that you create. A feature that was introduced between the last and this update was the ability to have photos automatically saved from your iPhone to Google as a cloud storage option. This feature is similar to Apple’s Photo Steam, except with Photo Stream the photos sync back to your desktop while with Google they stay on their storage… a couple gigs are provided at no charge, adding more carries charges.

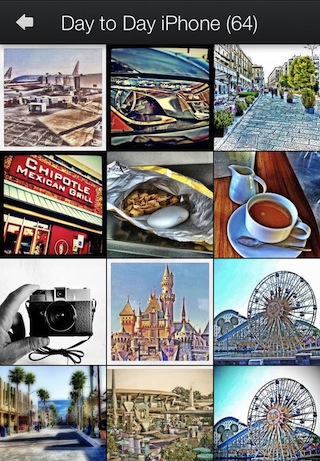
When viewing your photo libraries on Google through Google+, you can choose a single photo to look at comments others have made (those you chose to share). Swiping a photo takes you to the next in the series.

Photos are grouped by Google+ into areas that are similar to what you would see on other social share services. Multiple photos can be attached a post, which you can make viewable to no one, your friend’s circles or the general ‘public’.