Category Archives: Editing

Editing pictures on the iPhone

1 Second video per day stitched into your life movie

For years now, people have snapped a self photo per day and stitched together into a movie. It is interesting to see how a person’s face changes over time. Some of the photos reflecting the person in casual, some dressed up, some after work and others after working out. Recently, there has been a lot of talk about little video recording devices that are either constantly or near always-on recording what is going around the wearer. I’m not thrilled about people constantly recording all around me. Sure, there is traffic and safety cameras that catch me passing by every day. I’m talking about a person sitting in a meeting or talking to me at a personal level.

A Kickstarter project just wrapped up successful with a fun marriage of the two visual recording paths above. Instead of snapping a single photo or continuious video recording, 1 Second Everyday is an iPhone app that you use to record a moment in time every day. Then, merge the short one second videos into a movie. Within a second, you have a moment in time about what is going on around the user. While not collecting too much like a conversation or too little with a single snap that can’t always be put into context. The app also allows a second of time to be pulled out of longer videos you have on your iPhone.

Although the app is inexpensive, as a thanks for the Kickstarter funding ending well, Cesar Kuriyama is offering 1 Second Everyday for no charge on Thursday January 10th, 2013. This is a 24 hour only deal. I’m looking forward to seeing how those moments come together and how the story unfolds for the viewers in the future. Whether I keep the movie private or choose to share out directly through the app.

1 second everyday

Those Magical, One Tap iPhone Photo Enhancement Apps

Many articles have been written about why cell phone photography is becoming more popular than using a purpose built camera. Generally, the articles lean towards cell phones are always handy, while a camera is a extra bit of hardware to carry. I agree with my phone camera always being handy compared to my camera. But, I see social sharing creating the need to touch up photos a bit prior to posting anytime/anywhere being a big part of phone photography.

01 iPhone enhanced

The above is far from what the original quick snapshot was (below). Using a couple different apps, the resulting image has a completely different atmosphere about it. I have written here about many apps and their feature sets to get a image updated for different effect. Most of the iPhone photo apps have a central feature they lean on when marketing the app. A sort of ‘one tap’ photo fix feature. Use the one feature and your photos will be made ‘better’. I don’t use a single app as a do-it-all solution, rather different apps for different results. But, how do the app’s with a leading enhancement tool do when a single photo is left to their one button? Every app offers additional tuning, but here we will just import a common iPhone photo and tap the one button. Starting with our original store front snap:

02 iPhone original

First up, Instaflash. “Patented LCE (Lighting and Contrast Enhancement) from ACD Systems International Inc. It adds natural-looking illumination to the dark areas of your photos while still preserving contrast and detail using advanced image processing algorithms from ACDSee.”

03 iPhone Instaflash

Next, Dynamic Light: Known for it’s HDR effect “Dynamic Light gives you the best and most vibrant HDR-like look on any mobile platform. And this is all accomplished from just a single image using only a single dial.”

04 iPhone Dynamic Light

Camera+ with it’s Clarity feature: “We partnered with professional photographer, Lisa Bettany, to bring you a slew of stunningly beautiful effects. With a single tap, you can transform a soulless pic into a work of art. There are dozens of 1-touch effects for you to experiment with so that you can get the perfect result every time. ”

05 iPhone Camera Plus

Perfectly Clear Automatic Photo Correction: “Perfectly Clear for iPhone & iPad – Intelligent Image Correction. Our lab-quality corrections make sure your photos are perfect… with just 1 click! ”

06 iPhone Perfectly Clear

There are many other app for the iPhone that allow for quick photo editing on-the-go. These are just the top players that let it be well known they have a single click enhancement for you. Others may offer a ‘magic wand’ but they are multiple clicks in and at that point in time you might as well be doing fine tuning on your own.

Which of the above short list is best? Sorry, but to each their own. I don’t mean that ‘per person’, I mean it more ‘per photo’. While having so many options will clutter up a few app folders on my iPhone, depending on the desired end result, the starting quick tap can be different. After all, every photo will tell a different story depending on the story teller.

Gels and shapes for iPhone photos, a different thinking around enhancements

We know the filter apps, adding a set of effects to a photo to gain a different visual impact. While the filters have simple names, they are actually applying a set of changes for the final effect. This can be seen when using a photoshop like app that breaks changes down to individual steps, each step can be changed before adding the next.

When using a film camera with lenses, one adjustment available is gels. These are most often recognized by color filters that are screwed onto the lens to take the photo though.

00 Gelo iPhone

Gelo on the iPhone is those color lens gels, in an after effect electronic enhancement. Import a photo, then use the color spinner along the bottom of the Gelo screen to choose gradient or solid film and color.

01 Gelo iPhone

Sliding the area at the top downward will provide access to color adjustment outside of the defaults in the application wheel.

02 Gelo iPhone

If a gradient is chosen rather than a solid gel color, the filter start and end points can be adjusted easily via finger dots. Gelo allows the effect application to be at an angle too, not just up/down.

03 Gelo iPhone

A different effect I have not seen in other apps is the ability to add a shape (circle, square or triangle) to a photo. The shapes can be solid fill, adjusted like the background gel filter effects.

04 Gelo iPhone

The shapes can also be resized and moved around for impact. As well Gelo lets the shape to be changed if you find a square works better than a circle or triangle.

05 Gelo iPhone

KitCam on the iPhone enhances photography and photo editing in one app

Generally, there are two types of photography apps for the iPhone. There are Camera apps that alter the way photos are taken with the iPhone. Then, there are apps for enhancing images. The second of the two are more popular, tuning images for sharing on social sites with family and friends. Apps that alter how photos are taken from the beginning have a strong following amongst the retro and film camera fans.

The folks that created the PhotoForge2 editing app has now released KitCam. An app that has film and lens options for how a photo is taken to start with, then editing tool for enhancing more. Amongst the enhancements is even the ability to change the film and lens used when the photo was initial taken.

01 KitCam iPhone

Tap the KitCam lens to slide out the options. Swipe left/right to choose and see the impact of each. Some allow fine tuning their enhancement impacts beyond just applying.

02 KitCam iPhone

KitCam comes with a very nice selection of lenses, films and frames. If you want to go for an extra special effect, there are in-app purchasable groups of each. The built in options have kept me plenty busy, but I can imagine a few shots that would enjoy the upgraded bundle.

03 KitCam iPhone

Sliders for fine tuning contrast and white balance in real time.

04 KitCam iPhone

Popular photography camera are on the view finder screen through the settings icon. KitCam works with single photos and video too.

05 KitCam iPhone

Photos directly after taking or after enhancing, can be shared out in a wide variety of ways. KitCam provides for saving to popular Social Services, cloud storage or open in other apps that you may prefer using to more adjustments.

06 KitCam iPhone

Basic adjustments can be made to the photos like crop, ‘enhance’, and contrast/white balance.

07b KitCam iPhone

There are advanced ‘Pro’ photo editing options within KitCam. Even these tools are included without an extra charge.

08 KitCam iPhone

Choose the film icon in the upper right corner of the photo editing area to have access to the KitCam film/lens options that where available when first taking the photos. This feature works on imported photos that you have taken via the iPhone camera without KitCam.

09 KitCam iPhone

This is the photo as it was taken with the film/lens selections above.

10 KitCam iPhone

Where other apps that offer film/lens combinations to take the photo with initially then export the photo. KitCam lets you change your mind about the film/lens/frame later so nothing is ever stuck with a bad decision.

11 KitCam iPhone

Composing the perfect photograph on the iPhone

Most smartphone photography these days are the result of Spray and Pray shooting. Folks are taking a ton of photos and either hope or are just plain lucky to get a ‘perfect’ shot. Few mobile photographers take the time to work through their photos to find the one with an eye pleasing composition, rather they share all their photos with a few getting a lot of likes and comments. The high level of notoriety for a shared image is due to the image being striking, rather on a subject that is hot at the moment.

There is nothing wrong with this, until so many so-so shots cloud systems with clutter that lessen the enjoyment and thus return visits to a sharing location. I have a tendency to hunt out the ‘recognized correct way’ for anything I take on. I find that by having the knowledge, many times the information will be referenced without taking a lot of time to think about it. Photography is supposed to be fun after all, no reason to have so much set up involved that the moment was lost.

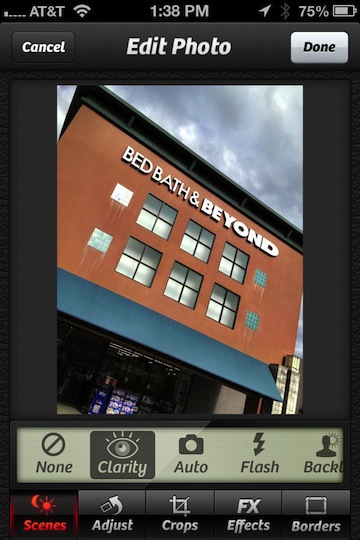
Most of the iPhone photography eBooks on the market cover how the Camera works, then dives right into specialty apps to use for the tuning of photos. They cover filters, enhancements and cropping options, but shy away from composition. “Big World, Little Lens” is one that has covers many apps, but took the time to include a nice group of inspirational examples. There isn’t much on why the photos look so nice as it relates to composition, but they do a nice job of showing what is possible via the camera on our iPhone. Included with the eBook is a series of videos showing how to use a handful of enhancement apps.

A bit better for what I was looking for had little to do with the iPhone per the title. “The Digital Photographer’s Guide to the Square Format” carried much more information in the area of getting an impact out of a area of a photo. As it happens, a few of the most popular photo share services and iPhone photo apps are in the square format so I found it matched up nicely to the real world.

I found a few nice articles along the way that explained and showed examples of how the rules work that have been followed since the earliest days of film photography. A glance at the photos shows how the rules work, whether they be in the area of Thirds, Golden, Fibonacci Spiral, try applying the rules to a few photos when walking around and they become more natural and less of a burden when needing to take a quick snap. While rules are made to be broken, know the rules first then add your personalized twist. A recent find on the eBook side of solutions is “Composing the Photo” by Trey Ratcliff. The book is much more about ‘seeing’ the composition of a photo through the viewfinder than adding a filter to make thing brighter or vintage.

An iPhone app that brought this to the fore front for me this last weekend is Sense Cam. The app has little to do with editing, rather it is for helping get the best composition shot from the start. Sliding the shutter button up, provides access to the popular accepted photography rules. Also, there is a few fine tuning options like Bracketing and Timer.

When your taking the actual photo, the rules are overlaid on the viewfinder screen. There is also a ’tilt’ indicator down the left and a horizon through the middle. Both handy if you need to hold your iPhone at arms length for a shot and not used to framing things up by eye. These can be turned on/off to keep the screen clear. All of the ‘rules’ can be individually or as a group used. In the case of the Spiral, Sense Cam provides a button in the upper corner to spin it to match the angle the subject it as so you don’t have to twist your physical iPhone to use the rule.

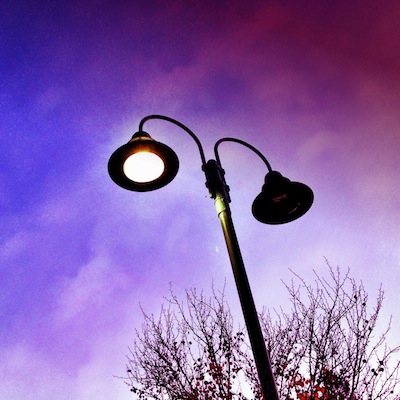
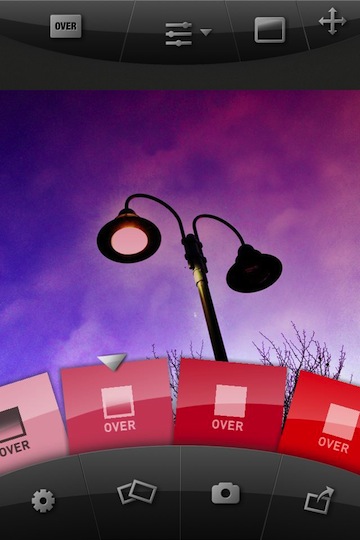
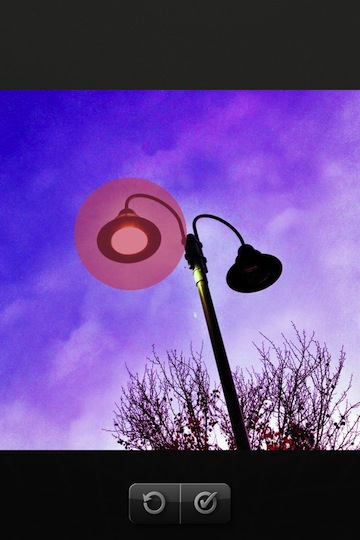
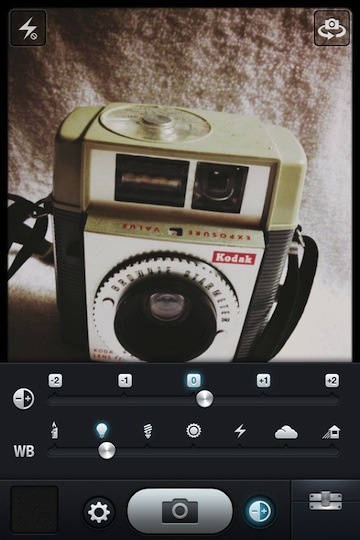
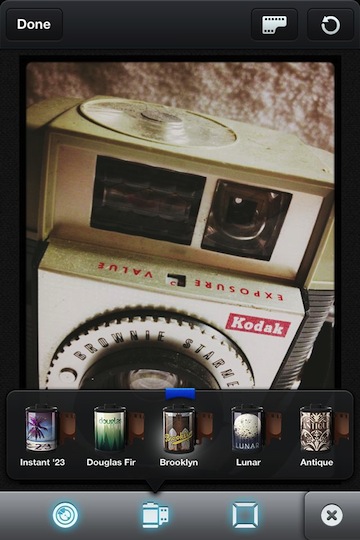
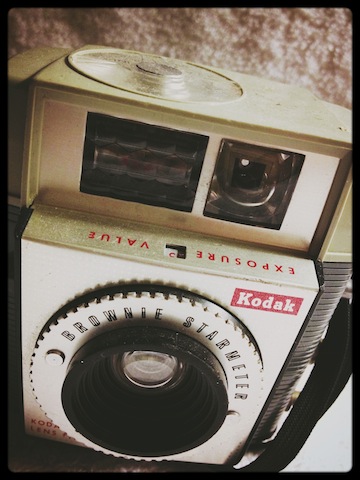
When shooting out in the ‘wild’, everything is ready to go on the screen to frame up the shot. There is separate focus and exposure and you can lock the settings by swiping to the side of the screen. I know, the photo below is not well done for composition, I was just showing that the guide lines that Sense Cam provides can be difficult to see in bright lit photos where this a lot of contrasting colors. Still, the tool is great way to start on the road to photos worth sharing!

Creating those cool Clone photos using only the iPhone

A year ago, I was involved in a fun movie, “People in Motion“. The movie follows several very talented folks as they Parkour their way around the US. That is to say, they leap and jump their way around city obstacles while making it look so easy. When I first decided to get involved in Producing the movie, I was taken by a single photo where a person is doing a summersault in air. The single photo had the artist at several spots in the action like they where frozen in time at different stages of the leap. A special photography technique was used for the shots, which is now available to do with an iPhone!

The above photo was done using the iPhone app Clone Camera. A full feature, yet amazingly easy to use app. While there are a few tuning options, the app is ready to use right upon launching. You take 2 to 4 images, either manually or let the app auto snap for you. Then, trace the part of each photo that you want to carry forward to the final image. Clone Camera then uses the single background and pastes in the parts you chose into a single final output.

The ‘camera shake correction’ is a nice feature. Just because everyone else does, Clone Camera also includes 27 filters to apply to the output image. When done, save to the iPhone photo library in high-resolution or share out through Instagram, Facebook, Twitter or Flickr.

Advanced Monochrome Photo Editing on the iPhone

I have covered my fondness of the challenges of black and white photography before. There is some fun in taking color photographs and converting to black and white since not all images work in both worlds. Generally though, like using non-color film, I prefer using an app that ‘shoots’ without colors from the start.

When managing monochrome photos, I recently found an app that allows a lot of precision tuning to adjust photos for maximum effect. MonoPhix is not a filter app. It offers editing of full resolution photos on the iPhone (separate version for the iPad). I wont cover how each of the slider option impact a photo, that would make for a very long post.

You can do a lot of fine tuning with the Processing option. Changes happen to the photo in real time as you make adjustments with the sliders. Sadly, I have yet to find a way to view the image without the tuning options over the top of the image. MonoPhix has so much to offer in getting the most out of a photo though, I’m willing to work around the view shortcoming.

The Vignette effect option is on/off, then a bit of fine turning. I have mixed luck with this feature, it really depends on the photo being edited. MonoPhix seems to glow or pixelate the outer edges on some photos. Particularly if the photo already had a bit of a natural vignette effect.

For Coloring, choose the overall color from the three buttons: B&W, Sepia or Antique. Notice the box to the right of the button shows in color which option was chosen since the buttons do not show the state they are in. After choosing the overall ‘color’, use the MonoPhix sliders to fine tune further.

“Sharing” for your photos edited in MonoPhix is either saving the updated image to your iPhone photo library or out to Muzy.

The finished image is still the full size and resolution you started with.

Yes, MonoPhix has a settings area where you can decide on using high quality versus faster turn around, if you have a Retina device for previewing the edited photos, here you can turn on/off the cute tack pins that virtually hold your photo in place while editing and the overlay’s transparency.

A word of warning about MonoPhix, it has no ‘back’ or ‘escape’ when you enter a new window. If you choose the share button from the upper bar, you are going to share. Until you choose how you will share the photo in progress, you can’t escape out of the page. The only way I have found is the leave the app, double tap the Home hardware button, and remove the app from the Multitask bar. Be aware that sometime that will remove the image you have been working on too so before you go there, know how you have edited your photo so far. Otherwise, the app is proving a nice tool to get just a bit more out my iPhone black and white shots.

My Sketch gets True Color upgrade for iPhone photos

Holiday and event cards always provide a nice challenge when creating their cover art. Do you use typography or a photo? Is the photo just a shot you took or do you enhance it for the mood. While My Sketch isn’t an app I use all of the time, it is one that has gotten me passed being blocked a few times when I need a unique feel to a creative piece. Today it solved a blocking issue for me so I thought I would share my success, fun stuff.

The app converts a photo, from your iPhone library or taken through the app, to what looks like a sketch. The My Sketch app offers 20 different sketch effects. This update includes True Color which is the effect I applied above. The new ‘sketch’ appears in the row of options you can swipe through below the photos.

The completed ‘sketched’ photos can be saved to the usual popular list of social friend sites. A step I always miss is the ‘Save’ button at the bottom. You must use the button for My Sketch to save your creation to your iPhone photo library. If you exit the app without doing that step, you lost your work as it wont be there when you re-launch.

The Sincerely print ordering system is built into My Sketch. It cuts a trip to the print shop is you want to create and have them print the image on a variety of layout styles.

PhotoForge2 taking Retro Film and Flash for iPhone photos to the next level

Some people complain about using Hipstamatic because it takes the photo in a retro fashion which is set via choosing lens/film/flash combinations before the photo is taken. They would prefer taking a regular photo then editing it. While Hipstamatic takes the photography experience back to the days of choosing a physical camera/film/lens, I can understand where the ‘modern’ iPhone photographer may want to use the many options they have rather than the limitations of yesteryear.

With the snap-and-edit-later photographer in mind, PhotoForge2 offers the usual filters/editing tools, but a large selection of retro film/flash/gels/papers to mix and match per the need of a particular photo. PhotoForge2 is a universal app so purchasing it will allow you to one the single copy on both devices. The interface is the same between the two, below I used screen shots from my iPad to see the options spread out more, making them easier to see.

The user interface for PhotoForge2 has all of the tools (except share and apply) across the bottom of the screen. Choose one of the icons to bring up the tools in that area. Then swipe from side to side to choose which to use.

Some PhotoForge2 tools offer the ability to fine tune their impact. When in the edit mode, a check (accept/apply) and ‘X’ (do not apply changes) in the upper left corner takes you back to the tools overview screen. This allows as many adjustments to a photo to be applied as you need. Layers are also supported so you can separate the adjustments for easier editing as you go.

One of the choices in the ‘FX’ area is a camera icon for ‘Pop!Cam’. This selection changes the PhotoForge2 tools along the bottom to Film, Lens, Gels, Flash, Chemicals, Paper and Frames. The ‘Pop!Cam’ area will let you use the tools but in order to save the image with the effects applied they have an upgrade fee (currently $1.99). Since this is not a free app, it is nice that a person gets to play a bit to see if there is any value in the Retro options.

Saving and sharing your creations is done via cloud icon in the upper right corner. The usual Cloud storage services are supported, as are the photo sharing sites. If you know someone else with PhotoForge2 installed, there is even the option to ‘bump’ to transfer images between the two units.


Expanded Instagram iPhone Photo Effects with Instagenius

Most posts to Instagram via the iPhone are quick shots that have one of the Instagram free filters applied. For me, photos usually run through Camera+, Dynamic Light, Snapseed and/or PaintFX prior to upload. These apps are easy to use but are meant for more than simply adding filters to photos.

An app I was recommended to test, Instagenius, is similar to Instagram filter application but there are lot more options. Importing an image, Instagenius starts with giving you adjusting your photos with Effects filters, tuning with Adjust, Crop, Rotate, add a Border/Frames or create a collage (collages are small resolution 612 square).

Selecting Effects results in thumbnail views of the photo with a variety of Instagram level filters applied for quick review.

Just selecting an Effect does not alter the photo. Instagenius presents a preview of how the photo would look using the effect. Swiping left/right moves through the effects. Skip adding an effect through the ‘Cancel’ button or add using ‘Apply’.

The ‘Adjust’ area also launches with thumbnails showing the adjustment applied. The list of options scroll up/down. If there are non you need to use, select the ‘Back’ button in the upper left corner to return to the Instagenius overview screen with the photo untouched.

The filters in the ‘Adjust’ area have sliders to tune the effect impact, select ‘Apply’ when done. Like the ‘Effects’ area, the app takes you back to the thumbnails of adjustments to apply another.

Selecting the ‘Done’ then ‘Instagram’ will launch Instagram with the photo loaded, ready to go through the normal steps. The images uploaded to Instagram are lower resolution than other apps that are less directed at Instagram. So while Instagenius adds more effects, the final image isn’t suited for many other uses.