While there are powerful photo tuning apps available on the iPhone, talking with the tools folks around me us, they generally keep it simple. When time allows, a features of the advanced tools are great. I’m usually on the go so I hit the quick adjustment apps to bring out the message of the photo, share, and move on.
Camera+ is one of those quick go-to apps to do a few touchups without having to take a lot of time. It has a handful of full image filters and enhancements with a pre-view available to speed up choosing a path forward. While there are a few workflow adjustments I would like to make the app more efficient, it does what it promises very nicely.
This week, an update to Camera+ was introduced. There is a large enhancement to image processing flow via the addition of Enhancement Layering as well a few for-pay additions in filters and frames.
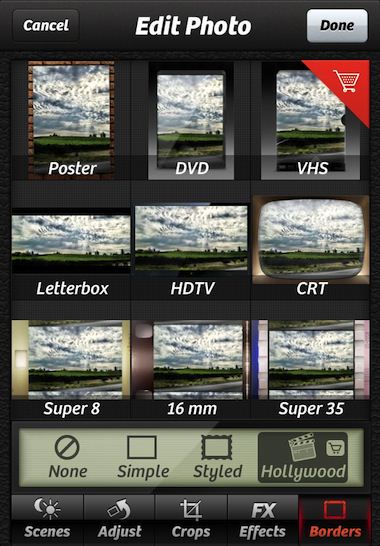
The ‘for-pay’ updates are wrapped in a new option called Hollywood. The package includes new Enhancement Filters and Frames to add the look and feel of yesteryear movies.

In the more robust photo editing apps, there is the option to layer effects over each other. With Camera+, until now, layering meant saving a photo with it’s enhancements, then re-importing to add another. Layers is now built into Camera+’s workflow. Allowing multiple effects to be added and adjusted quickly and easily. Well, easily when you understand where the feature is. After handing my iPhone off to several people to have them try the new feature and their stumbling around a bit, I thought I should cover the feature with a quick ‘how to’.
Like the earlier versions of Camera+, you can preview a thumbnail of any filter effect on the photo your working on (either taken with the app or imported from your iPhone photo library). Selecting a filter opens your photo in a larger view to see more detail. From this view, you can choose another option along the bottom of the screen to add ‘Scenes’ tuning, rotating, cropping and borders… or select Cancel to go back to no edits on the photo or Done to go to Save/Share screen.

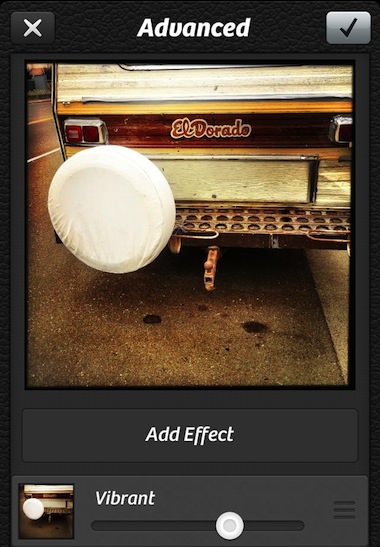
After adding an Camera+ enhancement Effect, choose the ‘Advanced’ button in the lower right corner. Along with the slider to adjust the percent of the filter being added is a new button “Add Effect”. Tap this button to be taken back to the Effects selector to choose another ‘layer’ of filter to be included with one already chosen. Buttons along the top are to through away the changes being made on the left and ‘save’ check on the right.
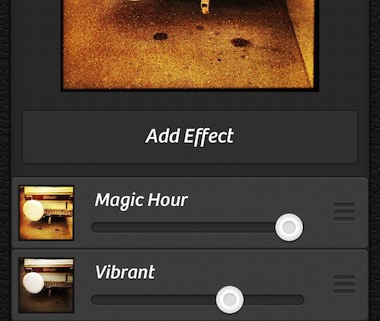
Each effect chosen to be used, stacks on the previous one in the list. The tuning adjustment bar is for each effect individually, changing the photo in real time.
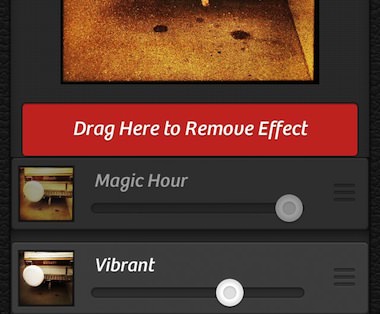
Oops, that additional enhancement isn’t getting what you want? No worries, if you use the right grabber and drag the filter up to the Add Effect button, the button changes to “Drag Here to Remove Effect”, just drop it there and the filter effect is removed. I found that after I used the new Camera+ layers and the adjusters on each filter, I may want to go back and rethink some of my earlier edits. Layering is now part of the workflow since Camera+ makes it easy and quick.