Category Archives: News

Lastest news for iPhone Photography

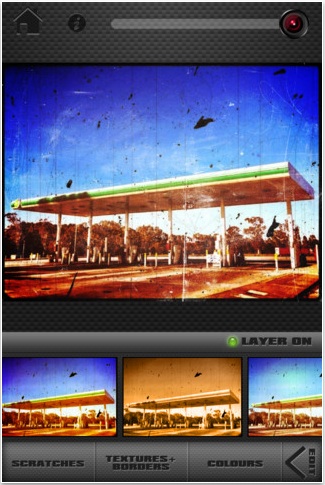
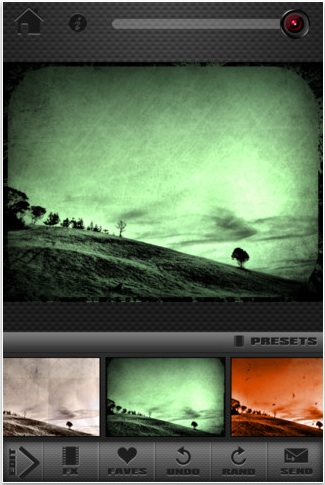
Worn photos effect with ScratchCam FX on the iPhone – 50% off this weekend only

I mentioned in an earlier post how I will age iPhone photos using PictureShow (The fun of film toy cameras on the iPhone). The effect is actually a grouping of many effects to get the final result. If you want to jump straight to a variety of worn film/paper effects, this weekend’s special for ScratchCam FX is good timing.

ScratchCam FX does more than age your iPhone photos. There is more to a old picture in a drawer than roughing up the image so the app offers several worn effects, each adjustable to get the aged effect your looking for.

✔ Scratched & damaged film
✔ Vintage black & whites
✔ Down and dirty grunge effects
✔ Poster & folded paper effects
✔ Awesome colour shifts and combos
✔ Full range of subtle to extreme textures


ProCamera for the iPhone on sale this weekend… and Wide Angle Photography

In the world of social services that want only square photos, a lot of iPhone photographers I talk to spend time thinking about the center of their photos knowing that is all that will be used. What is lost is the possible full wide view. I have used pano apps before to get a wider than normal view without going 360 degrees. But, the iPhone in landscape view alone is nicely wide. I found a nice article over on Photos Tuts+ that covers things to consider when taking wide photography. It covers things like framing, edge blur, depth of field, and more. The post is positioned towards a stand alone camera instead of a iPhone camera, but it has many important items you should keep in mind when framing up a iPhone shot.

If you have been sitting on the fence about whether you should buy the ProCamera ‘all-in-one’ iPhone camera app, now might be the right time. ProCamera is showing as only 99 cents in the iTunes store right now.

Quick reminder, the ProCamera solution was covered here before –Fine tuning how pictures are taken with the iPhone, before worrying about filters.

Wireless remote shutter control for the iPhone

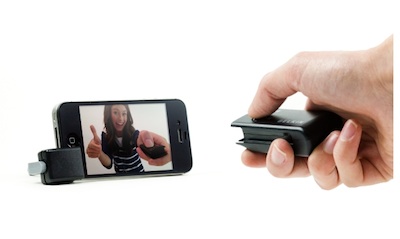
Here is a nifty little bluetooth wireless device I saw over on PhotoJojo. It’s a small two part gadget that snaps apart to be a remove you have in your hand and a stand that activates the shutter on the iPhone’s camera. The text claims 30ft which is a pretty good distance for self shots or nature photography (a bit of food near the iPhone and snap photos of the little creatures that walk up – best to you that one of them squirrels don’t grab and run with your iPhone!).

The iPhone Shutter Remote description mentions using the stand to do stop motion photography being improved since your not touching the iPhone to snap the shots. In small print though, it reads Please note that The iPhone Shutter Remote requires the free “Belkin LiveAction App” – which to me sounds like the device requires photos be taken through a particular app. Removing the ability to use the wireless remote shutter device with apps like Frames.


Creating custom physical products using your Instagram photos, all on your iPhone

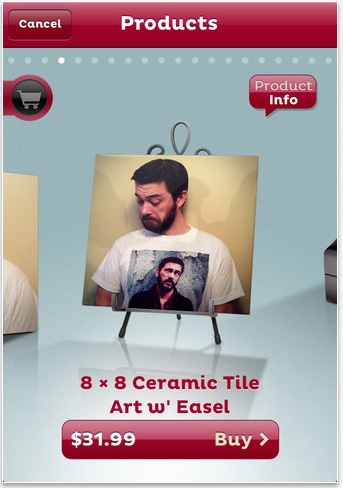
I will take my photos and print to a variety of physical items like mugs, wall art, water bottles and bags. They make great gifts. Until I found MoPho though, to create I had to download the images to my desktop where I would assemble/order. The free app MoPho is cutting the middle step out of the process and thus making a great way of being creative on the go.

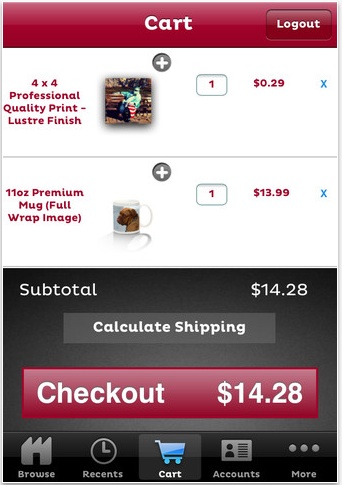
The app is a gateway to a service that lets you apply your images to a wide range of products which they will print, assemble and ship for you. Those Instagram creations aren’t stuck to the online world. Swipe through the many options, choose an object, add a photo, preview, then order all on your iPhone.

If your already using another service via your desktop, double check prices against being readily available. I found a few items created via the MoPho app where really well priced while others where more than I paid through other services on the desktop. Being quick to use when an idea hits is worth something.

List of Photo Products:
•Professional-quality Prints (various sizes)
•Canvas Prints (square & rectangle, various sizes)
•Aluminum Wall Art (4″x4″ & 5″x7″)
•8″x8″ Ceramic Photo Tile with 11″ Display Easel
•5″x7″ Easel Back Panel
•Custom iPhone 4/4S Case
•Custom iPad Case
•Keepsake Box
•Custom Coasters (set of 4)
•8.5″ x 11″ Re-Stick-Able Poster
•Large Canvas Tote Bag
•Photo T-Shirt (various sizes)
•Full Wrap Photo Mug
•Full Wrap “Magic” Mug (image appears when hot liquid is poured)
•Photo Key Chain
•Photo Mouse Pad
•20oz. Frosted Glass Stein
•20oz. Water Bottle
•Photo Tattoos (set of 15)

Free iPhone Retro Camera with Film – Popular Lomo Cameras on your iPhone

I mentioned the Pudding social photo share service earlier. There is also a Pudding Camera, that seems to be a big secret. Non of my iPhone photographer friends seem to know anything about this fun little app.

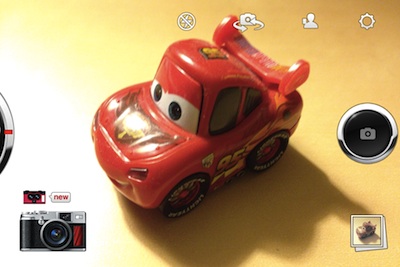
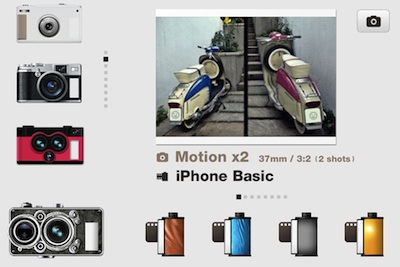
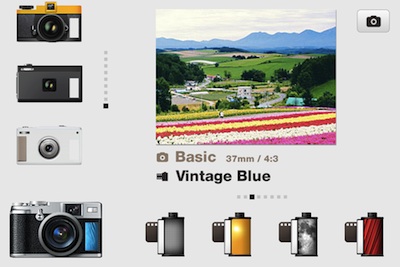
Pudding Camera offers a variety of ‘retro’ cameras that you may recognize by their Lomo names. Also, instead of filters, the app has ‘film’ that gives the same effect as adding a filter. Choose a pair to use and snap away.

After photos are taken, they are added to a library within the Pudding Camera app. Go to the area via the thumbnail image in the lower corner. Photos are shown in an overview of thumbnails, opening a single image gives you info about the camera/lens used to capture the photo.

Swipe up/down on the left through the Lomo ‘like’ camera and across the film area for the different Pudding Camera film filters. The window showing the result of matching the camera/film together is nice.


The resulting Pudding Camera photo can be saved to the iPhone photo library or shared on the Pudding.To, Facebook and Twitter social services. Output photos are 1280 x 960.


Taking full control of your photo timelines via your iPhone

As projects or events get rolling along, I have a tendency to take pictures along the way. When I sync to iPhoto on the notebook, I try to get them tagged properly. Then, later, when it comes time to tell the story, I search for the images and build a folder of them.

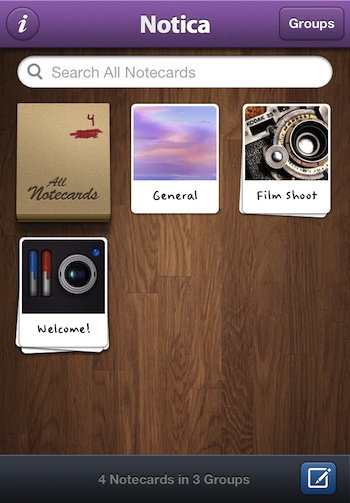
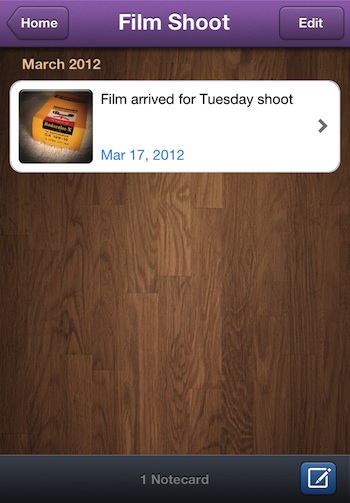
I stumbled across a app today that appears to be built to help me out at being better prepared when it comes time to share the story with photos. The iPhone app Notica is for building a visual timeline that can later be shared with information already built in. The timeline is ‘stacks’ of notecards that you can quickly create when you snap a photo or later when time permits.

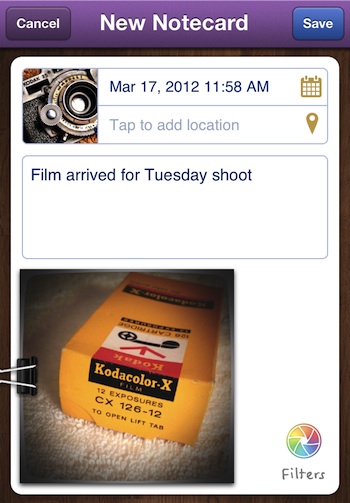
When a new Notica notecard is created. Some data can be inserted automatically like the date and location. Both of which can be edited later if needed. An image or a video as well as a descriptive note are added to each notecard. The cover art of the note’s stack shows in the upper left corner.

Images within each Notica notecard stack can be viewed and edited. Choosing the Edit button from this list view allows a card to be deleted or moved to another stack. Tapping a card in the list will show all the cards in full size side by side. Note’s text can be expanded or the cards can be reduced to show buttons for trash, move and share.

Within Notica, the groups of cards (either as just the image of the full card as below) can be saved to the iPhone photo library, sent  via email, shared on Facebook or Twitter and post to a Tumblr blog. The photo with information image is 1200 x 1545.


Full Featured iPhone Camera App – Camera Genius – on sale today only

Recently one of my more often used ‘all-in-one’ camera apps was updated and I got plenty excited with it’s new power. Yesterday, it was mentioned to me that I may want to look at Camera Genius. The timing was right as it had just gone on sale so I thought I get the word out. Jumping to the end, I would have been happy to have paid full price for Camera Genius.

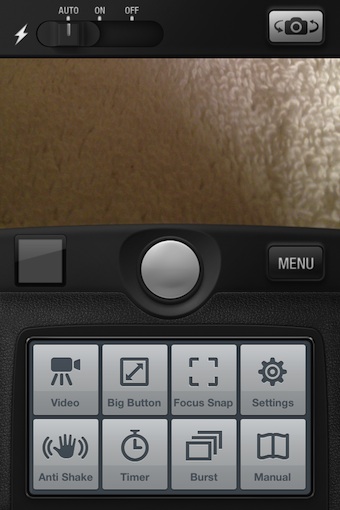
The opening screen is for getting directly to snapping a photo. Choosing the ‘Menu’ button will bring up a group of options that Camera Genius offers for better fine tuning your shots. Across the top is the flash control and the camera chooser. The lower box of buttons are for using Self Timer, Multi Photo Bursts, Anti-Shake, Big Buttons, Focus Point, Switch to Video and access to the built-in Manual.
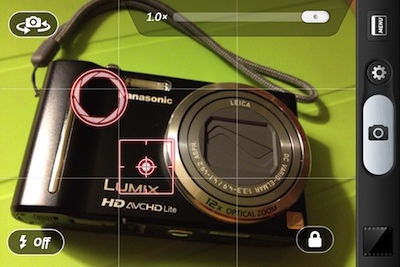
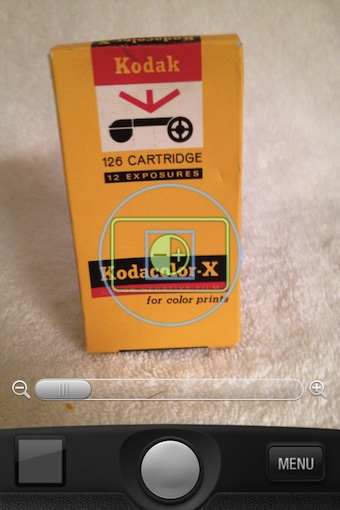
Camera Genius provides the Focus and Exposure splitting capabilities through a circle/square graphic. Tap to focus then drag the square to set the exposure. If you don’t like the split, just double tap on the screen again to pull them to a single point.
When a photo is taken, it is automatically saved to your iPhone’s Photo Library. Camera Genius doesn’t save it in a area of the app so you don’t have to worry about having your photos spread across multiple locations. The basic shot results in a 2448 x 3264 image.

After the photos are taken or if you want to edit a photo taken outside of the app, just tap the icon in the lower left corner of the screen to bring up the iPhone’s Photo Library. Choose a picture, then choose the edit button in the lower right corner.

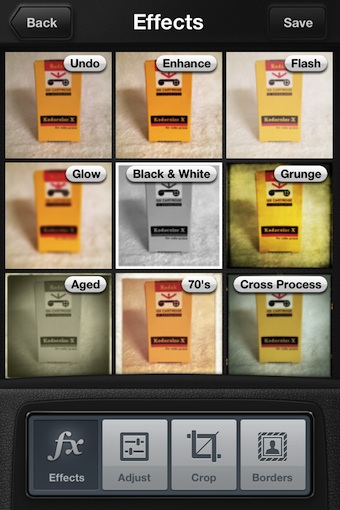
Several screens of Effects and Tuning Adjustments are all included in Camera Genius. Scroll the options up/down to view a thumbnail of the effect applied. Tapping one will show the photo with the effect applied, some have sliders to fine tune a bit. Cropping and a selection of borders is also available. Using the back button will take you to the previous screen without the filter effect being added, you must use the ‘apply’ button to set the filter in place. By Applying, the thumbnails will change to show effects/adjustments on the photo with the filter applied. This means that you can apply several effects without having to save the photo to your library and re-importing every time.
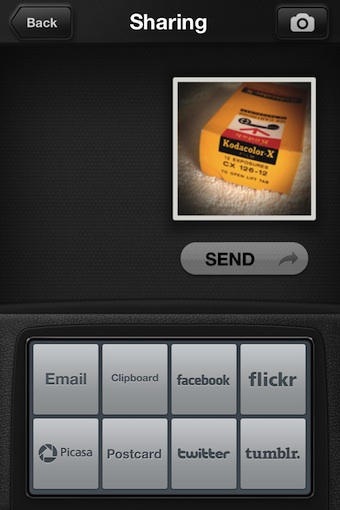
Sharing with Camera Genius has all the basics covered. Just saving the final photo creation saves it to the iPhone’s photo library. Through the app though, sharing through email, Web sites and social networks is a button tap away.
Built in is a nice how-to-use-this-app manual. It covers all the features and how to use them.
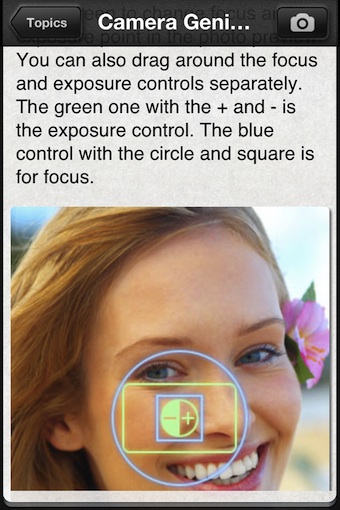
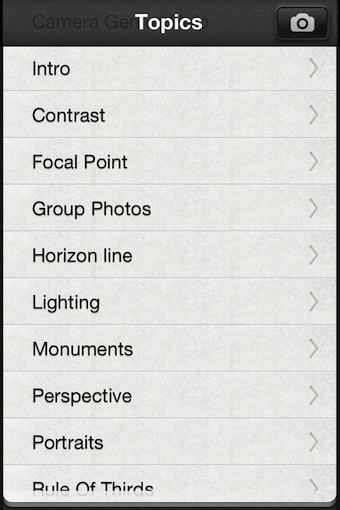
An interesting thing about that ‘help’ file in Camera Genius is that is actually a full manual too. The top topics of photography are covered, explaining what the technique is and how to get it. I will be adding this to my list of recommendations to new iPhone owners looking to get into photography.
 

Big updated to one of my favorites iPhone Photography apps – Camera+ goes 3.0

Camera+ gets used a lot. That is to say, I have a large selection of iPhone Photo apps I use every day. They go from very specialized to very generalized. There are a couple that are ‘do it all’ apps that I can shoot with, as well do my final edits in. Camera+ is one of those apps that I shoot with very little but turn to when I do edits  and enhancements. It isn’t like SnapSeed for tiny spot changes, rather for editing the full photo.

With this update, I will be using Camera+ for more of the actual photography too.

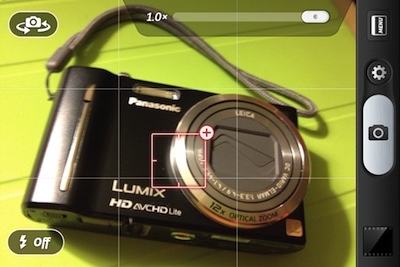
The list of updates to Camera+ is long, thus it is now version 3.0 (on sale right now!). To start, the ability to have focus and exposure as separate spots is now supported. What is nice is the way it was implemented. When frame up a shot, you may tap the screen to choose the focus area like normal. In other apps, you have to choose if you want to do a focus spot or a focus/exposure difference. Notice the small ‘+’ on the focus box, just tap that if you want the split.

Camera+ doesn’t require you decide up front through a setting if you want to do focus or focus/exposure, you decide on the fly.

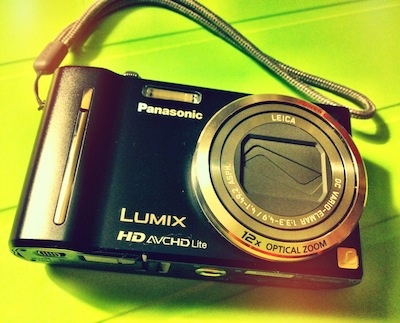
The filter selection continues to be a quality area of Camera+. With three screens of 9 filters in each area, there is also an additional specialized 9 for a 99 cent in-app upgrade. The best known of the enhancements offered by Camera+ is the ‘Clarify’ which received an upgrade in this update too. Below is a shot that was cropped, clarified, and filtered within Camera+… whole process took less than a minute including saving to the iPhone photo library.

Knowing that not all people work the same, Camera+ lets you: take a single picture and edit it right away, take multiple pictures to edit later and import one/many photos from the iPhone’s photo library to edit.

Along with the above, the folks that created Camera+ have opened an API to other app developers that may want to use the photo editing powers they provide. Titles like WordPress, Tweetbot, Twitterrific, Foodspotting, and Twittelator Neue apps.

The sharing speed has improved too… done via email, attach directly to a ‘message’ (cool now that Messenger works on the Mac too), through social services like Facebook and Twitter, as well now the creation of Web Links is supported.


iPhone photographers interested in video? FiLMiC Pro is free for a limited time!

Funny, I’m involved in the movie making industry, yet I record almost no video with my iPhone. I lean more towards taking photographs and playing with a snapshot of history.

An app I have had on my iPhone for those times I do want to record video is FiLMiC Pro. I bought it the first time I saw one of the team’s creations using it on their older iPhone. It’s list of features is much longer than I will most likely use in the near future. As I keep playing with it around town on photo walks, the features start making more sense to get the movie effect I was hoping for. With FiLMiC Pro being FREE right now, if you have ever thought about doing video with your iPhone, grab it quick. Share directly to YouTube, DropBox, Vimeo, Facebook, Tumblr and even to a FTP Server

From the FiLMiC Pro Developers:

– 3 separate shooting modes
– 4 selectable resolutions
– 26 different variable frame rates
– Audio monitoring levels
– Stereo recording support
– Custom slate configurations
– Grids
– Front Facing Camera Support
– Import Button for easy editing
– Overlays
– Colorbars up to 15 seconds
– 6 different upload destinations
– 4 bitrate options per resolution