Category Archives: News

Lastest news for iPhone Photography

Controlling the light source in iPhone photography – LensLight 3.0 is now available

There are two different lines of thinking when it comes to changing light sources in photos. There is those cute little dots of light to be added to photos for the Bokeh effect and there there is bright area highlights like a heavy light source. While I may play with both capabilities in this one app, LensLight’s new features means I will be leaning more towards the serious side of enhancing street walk photos.

I’m just diving into LensLight 3.0 and it’s doing everything as described so I won’t be knocking out a quick good/bad post, let me give the app a few days on the street before commenting. It is on sale for 99 cents right now so I thought I should at least mention it so you can jump in before the price goes up.

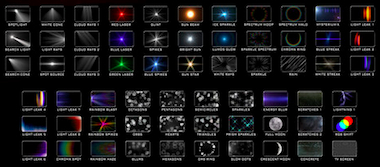
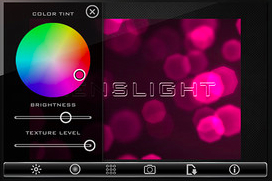
LensLight offers both light enhancements as well as texture filters. While the ability to adjust the light source location is lacking from more than adding the effect, the color picker for colorizing the filter is very nice. The color filter chooser actually took me from the app being cute to being a serious tool. Most of my photos shouldn’t be constrained to a default light when the world around us has reflective light of so many colors. With LensLight, the light splash can reflect the world around the subject in the photo.
 

Bump photo transfer for iPhone to iPhone now works for iPhone to Mac… like magic!

Bump started off as a fun contacts exchange app in the very early days of the iPhone. It expanded to do photos too. Then it expanded to apps and app lists and… well, it all got a bit crowded in the features area. Recently, the free Bump app went back to doing what they do best, Contacts and Photos. When you want to send someone with an iPhone a photo or your contact info, launch Bump, have them launch Bump and tap your hands with the iPhone in them together.

Now that you have that down, how about bumping your Mac desktop or notebook with your iPhone to transfer photos. Yup, you can now do that. The feature is in beta, but is working fine for me and my coworkers.

The iPhone and computer do not need to be on the same wireless network, the feature works off of your location in the world not networks. On your Mac, go to the special Bump Web site (https://photos.bu.mp/). The page will ask you to allow the Bump system to know where your computer is. Now, launch Bump on your iPhone, choose a picture, then tap your iPhone to the computer’s keyboard space bar.

If Bump can do this with pictures… what’s next?

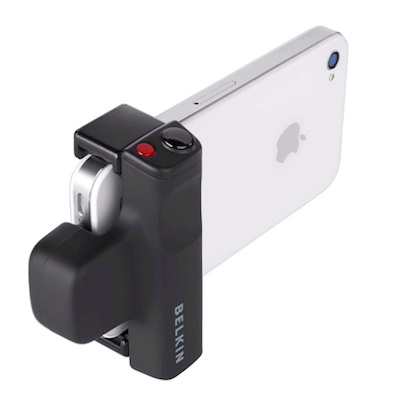
A grip for your iPhone 4 so it feels like a full size camera – Has shutter buttons too

Last year there was a project on Kickstarter (this post is not about a Kickstarter project) for a device that connected to a iPhone to make the photo taking experience more like a digital camera. A large grip with a shutter button and a related app that accepts the shutter button push to result in a photo being taken. I didn’t jump on board since the grip was larger for a firm group, cool, but I didn’t need anything that large.

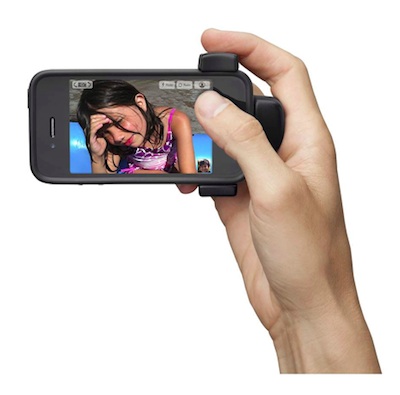
Just released from Belkin is a similar device for the iPhone 4. It is far leaner in bulk, has two shutter buttons and wraps around the iPhone further up the body. It too has an app that must be open to do the actual photographing. If you do most of your iPhone photography through an app other than the built-in camera app, this solution may not fit your needs. If you take photos with the built-in camera, then enhance and tune from there, the Belkin LiveAction Camera Grip may add to your photography enjoyment. Rather than holding the iPhone by the outer edges, you can grip like a single purpose camera. There is something to be said about the feeling involved with taking a photo that adds to the feeling in the resulting image.

The free Belkin app that must be open to accept the physical shutter presses of the LiveAction Camera Grip allows for jumping between shooting images and recording video with a push of the shutter buttons. In fact, as your recording video, you can snap individual photos. There are comments that the sound on the iPhone has to be turned off when doing this action, otherwise the shutter sound is heard in the video.

Creating fun moving GIFs on the iPhone is back with the free Jittergram

“Oh, that is so fun, how did you do that?”

Years ago, everyone knew about moving GIFs. At the time, they either had to be tiny because of sending them to people or they were annoying because people used them all over Web sites. Then came photo sharing and high resolution video via our iPhones. Finally, what is old will be new, moving GIFs are back to be shared with friends and family.

It might be due to the vintage photos being popular right now that the less smooth stop motion effect of GIFs are also a bit vintage in feel.

Unlike the previous moving GIF app I covered (Create and Share moving GIFS on the iPhone – easy as 1, 2, 3, now with 2.5 option!), Jittergram has no special photo effects to age or filter the images. Instead, it offers onion skinning which makes the animations much easier to create. Previously, you have to hold the camera very still and remember about where the previous photo had been taken. With onion skinning, Jittergram shows a light version of the photo just taken so you can see how to align the next image. Take a couple, or many to build the little movie, er… moving GIF. Jittergram does 2 image jittering too if you see a need for that effect.

When done, share your Jittergram creations with friends via Twitter or in a email. You can also save to your iPhone’s photo library where it won’t show as moving (Apple limited) but can be moved to or used with your other iPhone apps. I found a 17 frame GIF was 400 pixels wide and about 2 megapixels in size. The moving GIF below was downsized to 300 pixels and is now 500k. OK… I need to get back to my iPhone, Jittergram and a car that needs to buzz around my desk more…


Sketch Maker, the Free iPhone photo to sketch converter

Several of the all-in-one apps I have covered have a ‘convert to black and white’ or convert to Ansel. Either way, they pull the colors down to the basics. Sometimes, you may want more of a sketch or charcoal effect to the image, and that is what Sketch Maker does. Either photos you take with your iPhone through the app or import from your iPhone’s photo library, they are converted to a variety of sketched looks.

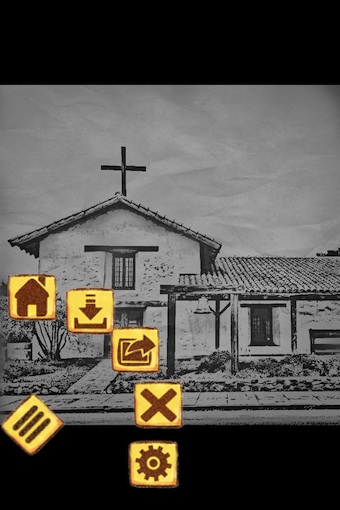
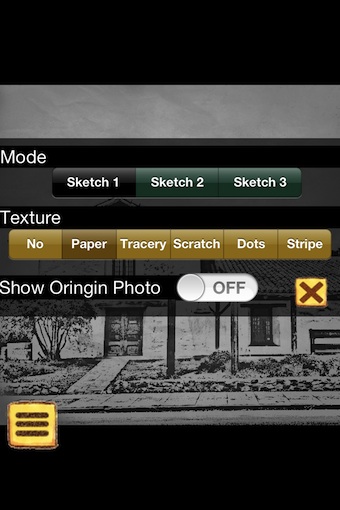
Tapping the yellow box in Sketch Maker brings up a row of buttons for starting over with a new image, saving, sharing, delete the  current effect back to default and access to Settings.

Choose the Settings icon to adjust the ‘Sketch’ mode as well the background Texture. These tuning options can be changed for a image your working on without having to reload the image.

This is another one of the sketch types chosen, and the background Texture set to non. No need for me to go into all of the looks available, Sketch Maker is free so you can grab a copy and play with the variety of effects that might best match the impact your looking for.


For iPhone users that are fans of Bokeh photography, Lumiè has you covered!

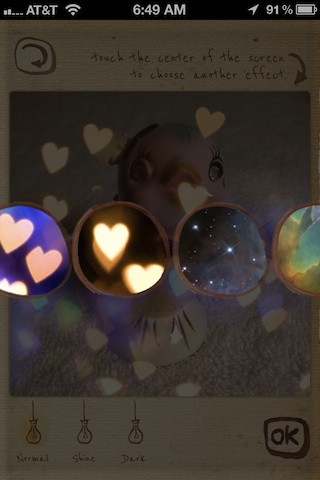
The Bokeh effect is a blur… with a bit of classic flare. Not the blur I have been covering in the past where your attempting depth, rather the blur you get a lot with old Polaroid photographs. A flash of light from a source you didn’t expect that causes a artistic wash out. I use it a lot with my black and white photography, In the case of the art of Bokeh effect photography, the bright areas get some flare with shapes. These are those fun circles, hearts, stars and streaks of light dancing around a photograph. Not for everyone’s taste, but done right the images can be unique and thought provoking… oh yea, and cute fun too.

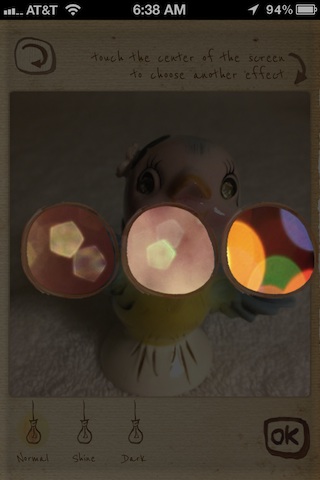
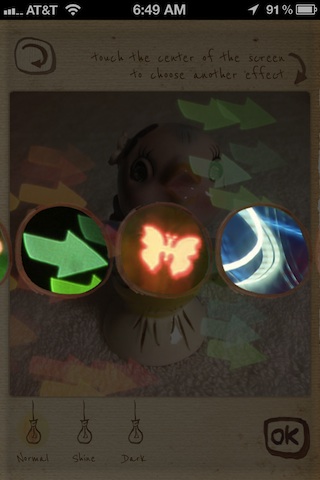
The Lumiè app (iPhone only) takes the uncertainty of getting the effect right when photographing and moves the effect to a series of filters. You can take a photo through the app or import from the iPhone photo library. Lumiè wants a square photo so the first step after import is to crop the photo, than onto the ‘effects’. Sweep your finger across the screen to choose an effect… there are many to choose from. Tap one to select, if you don’t like the effect, just tap the image to bring up the chooser again. There is also a picker in the lower left corner for the the image to be ‘normal’, ‘dark’, or add ‘sparkle’ to the filter.

The final image can be save and shared by it’s self or with a ‘paper’ frame similar to those old Polaroids. Sharing can be done directly from Lumiè to Instagram, Twitter, Facebook, Flickr, Timblr, save to your iPhone photo library or attach to an email.


InFrame Foto – the iPhone multi photo framed image builder – with enhancements

I know, I know… another iPhone app that lets you put multiple photos into individual boxes on a big frame that you can then create a single image from. True, InFrame Foto is that, but it offers just enough extra included features that I thought it was worth a mention. That, and it’s today’s Free iPhone app.

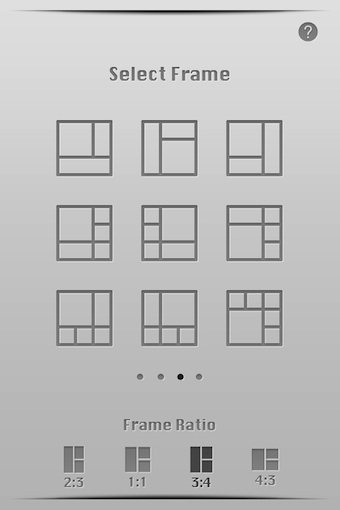
The first thing to notice in InFrame Foto is that there four screens of nine options each for frame layouts. Only the first page is what I would think of as ‘standard’ layouts, the rest are much more creative.

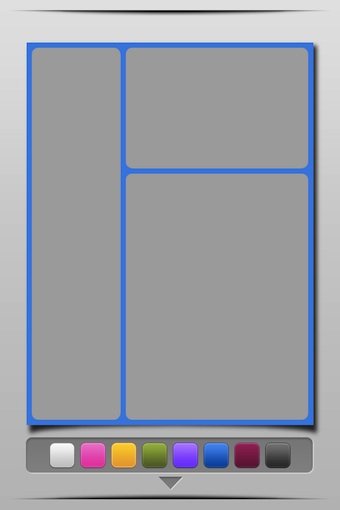
Frames in InFrame Foto can be adjusted for line width, roundness of corners and coloring.

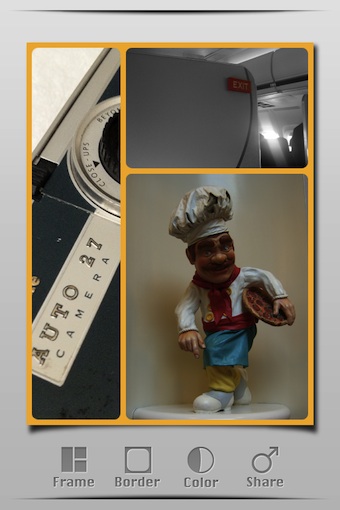
Tap a box to be taken to your iPhone’s photo library, choose and image and it is brought into that part of the frame. The photos can be pinch/expanded and moved around to best match the area chosen. Tap again to choose a different picture for that area if you change your mind.

A tap and hold on a photo in InFrame Foto opens the image into a photo editor. A nice enhancement to the multi image framing apps as now it is possible to get the photos closer to each other in brightness and contrast where with others you can easily get photos conflicting with each other.

The photo enhancement area continues via a swipe,  offering more ways to clean up and customize each of the photos in the frames.

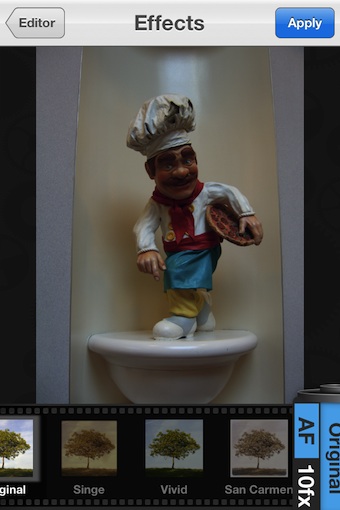
‘Effects’ in the editing area is InFrame Foto’s filter group. While not very large compared to other app that specialize in filters, the ones that are available are so much more than other multi image framing apps offer.

Adjustments are made through dials and sliders. Everything is temporary till you select the ‘Apply’.

I was actually pretty excited about the Text feature in InFrame Foto. Not only is the color adjustable, you can also resize and twist with the white do in the corner. Until you select the ‘Apply’ button, you can tap on the text and edit it too.

Saving to your iPhone photo library and sharing the last option on the work area screen. The image can be exported in two sizes, with the ultra-res producing an image that is 1350 x 1800. InFrame Foto also supports sharing through Facebook, Tumblr, Twitter… and there is a ‘more’ button too.


Create and Share moving GIFS on the iPhone – easy as 1, 2, 3, now with 2.5 option!

There has been a few moving GIF apps for the iPhone. I have played with them but pushed them aside as they required the result be shared via their site or they put their logo on the end product. This morning I found Gifmator which is proving to be a bit of fun!

The app has a rather extensive What a Moving GIF is and How-To book built in, handy if you want to jump right in then have a question.

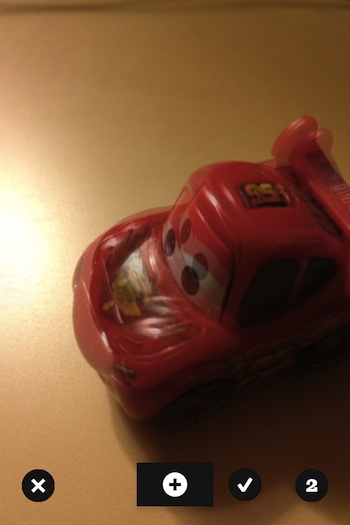
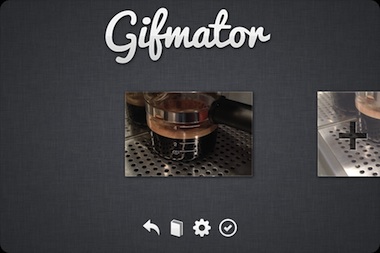
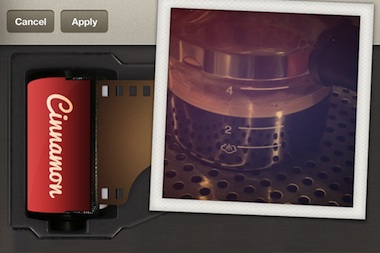
Gifmator allows you to build moving images, think of them as flip cards in a single image file, with 2 to 30 images. You can use photos or videos you take through the app or tap/hold on the ‘+’ to use images from your iPhone’s photo library. There is no re-ordering of the photos, cropping or sizing, but there is film and lens filters that you can apply to alter the images and impact of your GIF. This enhancement to the images is my ‘2.5’ step that other options do not provide.

When you have the images as you like, tap the check and Gifmator assembles the images into a single GIF, ready for you to view, send via email or share through Facebook, Twitter, Tumblr or even attach to a text message. Your finished result can be as fun or serious as you make it. I’m thinking about all of the little stop-motion shorts that I can do.


Your iPhone Instagram Photos printed to magnets – StickyGram Half Off Sale!

Just got a special sale email from StickyGram… the good and bad of using someone’s service often is they send you email marketing but usually it has discounts in it!

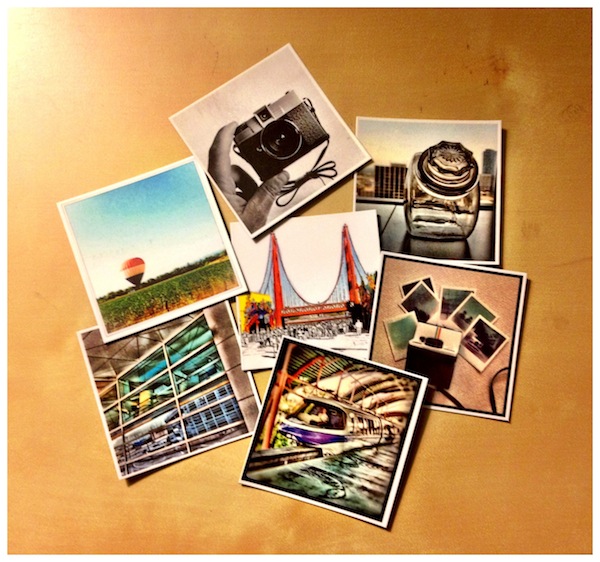
As a refresher, StickyGram is a online service that offers printing of your Instagram photos onto little flat magnets. They are nice around the house and folks love them as gifts. The magnets are printed in a sheet of 3 by 3 individual images that snap apart to make 9 individual magnets, the last set I bought came in at $14.99 US (for the printed set of 9). You just choose which images you want printed from your Instagram account through the StickyGram interface, pay, they print and mail right out to you. The magnets print finish is matte with a slight white boarder.

The email mentioned a discount good through April 9th.

Buy a set of StickyGrams and get another for half price. It doesn’t matter if you buy 2 or 100, the second one will always be half price. Just use the code: “EASTEREMAIL


Making ‘Toy’ Tiltshift movies with your iPhone – Today’s Free App

TiltShift photography is a great way of taking big pictures that look like little toy villages. One small area in focus with the rest appearing to be at a far different depth. Just like if you where standing over a little model of a big town model.

There are many iPhone apps to help take TiltShift effect images and even more that will let you edit a photo to add the effect later.  Lately, there has been a few really fun videos on popular video sharing sites using that same TiltShift effect. The effect is great for a video of a train moving in the distance, or people walking around town. One I really enjoyed was a video from a cliff overlooking the ocean as a ship goes by… give it a try!

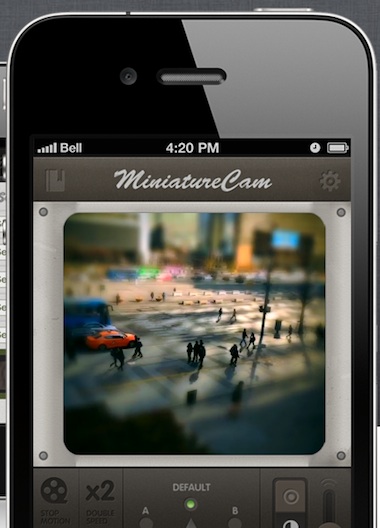
If it sound like fun, then you may want to take a look at a free app I found, MiniatureCam. A video app that shows the effect applied as you record. No mystery if your getting the video you where hoping for. For a bit of extra impact, the speed of recording can also be controlled in MiniatureCam. This gives a less smooth movement of characters in your video to add to the ‘toy’ effect.