Author Archives: admin

Selective color add and enhancing on iPhone Photos

I have run through a bunch of apps I use to tune images overall with contrast, brightness and saturation… as well a bunch of filter options. One item in my iPhone ‘camera bag’ is the ability to add/remove color from a iPhone Photo. For a long while, I have been using ColorSplash (more on it later, mentioned in another post here) to make areas of a photo pop with color while altering the rest of the photo to black and white.

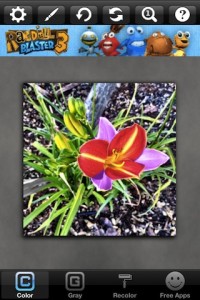
A new app, to me, is a free app (no way to remove on screen iAds) called Color Splurge. It offers a different and valuable set of photo coloring enhancements. After importing a photo, it is converted to gray, or rather, all color is removed. You can ‘paint’ with your finger which areas you want color to be returned to. What sets Color Splurge apart from many options is there is also a color picker to paint color back on. Color can be chosen through color number dials or three sliders. You aren’t able to adjust the saturation of the color but that ability can really change reality in a photo.

Previously, I have taken photos and only highlighted the areas of importance or where I want a element to cut out visually. With Color Splurge, I have been reversing the thinking where I use the color brush to recolor the whole photo then drop areas out of little importance by converting them to gray scale.
A DIFFerent case for the serious iPhone photographer

I’m always on the watch for a new case idea. The problem being is that I like the portability of the iPhone without a case, but like the features of many of the specialty cases. The Survivor from Griffin Technology is the case I use when I might be someplace the iPhone will get handled roughly. It does bulk up the iPhone 4 a lot though.

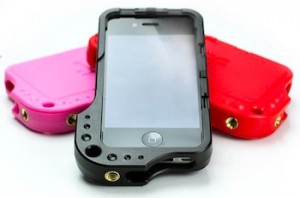
New to me is the Diff Case. The case is less about drop protect, which it does, rather it is more about protecting the faces and being able to mount your iPhone to a tripod. The Diff Case is currently $30, available directly from the manufacture.

The main ‘features’ of the Diff case is the doors that cover the flat sides of the iPhone 4, which can be opened tall or wide, and has a opening for the camera to work with the case still on. The two tripod mounts make it easy to set up for still or long exposure photographs.


Creating Typographic Word Art on the iPhone

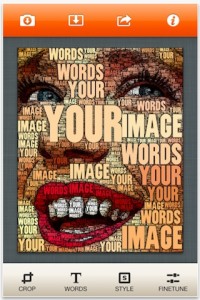
Will I be using this app everyday, no. Will I be saving my action shoots with this effect, not likely. What is very likely though is that the effect availability has opened up a whole new line of thinking around some photos.

The WordFoto app takes an image on your iPhone and overlays words that you have chosen. It appears the size of the text varies a bit depending on the detail of a point in the image. There are 8 preset effects to start with; Romance, Color Classic, Gray Classic, Comic, Howling, Black Label, Blocky and Howling. Then, using the WordFoto adjusters, you can tune the highlights and shadows, saturation, contrast, brightness and even the edging. Cropping is also supported.

Sharing is done via email, saving to your iPhone or sharing on Facebook. Hmmm… Facebook… it might be fun to use the effect on my Timeline header. Meanwhile, I’ll try it on some photos I took of the building in San Francisco. I wonder what a Christmas Card might look like with the WordFoto effect…

Pixelating Parts of iPhone Photos Right On The iPhone

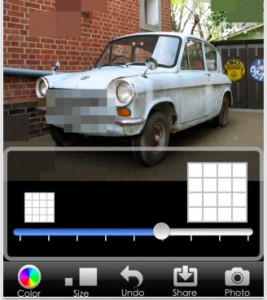
Popular in reality TV shows is the pixelate company logos of offensive images. You often see a person wearing a hat or tshirt where the logo is blurry. From time-to-time, a similar need might come to a photo taken with your iPhone. A license plate or someone in a window of a building that should not be there. Cloning or soft blur if you have the time is best, I’ll cover here shortly how best to do both of those. If your in a hurry though, a quick pixelation method is the app MosaicTouch.

You can select an area with two fingers or just swipe across with one finger to apply the pixelating effect. To lessen the impact of the area, there are 18 base colors to choose from as well you can adjust the size of the pixels. MosaicTouch is quick, simple, and even lets you share directly out to Facebook, Twitter, Tumblr, email or save to your iPhone’s photo album.

Fun to blur out friends at a party pictures too for a humorous ‘what stays in Vegas’ look.

The Science of Taking Low Light Photos with the iPhone

there are mixed opinions on if the latest iPhones are better in low light than previous models. The higher resolution, faster action and more capabilities to focus has gotten us to notice when our images are less than perfect. So, whether it’s a iPhone 3 or iPhone 4, photos taken in low light appear grainy at best.

One solution is to hold the shutter open longer to get as much of the available light into the iPhone’s camera. A new solution offers a different line of thinking… taking multiple pictures and merging them together. Both paths work best with the iPhone on a tripod or at a minimum on a solid surface. The solution, Average Camera Pro does as it’s name states, takes multiple images and averages them. Giving a brighter finished photo with stronger colors. Length of time and number of photos taken is adjustable.

Taking that a step further, when a iPhone camera is assembled, there are a few irregularities that show up in photos that are challenging. Average Camera Pro offers a solution to this problem too. Telling the app where the issues are, the app uses the info to correct those areas. “Telling the app” is as simple as taking a picture of a white piece of paper.

Getting the Tri-Filter Effect with your iPhone Photos

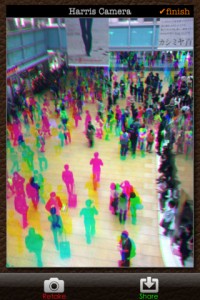
The Tri-Filter Effect, also known as the Harris Shutter, is where three photos are taken and merged together. Unlike TiltShift, the Tri-Filter takes the three images with different color filters: Cyan, Yellow, Magenta (some refer to as the Red/Green/Blue). Since the three photos are taken one after the next, any areas that move will show as a ghost on the final photo in a particular color. Imagine a person walking across the street, if you take three photos quickly, the background and road are still but you will have three of the people as they progressed between the time you snapped the shot.

Take that idea and apply it to anything that moves a bit like water or clouds. You can also move the camera to cause a color shadow on the objects in the photo. A few examples sites/pages: Tri-Filter Landscapes, Harris Shutter Flickr Discussion, “Apply Filter” looking at Tri-Filter photo options.

Since we have a iPhone in our hand and don’t want to haul around a bunch of filters to change out, there is an app to handle that magic for us. HarrisCamera will snap the three photos with digital color filters across 1, 2, 5, or 10 seconds. Then, save the image to your iPhone Album, email or share on Facebook, Twitter or Tumblr.

Creating photo mosaics on the iPhone… for free

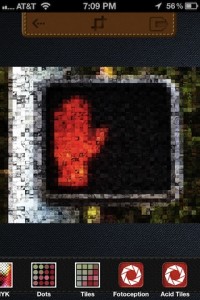
Normally, mosaics are a job for the desktop computer. Software has to look at a photo, examine the bright/dark areas and finding pictures that reflect the right coloring. An app that does basic cropping and image filters also offers several levels of mosaics.

The app, Fotoyaki, is a free iPhone app that produces some very interesting effects. Like any specialty photo app, some pictures produce great results, others not so much. The free price of Fotoyaki means it’s on my iPhone that I toss pictures at to see what works.

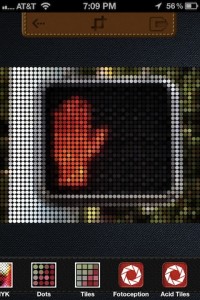
Along with the mosaics processing, there are also to levels of dot effects that can really be fun. The Fotoyaki dots have proven to work best on images I have taken with straight lines. Sharing the finished result is done by saving to the iPhone photo library, email, Twitter and Facebook.

Another iPhone HDR photo app, this one with a ton of fine tuning tools

I have covered several HDR photos apps for the iPhone. Some create a HDR like photos by applying filters to lighten the dark areas and push the bright colors with a bit of a boost. Then, there are a few that take actual HDR photos which is to say they take multiple images and merge them together.

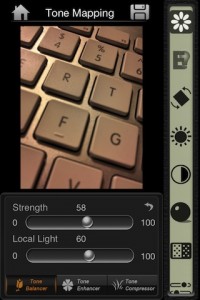
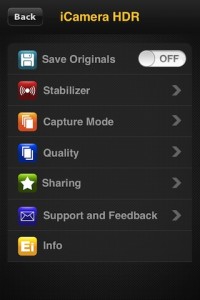
A new option (to me) is iCamera HDR. The developer claims it is the first true HDR photo app in the iTunes store… I’m not sure about that claim since I have been using a few options for years now. What intrigued me about iCamera HDR was all of the fine tuning that app lets you do to the images. After you snap the photos (manual or automatic) and the pictures are made into one, there is a long list of adjuster sliders to tweak your iPhone photos to really bring out the strong parts.

The settings area is pretty extensive too if you want to get defaults set up. Then, when getting ready to take the image, there are last second options through the buttons around the camera button for stabilization and auto/manual.

Using the iPhone to get better film based Pinhole Photographs

While my iPhone is the ‘camera’ I always have with me. I also shoot with a 16 megapixel digital, a Diana Mini and a Diana Pinhole. Since the Diana cameras are film cameras with a level of uncertainty built in, a bit more thought happens before hitting the shutter button. Film is a lot of fun, with a large variety of simple camera being available at very low prices. The film they use though is getting more expensive as suppliers lessen as well there is the cost of developing/printing. Due to this, I’m less likely to just shoot up a roll of film of anything I see like I would with a digital camera. I must say though, when film/developing was less expensive, a lot of experimentation can really help create a person’s look/feel.

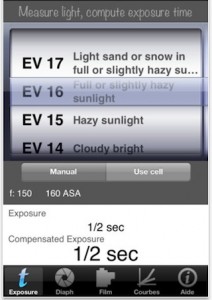
A nice little app I found to make sure my Pinhole camera shots are more often usable instead of over/under exposed is Pinhole Assist. It offers a few screens of dials for you to tell the app what the environment is like, as well what film speed you have loaded and how big the pinhole (or f stop lens if you have the option on your camera). The answer you will get is how long you need to have the shutter open.

Pinhole Assist does cover a nice list of particular pinhole cameras (Diana, Holga, Zeroimage, Ilford and more), as well it has enough flexibility to be used with a camera you may have built yourself.

The iPhone, a serious tool for photographers, amateur and professionals

Not all photography tools for the iPhone involve using the iPhone’s camera. I stumbled on this little gem of an app for pin pointing location data for making decisions on when the perfect photography time will be. The app, GoldenPic, is a valuable tool for outside photography.

When at a location, the app will tell you sunrise, sunset, weather for the next few days, the geo-location and data on the moon. If the timing isn’t perfect, save the location for later to check when your not there. Imagine, parks and landmarks in your area, bookmarked so that later you know when you should go to one of the locations to take photos because the environment around the location will be best suited for your shots. You don’t actually have to visit the location, just enter the name, address or geo-location into GoldenPic and save for later. Use it for planning out your next vacation path, know in advance when different stops will be at their best to take their picture rather than showing up when the weather, sun and time of day are all wrong.