Author Archives: admin

Making your iPhone Photos square without cropping

Personally, my real retro film camera is 35mm, with images being wider than tall. But, the choice of most ‘social’ photo sharing services use square images. This makes the management of photos by the service much easier, they don’t have to worry about the presentation of wide vs tall images.

Unless you have a ‘square’ frame of mind when taking a picture with your iPhone, or specifically using one of the social apps to take the picture, you will be cropping every image to fit the format. This can mean the loss of some of the photo message.

A free app, Squaready, takes the opposite approach to the square problem than cropping. It gives you a square area to work in. Placing your image in that work area, you can expand to the edges, then fill in the area around the image with a color (tons available through picker). Squaready also offers a few tuning options; rotate, mirror, and manual resizing. When you have the image as you like, you can directly post to Instagram, save to the iPhone photo library or ‘sent to’ another app. A variety of image size and formats are available too.

The app is free, but has iAds taking up the lower edge part of the screen. There isn’t an in-app purchase option to remove the ads, but the developer claims that if you tap the iAd you won’t be bothered with it for a few hours.

Quick picture and note from the iPhone to your free Evernote Account

There are many options to jot notes down on the iPhone as well to keep ToDo lists. I find that I have much of my quick notes spread out amongst many apps. This causes problems trying to make sure I use the right app for the right project and that I check that app later. In an attempt to get everything in one place across my iPhone, iPad and notebook, I have been playing around with the free cloud notes system, Evernote.

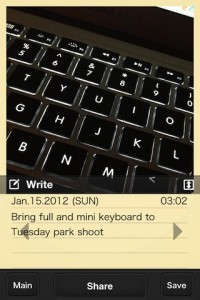
An app I have been playing with over the last week, ShotMemo is helping with that process rethink. ShotMemo let me take a quick photo, resize it, add a bit of text and send it to my Evernote account. Super quick!

ShotMemo does have a lot of fine tuning features too for those times it’s more about appearance or more info is needed. You can choose to have the date/time auto inserted into the note. As well, Geo location can be auto entered. The background of ShotMemo’s notes area (resizable) can be changed to any of the 16 (I actually counted 17, but the dev says 16) options. If that isn’t enough, there is the option to in-app purchase 23 more.

When you have your shot and text, then choose to send, you have the option of the size of the image… which is handy when there is only slow internet available. Sending to has more options than just Evernote, you can also choose to attach the image/text to a email, or share through Twitter, Facebook, Tumblr and Flickr. In the case of Evernote, the last screen gives you the option of which folder you want the note sent to. So, while I say ShotMemo is super fast to get a photo and note to my Evernote account, there are tuning options that can stretch the sending out a bit. It all comes down to what you need at that time.


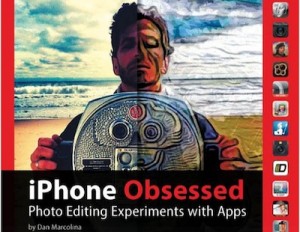
iPhone Obsessed – the iPhone photography book I wanted to write!

The concept was simple, but to pull it off meant a lot of work. I set about taking photos with my iPhone and editing them with a variety of iPhone photo editing apps. I then showed the original and the final options with effects applied. It has been a lot of fun over the last year, and it has been a serious lot of work for a year.

Over the holidays, I found and purchased “iPhone Obsessed“. A book that shows finished images and the app/settings it took to get the image. The author claims it took them a year of hard work to take the photos and work through the best solution to get the effect they were looking for. Having lived a similar year, I can say I believe them. The book is a very nice item to grab (found it on Amazon here) to save yourself many hours to playing around. It is still best to experiment to learn what you can do and equally what doesn’t work. But iPhone Obsessed takes a lot of guess work out of getting to the finished result you may be looking for. It’s a great way of ‘seeing’ ideas around what is possible when you frame up a shot too.

Google+ changes the look of the photo area on the iPhone

I don’t post a ton of pictures up to my profile on Google+, but do a few here and there. Just one more place to share with friends.

It has actually proven to be a great place to connect up with other photographers sharing different types of photography. I’m often in the different HDR group lists and chats, or as they call them on Google+, “Hangouts”.

The recent update to the iPhone Google+ app is mostly around the framing of photos in the albums areas. Before, Albums and individual photos where surrounded with a white frame, very ‘Google’ like. Now, the Albums list went from two columns of square framed images to one row where a slim line of the Album’s cover photo is cropped. Clicking on an Album gives you a frame-less multi column view of your images. Notice how everything is dark/black outlined now too.


Fixed depth and Multi Focus Photography with the iPhone

Beyond Tilt Shift effect is the whole science of blurring out an area of a photo for an added effect… it’s called Bokeh. Tilt Shift is the focus of a single point to fool the eye into ‘seeing’ a depth that isn’t there. Bokeh is more about the effect of a blurred area causing a feeling for the photograph. The ‘out of focus’ area can be strong or light for different effects.

An app that goes beyond ‘simple’ Tilt Shift is SynthCam. Rather than just blurring everything outside of an area on a single photograph, SynthCam takes grabs 30 frames a second to see what your eye sees. The app relies on you aiming it’s camera at a object and moving side to side a slight bit (not forward/back!) over the ‘in focus’ object so SynthCam can learn the distance of that object. If you have multiple items you want in focus, you can do the process several times for SynthCam to learn each item’s depth. This mean a complicated object like a flower or a person can be central to the final image instead of a circle or blocked area. It has taken some practice to learn the amount of movement to get the right result, but this is digital so it doesn’t cost anything to take a lot of image attempts.

20% off serious iPhone protection – This weekend only!

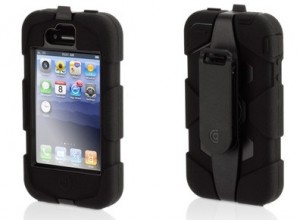
I have had a Survivor case for my iPhone 4 since it came out from Griffin Technology. I don’t use it much during the summer around the office, but it is a must have for the winter or when I travel. Now on my iPhone 4s, the case protected my iPhone 4 last winter when I dropped the phone twice getting out of the car and once when I slipped and ejected everything in my hands skyward.

The case completely covers the iPhone with little doors over things you need to get to or nubs that allow you to push buttons through the rubbery outside. It means an extra step to take a picture to uncover the camera lens… putting up with that in exchange to not have to buy another iPhone when the inevitable drop happens.

I thought I would pass on a link that I just received in an email for 20% off the case. It isn’t a cheap case, but this is a great example of you get what you pay for (they offer other colors than the black I chose too). Kick off your New Year with 20% Off Sitewide at Griffin Technology. Use NEWGEAR20 at Checkout. Valid to 1/1/12.


SnapSeed iPhone Photo Editing App – Free Today Only

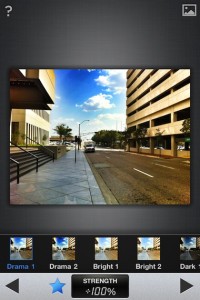
Grab SnapSeed while you can for FREE, Dec 31st only. I had no problem paying for this app due to it’s huge list of photo editing features. TiltShift effect area can be stretched rather than only round/straight, Apply image tuning to a single point rather than always the full image, Add filter effects, Twist – Crop… well, the list is pretty long, take a look at it.

The use of SnapSeed is a bit different too… you select the type of tuning, then move your finger up/down the screen to choose the specifics, followed by moving your finger left/right to adjust the strength of the change.


Check your heart rate – another thing the iPhone camera can do

What is that little red light up thingy with the wire that the hospital folks put on your finger? They say it is what is telling the machine your heart rate. OK… that’s cool.

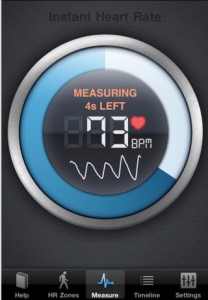
Maybe on this holiday, your wondering if all the family fun is getting your heart rate up. Now, you can check with your iPhone’s camera. An app I grabbed, with a proper name of Instant Heart Rate fills in the gap between your finger and what your iPhone’s camera sees. Just launch the app, aim your iPhone’s camera at your finger tip… within 10 seconds you will know your heart rate. No joke… it really works, this is NOT a comic gag app!

With my iPhone4, the LED ‘flash’ lights up to help the camera ‘see’ inside of the finger. If you have an iPhone or iPad with no flash, they suggest using the app in better light. The Instant Heard Rate app offers to keep track of your Heart Rate recordings in the app, this is nice. It also offers to store the history on the developer’s site… not sure I want my heart rate history out in the wild, thanks. I’ll keep using it as a stand along iPhone app though since it’s nice to know how I did after my walk or when a relative makes a wise crack!


iPhone Photos printed on cards and mailed… for you!

There are a few options for creating printed Holiday, Birthday and Than-You cards on my iPhone. Most apps are for creating cards that you email, but there is a growing popularity in doing the creative work myself, then letting someone else print and mail for me. Sincerely is a company that allows developers to add their code so photo apps can offer the printing of the images you took with your iPhone. “Sincerely Ink” is an app they offer themselves for free (Universal so it works on your iPad too).

Sincerely Ink has over 30 layouts to choose from. There are card templates that have illustrated art on them, and others that allow me to insert my own photos. All have editable text. After the card is as I like, I can manually add a name/address to send to or choose one/multiples from my iPhone Contacts area. Through the app, Sincerely charges $1.69 per card to print and mail for me. I’m sure all of my relatives will just love a photo I took on the Thank You cards.


All-in-one iPhone Photo app TopCamera kicks it up a notch with latest release

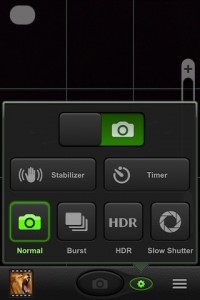
TopCamera is an app that ‘has it all’. It allows you to take pictures with Stabilizer, has a true multi image HDR, does burst photography shooting, slow shutter for low light and even  a timer to get yourself in the image. The only ‘negative’ for me so far is the user experience for editing photos within TopCamera. It has all the features to tune/enhance photos, it just isn’t very natural. What the app is for me is the single app to launch for just about any photo I need to take.

In the update, TopCamera lets’ you choose what the app launches with – the camera, image enhance area or ‘the last used’. Also in the update is smoother zooming, and more selective focusing if your shooting video. I may have missed that above, TopCamera does both photography and video recording… it really is that first app you launch when your in any visual recording situation, then think about how you want to save to share later.

Oh yea, and the new launcher icon update is really nice too!