I have covered HDR photography here before. The iPhone camera and many apps take two photos at different exposure settings and merge the images to lighten the dark and make the light areas really pop. That of course is over simplified, I’m not going for an HDR lesson in this post.
When a person finds an HDR photo on the Internet, there are three types. The basic two image merge like what is found with the iPhone’s built in camera app, there are enhanced HDR where an app is used to alter a single image for the effect and finally the images produced by a digital camera. The digital camera version usually has more natural looking lighting but everything has more vivid contrasts. The images are closer to what we see with our eyes instead of through the limitations of a smartphone camera lens unable to collect all the differences an eye can.
The digital camera version is partially due to ‘better’ or ‘specialized’ equipment… not many digital cameras have games on them or allow to be used to call mom. And, instead of two images merged, the camera captures 3 images, most common called ‘Bracketed’. The images are 3 photos taken quickly after each other so they align, but at different exposure settings. Then, via a desktop app, the photos are merged together and enhanced or cleaned up. The 3 bracket photos providing much more contrasting information to work with than only 2.
On the iPhone, app developers attempt to do the whole process of HDR so they keep it within the power of the iPhone edit capabilities, only collecting and merging two photos.
PureShot was recently updated with the feature of snapping 3 Bracket shots to be used with desktop editing software rather than being all things to all people.
The app still has more features and gadgets than the average iPhone photographer will need. But, if you are looking for more control over taking the photo and less worried about having to edit later, PureShot is the tool to be in your iPhone Camera Bag. Complete control over focus and exposure points, being able to lock both along with the focus point. The app collects a lot of data with the photo too so sharing has data that most other apps will happily use.
If you dip into the Menu area of Pureshot, choose Shutter Settings, then Shutter fires, you will be given the options to have your iPhone (via PureShot, not when using the iPhone’s default camera app) capture a single image, 3-Shot Burst, or 3-Shot Bracket. Use the 3-Shot Bracket if your going after collecting 3 images for editing into a high quality HDR photo via your desktop computer.
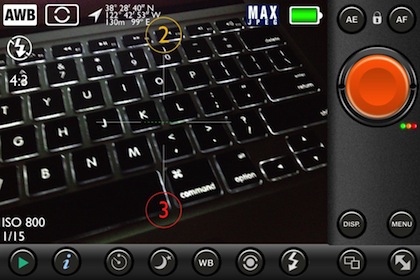
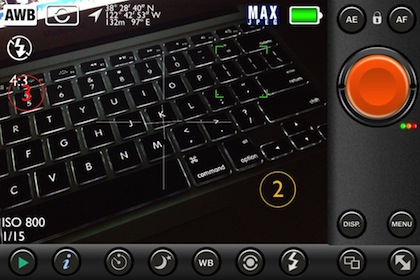
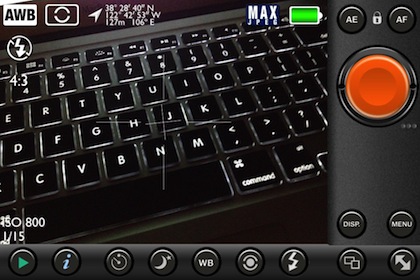
Now, when looking through PureShot’s viewfinder, you will notice the addition of a ‘2’ and ‘3’ spot. Just drag those to contrasting exposure spots on the area you are going to photograph. Perhaps ‘2’ to the darkest area and ‘3’ to the brightest (don’t forget to tap the screen to focus!). When the big orange shutter button is tapped, 3 Shots will be taken with about 2 seconds between each. The slight delay allows the camera to adjust to the different exposures rather than an over all photo and attempting to fill in later. There are three small dots next to the shutter button that change from colored to blank as the three shots are taken and saved to the iPhone photo library. Now, export the three photos to your favorite HDR app on your computer and create some real bracket HDR images.