Tag Archives: mobile solution

Photogene Updated To Version 4, Includes Pro Features At No Extra Charge

Photogene is one of those iPhone photo editing apps that I use a bunch, back shelf for a while then ‘rediscover’ it again. Once again using it a lot as a single app that give the ability to do all the work in one app without  silly clutter. Along with the update to the feature set in the new version 4, the app has also gone Universal so you can install it on your iPad for a larger view of your edits. The iPad interface is completely different, I’m only showing the iPhone version here.

Included in the version 4 update:

  • Photogene is now a universal app for both iPad and iPhone.
  • iOS 7 compatibility.
  • New look for iPad user interface. New icon.
  • The PRO package is now free! Everyone has been upgraded to PRO.
  • Enhanced RAW support. RAW files are now opened in full resolution.
  • Flickr export: can now choose a set.
  • New feature for exporting XMP sidecars.

Now, onto actually enjoying the power of the app – After importing a photo, Photogene 4 has a quick access tool pop up wheel to get right in and editing.

02 Photogene 4 iPhone

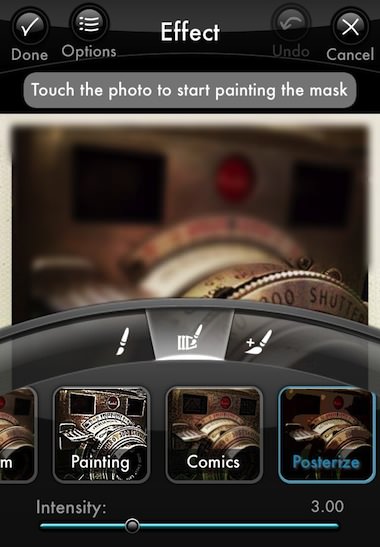
First off, there is a nice group of pre-built overall picture filters. These can be applied in layers when in a rush…

03 Photogene 4 iPhone

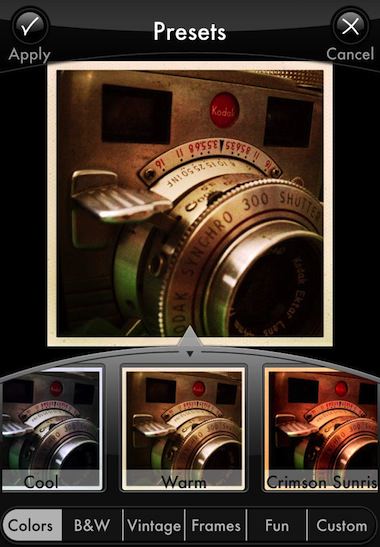
Fun overall filters that are quick and tunable. The real power of Photogene 4 though is the specific photo area tuning tools. Notice that at this level, there is also a row of fuzzy undo/redo/restore buttons along the very bottom of the screen for those times you want to throw a bunch of changes out and rethink the image.

04 Photogene 4 iPhone

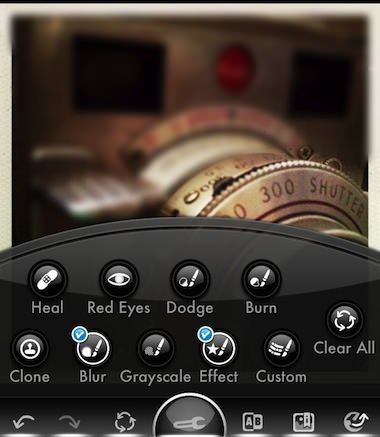
Each effect can be chosen to be applied to a very specific area of the photo. Photogene lets you save/undo/cancel and move onto the next effect. So, you can brighten an area, darken another part of the photos, blur a bit, burn some light… and so on. It’s easy to move from one alteration to the next so doing simple to more detailed edits is pretty quick. When using a tool, don’t miss the ‘Options’ button in the upper area for more adjustments available for that effect.

05 Photogene 4 iPhone

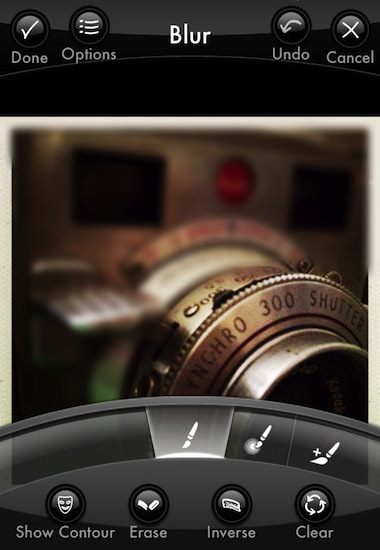
Each of the effects have additional options from the dial. Usually, these start with the basic brush head used to apply the change. Choosing other tools will result in a different sub group of effects within the top level group. Notice the slider along the bottom, Photogene 4 is not an all-or-nothing filter app.

06 Photogene 4 iPhone

Every time you save adjustment, it is layered on top of the previous work. Returning to the work picker, notice that the features used have a check mark next to them. If you develop a workflow, this is handy to see where you are in the process and to assure all steps got covered.

07 Photogene 4 iPhone

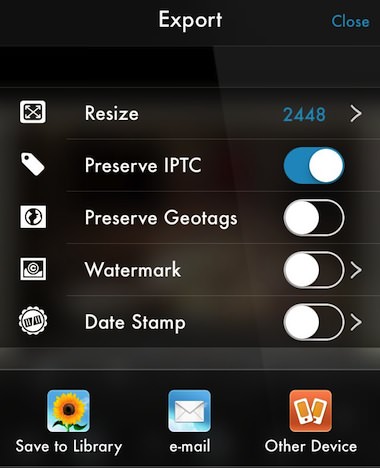
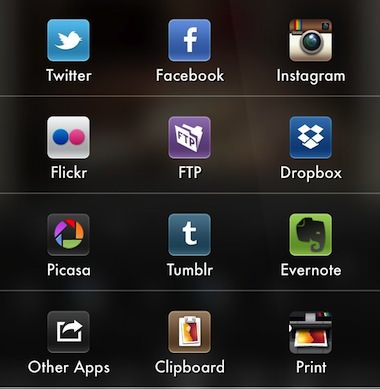
When the image is as you like visually, Photogene offers the ability to adjust pixels to best fit the way you will be using the photo. As well, you can review the photo tags, then share through a large variety of options. Speaking of all-in-one without clutter, notice that you can water mark the photo without having to go to another app also… high on my list since I found a recent photo of mine on over 85 sites with no credit.

08a Photogene 4 iPhone

08b Photogene 4 iPhone

iPhone Photographers Print Without The Need Of A Computer

After a photograph is captured with the iPhone, there are many ways to share the image with others via social share or cloud storage. While, it’s a very digital world now for photos, there is still a need to be able to print the photos too. Most people will sync their iPhone photo library to a computers which can then print, but that can be a limited line of thinking when the iPhone allows so much mobility.

I have covered a couple printers in the past that I have and use regularly. Along with physical mobile printing options, there are also online printing services available to use with the need of a computer. Everyone knows to think through both price and portability of the printing solution. First on my list though is the resulting image print. What the prints will be used for will impact the final choice.

Jumping right to the point, here is a snapshot of a few of the printing outputs available for the iPhone –

iPhone prints

A: The wireless CP900 from Canon. The prints are the size of a postcard, with the option to print full bleed or with a boarder. The paper is either Canon Branded back or with a mailing postcard marking (text area, address area and stamp box). Printing involves the paper automatically passing through the printer 4 times to layer the colors and protective surface on.

B and B: Two examples of printing through the LG PD233. It is the most portable printer being barely larger than the iPhone, using bluetooth, and the ZINK active paper. Kids love being able to have a little print right away from something that fits in a pocket (takes about a minute). QR barcode can automatically be added if the image is also uploaded to a social share service.

C: Just for reference, a real Polaroid print from a OneTouch Land Camera.

D: Printic service printed. The service charges less than a dollar per print uploaded from the iPhone, the service prints and mails in a nice envelope. Text can be added to the photo via the app too. The quality is very nice, but it isn’t instant gratification.

E: StickyGram is an online printing service. This is an example of their Instagram magnets (9 different per sheet). It can be accessed via the iPhone browser. The magnets are only one of the many printings that are offered using a person’s Instagram photos.

F: Another ‘for example’, this is an print from the current Polaroid camera, like the Canon uses Zink paper.

G: Not shown, Prinstagram has an iPhone app (called Print Studio) to select the print size and format (small/large cards and small/large photo books) and photos. They offer as many print sizes and formats as there is examples above. Again, not for instant gratification but provides a nice quality product.