Tag Archives: iPhone Photography

Shooting with BlacKeys Extra Fine Black and White Film on the iPhone

Last week I discovered a nice surprise, a free film pack in Hipstamatic!

Normally, there will all kinds of news from the Hipstamatic team about a new film, lens and flash pack. This time though, a new pack called “Long Island FreePak” went under my radar. As the name implies, this ‘Pak’ is free. Included is a film and a fun camera body, no lens or flash. But, that is fine as the film is a nice extra fine black and white so it matches up nicely to my currently installed lenses.

01 blackeys extra fine film

02 blackeys extra fine film

Nothing special about getting the free offer, just go to the Hipstamatic retro camera app on your iPhone, choose the cart and find/download. Then head out and shoot! As promised in my last post about add on film, lens, filters and effects, here are a few photos I took the afternoon I installed the update so you can see a real world results.

03 blackeys extra fine film04 blackeys extra fine film05 blackeys extra fine film

Olloclip Introduces Lens Kit with Circular Polarizing and 2x Telephoto

If you have heard of Olloclip lenses for the iPhone 4s and iPhone 5, it most likely was for their Fisheye, Wide-Angle and Macro. Their iPhone lens solution is a two sided slip over metal device. On one side is a fisheye lens, which gives a true fisheye photo over a software generated fisheye image. On the other side is a Wide-Angle lens and a Macro lens layered over each other. The lens corner ‘clip’ is a solid piece so there is one for an iPhone 4s and another for the thinner iPhone 5.

01 orig olloclip

Today, I received several emails from Olloclip announcing a new version. The new solution isn’t more lenses on the original unit, instead it’s a whole new clip that carries two lenses to further expand the options for the iPhone photographer. The new Olloclip is similar in size to the original, small enough to have in my pocket without having to carry in an external case.

The first lens is a 2 x Telephoto. Things at a distance can be magnified by 2x with a mechanical lens, rather than the built in digital. As electronic zoom gets better at image correcting, a lens solution will make less of a difference. For now though, a lens should have a sharper image.

02 telephoto olloclip

On the other side is a round Polarizer lens. While I enjoy taking reflection pictures, I have been missing the option of a polarizer. I covered in an earlier post a less expensive clip lens I use, based on their original device quality this solution should be nice. My full size cameras all have lens polarizer filters for those time I need to see through a transparent surface that could be reflecting the sky or even me!

03 polarizing olloclip

I am anxious to get my hands on one of these new Olloclip lens packs to see if it is much larger than the original. What has made the first Olloclip so usable is it can be tossed in any bag I’m carrying or even my pocket. The solid construction means I don’t worry about it getting squished like the less expensive spring clip or magnetic options.

Till I have shots to show the lenses in action, here are a few from the Olloclip site.

compare1

compare3

compare4

Brighton Hipstapak introduced with Sussex Film and Doris Lens

The Hipstamatic vintage iPhone camera app has undergone several updates recently. I’ll cover lens/film sharing and working with Oggl in another post. For this Hipstapak mention, I thought I would go in a slightly different direction. Normally, I will let you know that I found a new pak available of interest for folks that like to play with lens and film combos. Then, what the folks at Hipstamatic has to say about the pak’s shooting results.

Going forward, I’ll let you know when a camera app has introduced new add-ins, as well a few shots I have done using the update in real life. I hope this helps you make a decision if the feature will enhance your photography outside of the parameters that the app provider shows.

So, like the title says, Hipstamatic now has a Brighton Pak available through the app on the iPhone. Included in this Brighton Pak is the Sussex Film and Doris Lens.

01 Brighton Hipstapak

02 Brighton Hipstapak

Below are a few shots using the Brighton combination. Since taking these photos, I’m finding the Doris lens getting used a lot with other films on the iPhone Hipstamatic app. Your preference and milage may vary.

03 Brighton Hipstapak

04 Brighton Hipstapak

05 Brighton Hipstapak

06 Brighton Hipstapak

Photojournalists Turn To Instagram To Get Their Photos To The World

My parents grew up with photographers taking pictures at a ‘news worthy’ event, turning the photos into newspapers and then leaving it up to the decision makers what made it to the public to see. Twitter changed that a bit, allowing anyone to post a bit of text explaining what they are seeing. Either people saw the tweets and went there to take photos to submit to the regular news channels or attach the photos to more tweets. The limitation for the Twitter path is the service is about text, photos are an extra click, so text must be enticing enough to encourage a click. Adding Vine to Twitter, in the area of distributing News, will give more context than photos but still require a ‘click to view’.

Instagram is a stream of photos that people sweep through, seldom looking at words unless they stop on a photo. Perfect for getting a visual to the public about an event, no matter where it is happening in the world. People can comment and share with others. Thus, getting information out to the masses through images, with no one person making a decision what is news worthy.

Instagram has recently run two blog posts outlining a few Photojournalists that post to Instagram. Of course, everyone can be a photojournalist via a system that allows anyone to take a photo with their smartphone and post for all to see.

A list of the few mentioned in the two Instagram posts:

  • Michael Christopher Brown, documents life in Congolese refugee camps — @michaelchristopherbrown
  • Ben Lowy, a conflict and feature photographer based in New York City — @benlowy
  • Phil Moore, a British photojournalist based in East Africa — @philmoorephoto
  • Kevin Frayer, the chief photographer for the Associated Press in South Asia — @kevinfrayer
  • Ivan Kashinsky, a freelance photographer based in Quito, Ecuador — @ivankphoto
  • Michael Yamashita, a documentary photographer for National Geographic specializing in Asia — @yamashitaphoto
  • Tim Fitzsimons, Beirut-based journalist — @tfitzsimons
  • Ed Ou, journalist based in the Middle East, Africa and Central Asia — @edouphoto
  • Teru Kuwayama, Afghanistan and Pakistan-based journalist — @terukuwayama
  • Wissam Nassar, a photographer based in the Middle East — @wissamgaza
  • Damir Sagolj, Reuters photojournalist based in Bangkok — @damirsagolj
  • Daniel Berehulak, Australian photojournalist based in New Delhi — @danielberehulak

The blog posts:
Photojournalists Sharing the World through Instagram
Photojournalists Sharing the World through Instagram, Part 2

thumbnail instagram Photojournalist

Photography Week, this week is the iPhone Photographer issue

There is a lot of chatter on the Internet from Pro Photographers explaining how an iPhone camera can never replace a high end DSLR in a Professional’s hands. I don’t try to put them all into one group. Even a smartphone camera in the right hands will result in photos ‘better’ than those produced by someone without the experience.

Rather than choose a side, why not explore the options to get the most out of a iPhone camera. There are going to be a lot of times opportunity presents it’s self and the full digital camera is sitting back on the kitchen table. Photography Week, a Universal app digital photography magazine is offering suggestions on getting more out of that iPhone camera that is always available in your pocket.

01 iPhone Photography Week

This week’s issue is an ‘iPhone Special’. There is a few apps covered, the usual group you have seen elsewhere (no new surprises), I enjoyed the articles they included on doing more with the iPhone than just photo adjustments. Lighting, angles, views, coloring and other interesting perspectives are covered.

02 iPhone Photography Week

03 iPhone Photography Week

iPhone Photography Apps Trending Towards Huge Lists Of Up Charges

Interesting that I originally started taking notice of so many in-app purchase options with the app KitCam, which has now been discontinued.

App creators are looking for ‘better’ ways of making a profit. Initially, everyone was making their millions from charging 99 cents and selling many many copies. Then there was the twist towards iAds everywhere in the app which has had mixed results for app sellers. Most recently is the push to start charging more for apps to move them into the world of ‘real software’. Pricing for iOS apps closer to their desktop counterparts.

Hosted solutions and apps that require online support are limited to apps that can use that feature. They carry a monthly/yearly charge for the developer to maintain access to your data across multiple devices. With many services going under and the app becoming useless without, these may be feeling a crunch of concerned buyers. Currently though, more apps are going the direction of free or minimal charge for the app, then anything but the very basic features will cost more. ‘Enhanced’ filters for photo editors or ‘brushes’ for drawing apps, all just a dollar more and then another dollar more.

I have no doubt that this pricing scheme of encouraging people to buy another add on works, a long time success story is Hipstamatic where new new Packs are introduced throughout the year. Most just show a group of lenses and film packs, with a descriptive name that an individual can buy to get that extra special effect for their photos. The drawing app Paper has additional brush tips and color mixing for those more creative drawing folks, and those that wish more options might make them a better at drawing.

The up charging does work for apps for bridging between basic users and the more advanced. There are those that seem to hook a person in with a low up front charge then charge for what a person would think are ‘basic’ supported features.

A few examples of both:

01 in app feature upcharing

02 in app feature upcharing

03 in app feature upcharing

04 in app feature upcharing

05 in app feature upcharing

Using the iPhone for Long Exposure photography with LongExpo

I have covered a few Long Exposure photography solutions over the last couple years. The camera on the iPhone is quite capable but you have to have more power over the exposure length which is possible with apps like LongExpo. There is actually more to long exposure photography then just holding the shutter open longer. It depends on what the end result is needing to be… a streak of light behind cars zooming by, blur of moving objects like water over a waterfall and low light. Each of those can require a different set up and tuning to the environment around the photographer. Usually, this means a lot of adjustment behind naming from film photography counterparts.

LongExpo attempts to give the options needed for all of the different long exposure via plain english options. Then, add on specialized editing tools to get the final photo closer to what was hoped for when the shot was imagined.

01 LongExpo iPhone

Choosing a different different photo type as seen above allows for access to different tools via the shutter setting button. I like the ‘keep it simple’ both in the options and the text used to describe the feature settings.

02 LongExpo iPhone

03 LongExpo iPhone

After a photo is taken, general fine tuning is possible via a set of sliders. The camera icon returns you to the camera and deletes the photo just taken.

04 LongExpo iPhone

Images managed through LongExpo can be shared or saved at full resolution. I have found most editing apps like to downsize the output to help manage memory usage and the speed of the app. From the ‘Next’ button you can save to your iPhone photo library, create a project so you can edit that photo more later and access to the ‘Magic’ tool set.

5 LongExpo iPhone

“Magic Sharpener” isn’t just a sharpening tool. The area of LongExpo is where you will find the ability to fine tune the image. The tuning is for sharpening and blurring. Paint an area, then choose which your trying to do. Also, the strength of the adjustments. Notice the image in the upper left corner, via this you can choose a photo within the time lapse photography in case an individual photo is better than the mix of the many used to create the long exposure. LongExpo attempts to keep the process easy to start, then more enhanced for those photos needing that extra touch for maximum effect.

06 LongExpo iPhone

07 LongExpo iPhone

Maximizing the iPhone camera with PureShot without the clutter of 645 Pro

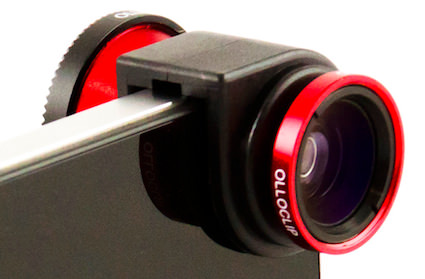
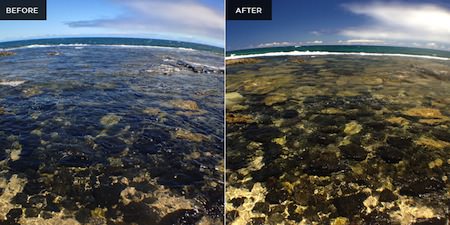
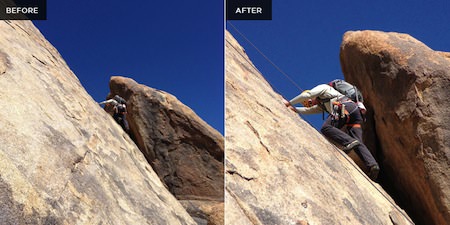
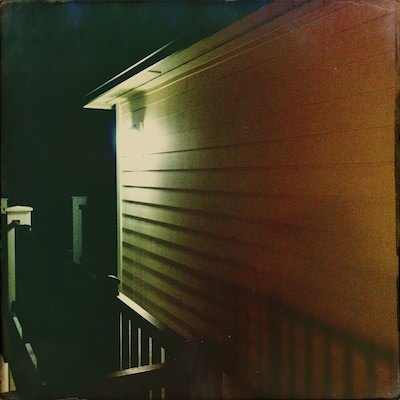
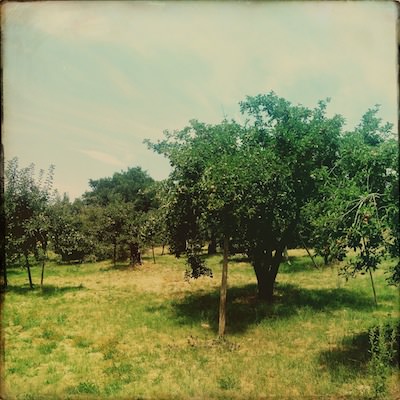
Getting the most out of taking pictures with the iPhone, that is pretty much what this blog is about. The maximum is up to the user’s opinion. Some folks want the iPhone camera to be more like something else. They miss their film camera, they want better ways of sharing, they like the retro days, they want what they get out of their high end digital camera… the list goes on. In this case, how does one get more robust photos through the iPhone’s camera, prior to any edits or special effects.

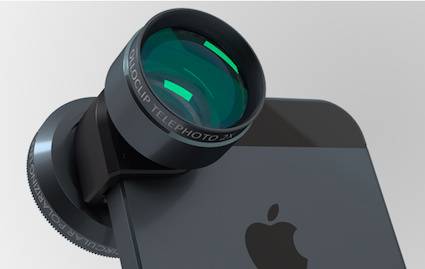
Most editing apps offer their own doorway to the camera so that editing avoids extra steps. In the case of the 645 Pro app, it is all about getting a better shot to work with somewhere else. I found myself liking the features but hating the interface. The app attempts to mimic my physical camera with images of buttons to use for adjusting and every little fact about the photo capture happening is over laid on the view finder. To help others in my situation, 645 Pro’s developers released PureShot.

At first, I didn’t look beyond the app description as I saw it as a new app doing less than their earlier app, yet charging full price. Why not just have the ability to go ‘lite’ with the current? Once I got past what appeared to be a way to get more money out of people who already bought… I plunked down my hard earned cash and dove into a day with PureShot.

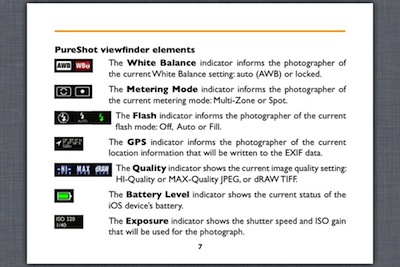
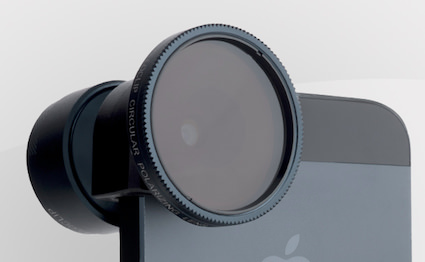
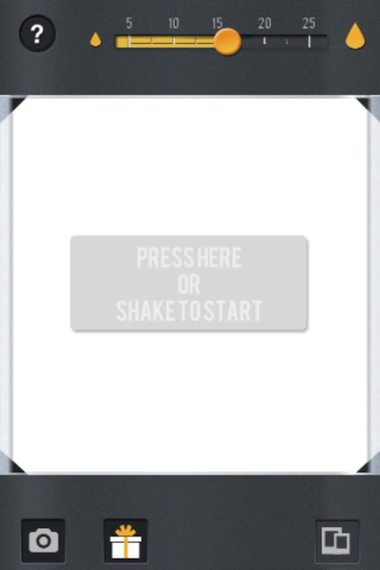
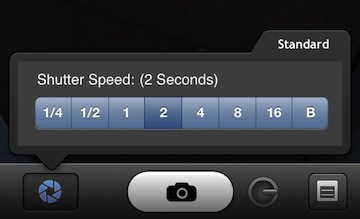
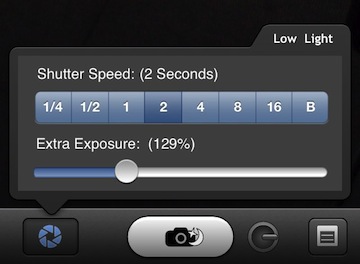
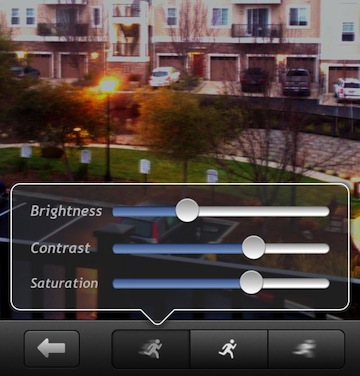
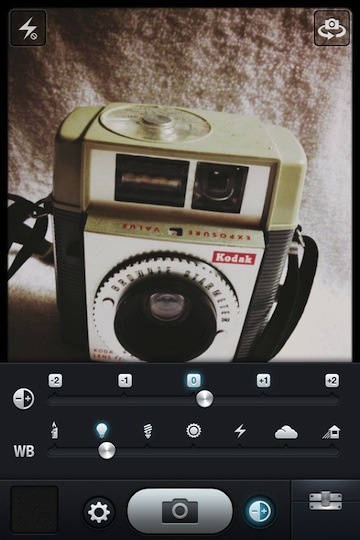
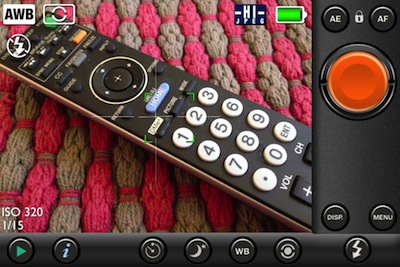
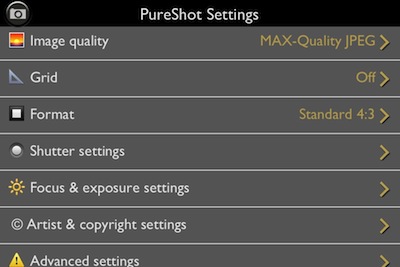
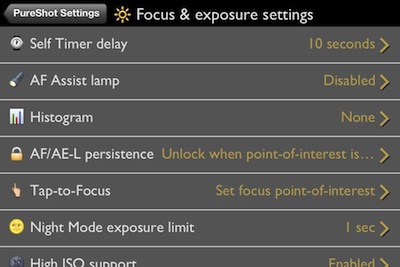
As promised, the view finder has far less clutter. Just the basics I need to get more from a photo being taken. Selecting and locking focus area has become standard for iPhone camera apps, good to see it’s on/off and use is quick and easy. As is the whole app, set up the preferences for shooting going forward, the app launches ready to start that shooting very quickly.

01 Pure Shot iPhone

PureShot offers many fine tuning features to get the most out of the actual photo taking experience. While the settings are easy to get to and quick to adjust, the power is more about getting things tuned the way you like and leaving alone. Like I mentioned, the view finder is cleaner and the app launches quickly so I spend my time getting the shot right rather than worrying about spinning dial. Making PureShot more like a built-in app than an add-on. Format setting 4:3 or 1:1 means framing on a street walk is shot for how it will be used later is one less thing to worry about.

02 Pure Shot iPhone

03 Pure Shot iPhone

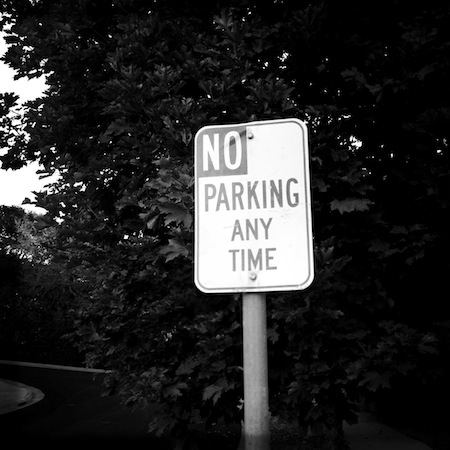
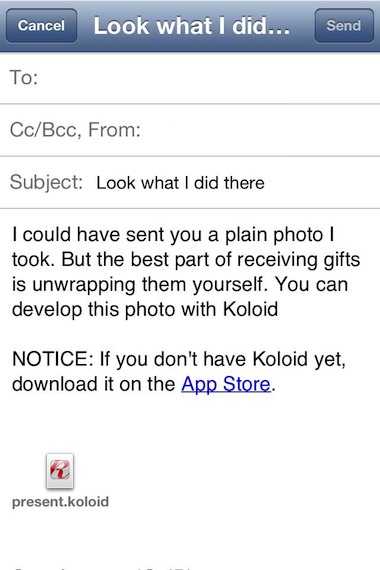
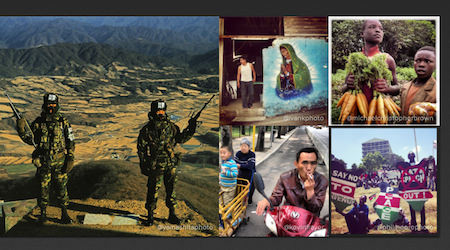
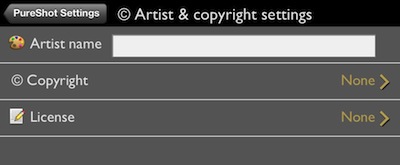
 The photo social sharing world get a bit excited when Instagram recently mentioned they may start using your uploaded photos in their ads without crediting your photography efforts. One solution has been for folks to start adding a Copyright to their photos. This isn’t just for Instagram uploads, imprinting your copyright on photos is an effective way of keeping your work yours no matter where you share.

04 Pure Shot iPhone

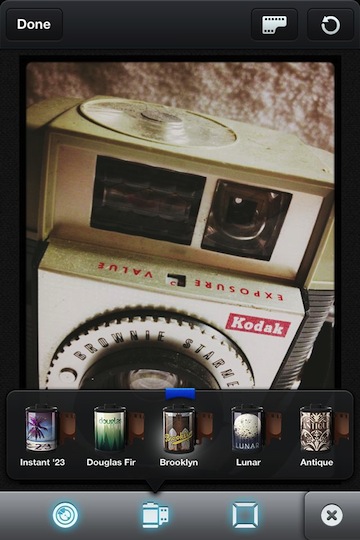
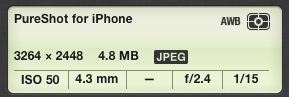
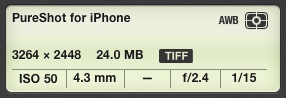
Within the settings area is access to one of the features that PureShot is and will be best known for. Multiple format options for the resulting images:

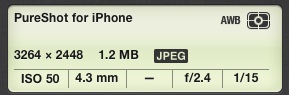
“HI_Quality JPEG, MAX-Quality JPEG or dRAW TIFF output – The term “developed RAW”—dRAW—is used to describe a TIFF image that has had no in-app post-processing applied and, critically, no JPEG compression at any stage.”

05 Pure Shot iPhone

06 Pure Shot iPhone

07 Pure Shot iPhone

Everything you need to know about the features, icons and settings is available via the built-in manual. PureShot makes it available through the ‘i’ button along the bottom of the view finder screen.

08 Pure Shot iPhone

KitCam on the iPhone enhances photography and photo editing in one app

Generally, there are two types of photography apps for the iPhone. There are Camera apps that alter the way photos are taken with the iPhone. Then, there are apps for enhancing images. The second of the two are more popular, tuning images for sharing on social sites with family and friends. Apps that alter how photos are taken from the beginning have a strong following amongst the retro and film camera fans.

The folks that created the PhotoForge2 editing app has now released KitCam. An app that has film and lens options for how a photo is taken to start with, then editing tool for enhancing more. Amongst the enhancements is even the ability to change the film and lens used when the photo was initial taken.

01 KitCam iPhone

Tap the KitCam lens to slide out the options. Swipe left/right to choose and see the impact of each. Some allow fine tuning their enhancement impacts beyond just applying.

02 KitCam iPhone

KitCam comes with a very nice selection of lenses, films and frames. If you want to go for an extra special effect, there are in-app purchasable groups of each. The built in options have kept me plenty busy, but I can imagine a few shots that would enjoy the upgraded bundle.

03 KitCam iPhone

Sliders for fine tuning contrast and white balance in real time.

04 KitCam iPhone

Popular photography camera are on the view finder screen through the settings icon. KitCam works with single photos and video too.

05 KitCam iPhone

Photos directly after taking or after enhancing, can be shared out in a wide variety of ways. KitCam provides for saving to popular Social Services, cloud storage or open in other apps that you may prefer using to more adjustments.

06 KitCam iPhone

Basic adjustments can be made to the photos like crop, ‘enhance’, and contrast/white balance.

07b KitCam iPhone

There are advanced ‘Pro’ photo editing options within KitCam. Even these tools are included without an extra charge.

08 KitCam iPhone

Choose the film icon in the upper right corner of the photo editing area to have access to the KitCam film/lens options that where available when first taking the photos. This feature works on imported photos that you have taken via the iPhone camera without KitCam.

09 KitCam iPhone

This is the photo as it was taken with the film/lens selections above.

10 KitCam iPhone

Where other apps that offer film/lens combinations to take the photo with initially then export the photo. KitCam lets you change your mind about the film/lens/frame later so nothing is ever stuck with a bad decision.

11 KitCam iPhone