Today I saw some chatter on the Internet about Fotor HDR. I’m a fan of well done HDR so I’m always game to see what a new HDR iPhone option has to offer. A bit of reading gave me an answer I didn’t want to see, the app uses two photos to merge. The HDR process outside of smartphones is done by bracketing three photos, not just two. With two photos being used, the impact of the final image is up to the creativity of the app developers.
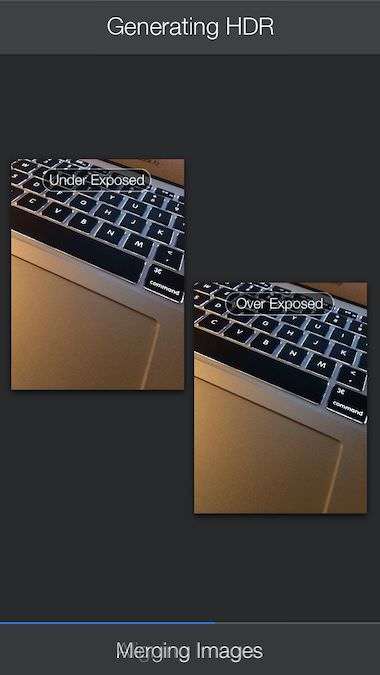
Fotor HDR starts with the option to have a grid overlay on the viewfinder to make sure photos taken individually are aligned. The app offers two shutter options. One takes photos, one after another and saved to the app’s photo folder, without stopping so nothing is missed. Or, a single shot mode that snaps two photos to merge into a single.
Take the time to visit the Settings area, there is a nice anti blur/anti ghosting switch which will help avoid the white ghost outline around objects when photos are merged by the app.
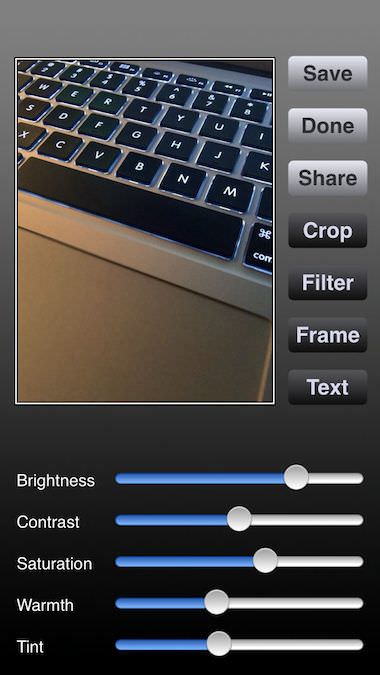
After the photos are merged, a finger swipe up/down reveals the areas of photo tuning built into Fotor HDR. Along the bottom of the screen is a row of full image filters.

Pro HDR does offer the ability to tap the screen to set the initial photo’s bright/contract spot. While Fotor HDR has a bullseye to slide around to set while Pro HDR doesn’t have an indicator of the spot chosen, just where you tap with your finger. Which can be tricky when the point being chosen is a small spot. After the photo is captures, a single page gives access to sliders to tune the overall image.
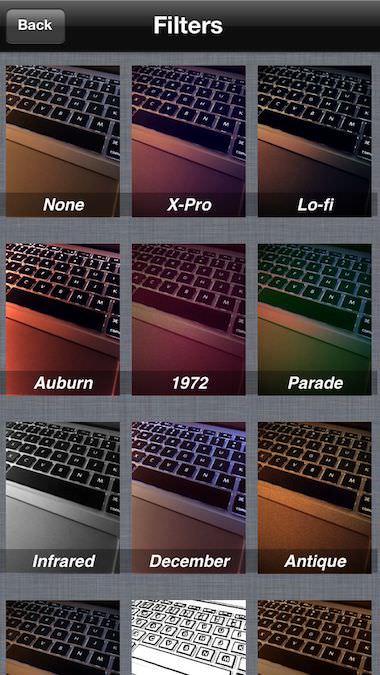
Filters are available in Pro HDR also, just a different user interface. Both solutions have a nice variety of creative named filters, neither really offer what a photographer would find as HDR adjustments on desktop photo solutions.
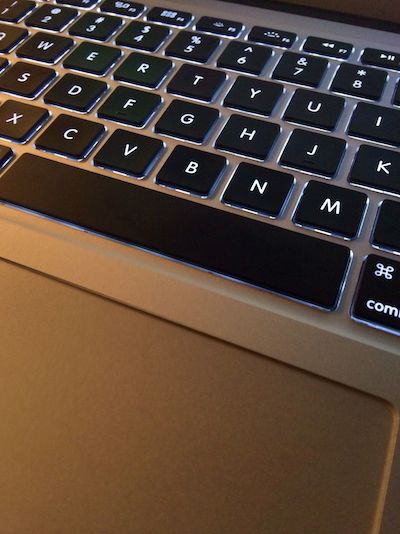
Here is the result of a snap taken with Foto HDR without any filters or tuning adjustments applied.

And… a shot done with Pro HDR, again without filters or tuning done. I attempted to get as close a shot as the previous. If one is taken higher than the other, the app will see the brightness of the notebook’s screen and cause the result to be different so not a apple vs apple.
I resized the two resulting photos above to fit on the page. Actual highest resolution out of the apps is:
Foto HDR 1916 x 2555
Pro HDR 2422 x 3232
Tag Archives: iPhone photo
Rando is updated with ratings, app is back on the iPhone
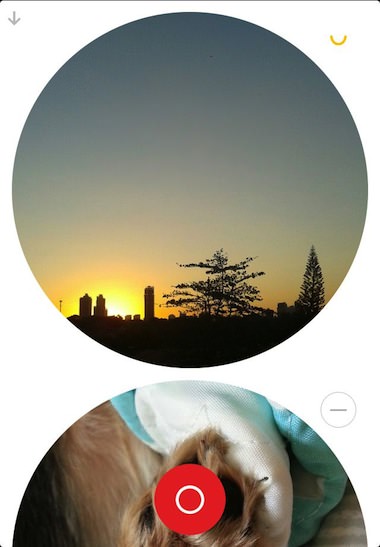
Remember Rando? It’s that free snapshot photography app that is about anonymous two way sharing.
You snap a shot with the app and send it. The Rando app delivers the photo to someone without anything more about you than a location (city level map) and in return gives you back an anonymous photo someone else took and shared (not the same person that received your snap). There is no importing, filters, enhancements, it’s all about the quick snap shot.
The Rando interface is simple. On the opening screen is images taken by others which can be scrolled through up/down. Swipe from right to left to see the images you took and shared. The shutter button is at the bottom (red circle) which takes the photo then gives the option to send or delete.

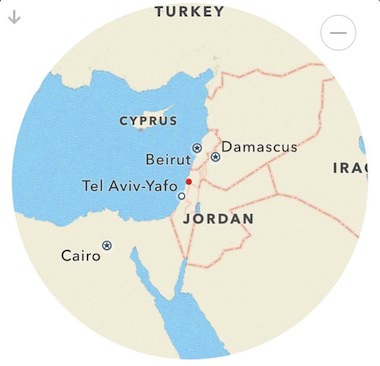
Tap an image to flip it over for a location – received images show where the photo was taken while tapping shots you took will show you where the photo was delivered to.
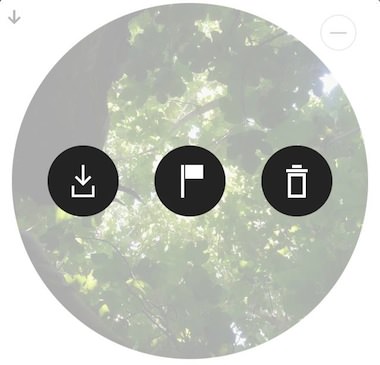
Double tap a Rando image you have received to Delete it, Flag it inappropriate or Download it to your iPhone’s photo library. The download option is an option I don’t like in the app, someone being able to save my snap shot shares puts a different angle on the shooting thoughts.
New in this update to Rando is a small circle with a line in it next to each photo. Tapping that will result in the image becoming a rating solution so people can now say they enjoyed or didn’t enjoy a photo back to the creator. On either side of the rating face is the close without saving edits ‘x’ and save check buttons.
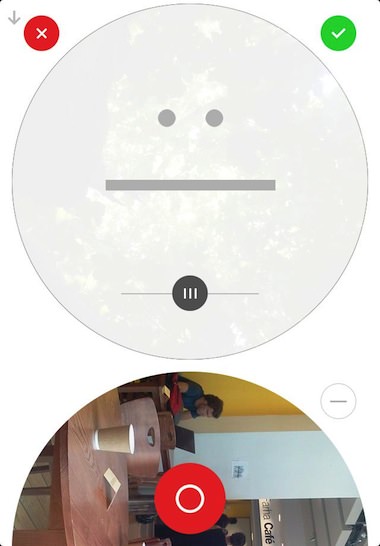
After you have rated a photo shared with you or someone has rated one of your photos, the small circle next to the image changes to what the rating is. Anything from a big happy smile to a very sad frown. Some folks may just hit the rating circle then the green check mark thinking they just gave a positive till they learn they have to adjust the face. It’s tricky to do an UX that is more than a Like or nothing solution. Now, I will know if someone likes my grapes shot or not. No idea who the person is, hope they are not allergic to grapes!
Buenos Aires Square Format Photos Like My Instant Film Camera Takes
When out at the Antique Malls, there is almost always someone offering little square photos. They are fun to browse through, handy if you don’t have any family history, build your own for a couple bucks.
Interesting that many of the small square photos are actually from early Polaroid cameras. Before the iconic SX-70 and the auto developing photos buzzing out the square photos on a large lower lip print, there was the two part instant film. The early Polaroid cameras opened with an expanding front lens, the exposed film was pulled out the back, waved around for a bit then the two parts where separated to show a small lipped square photo. Fujifilm is now offering film for these early cameras so an older 180 model pulls in $700+. If you want to see the different cameras and film options, take a look at the The Land List.
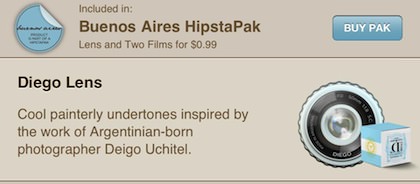
There are a few iPhone filter apps that make an attempt to match the real look of film photography. That is, film photography of yesteryear with 1940/50s or lomo cameras with simple lenses. Having a collection of those early cameras that actually work, it is fun at times to compare a filter to a shot I took with film. This week, Hipstamatic rolled out a new Buenos Aires film and lens pack.
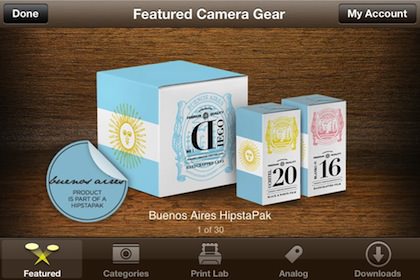
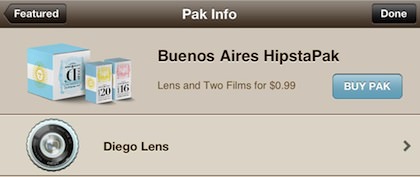
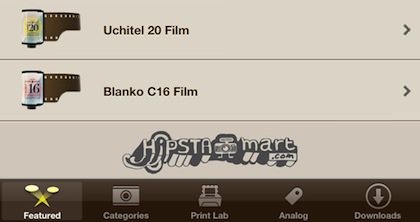
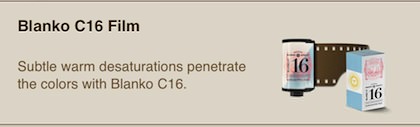
The HipstaPak is a single lens, Diego and two films, Uchitel 20 and Blanko C16.

As a reminder, Hipstamatic has you choose a lens, film and a flash (turn on/off) that you use to take a photo. Like early cameras and film, you can’t change that choice after you snap the photo. You tune the photo ‘later’. I have my selection of filter/enhancement apps I use, with Hipstamatic having it’s own place in my daily shooting… the fun of planning ahead instead of bulk snapping and tuning later.
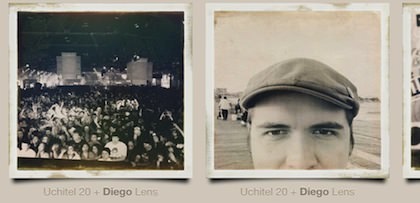
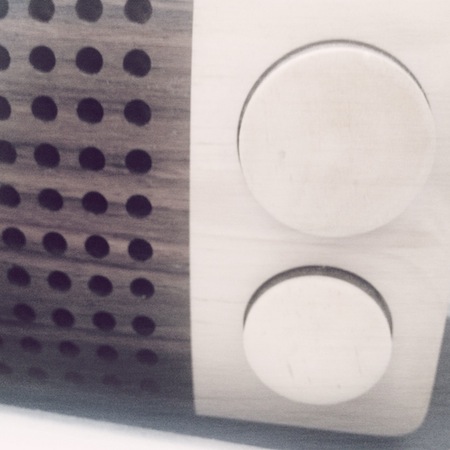
Here are a few shots of the lens/film options in the Buenos Aires Hipstapak, real world stuff:
Lens: Diego – Film: Uchitel 20
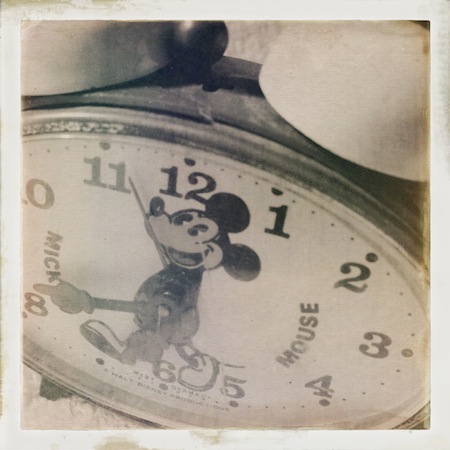
Lens: Diego – Film: Blanko C16

Lens: Diego – Film: Uchitel 20

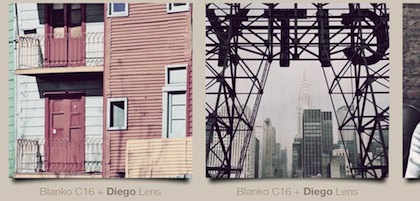
For something to compare, here is a shot using the Diego lens and the Sussex film
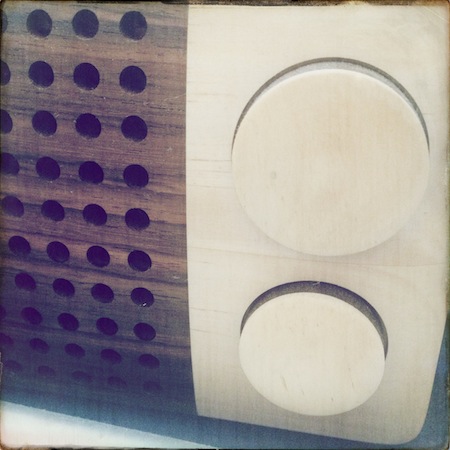
Lens: Diego – Film: Uchitel 20
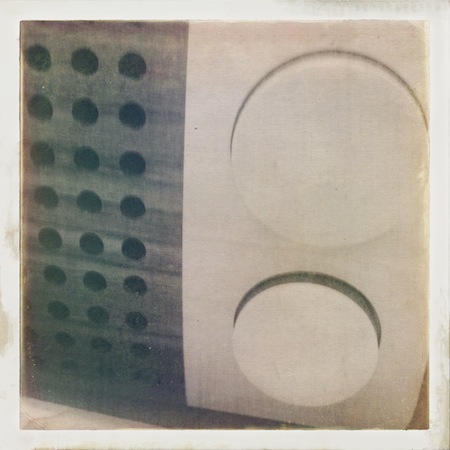
Lens: Diego – Film: Blanko C16
Instagram takes the limitations off of video
Both Instagram and Vine have attempted to keep vide posts fresh by keeping the videos to what is recorded through the Apps. People have gotten very creative with the timing of their videos by making stop-motion like movies. Normally, when we hear stop-motion, we think cartoon like animations. But, the process is being used to create videos with many breaks and short action, letting a viewer’s mind fill in the gaps. The limitations where also in place to keep out heavily produced commercial posts. Since people have gotten so creative, Instagram has removed this lock, allowing videos to be imported from the iPhone library as well as edited for size and length. Cut a long video down to the allowed 15 seconds and choose the center of the action to appear in the Instagram square format.
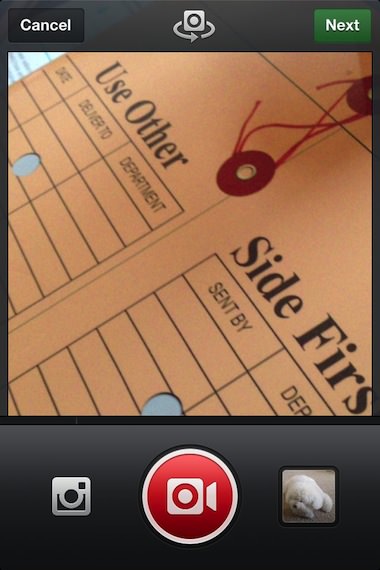
When you choose to take an image or record a video, you will notice a new image square to the right of the screen.
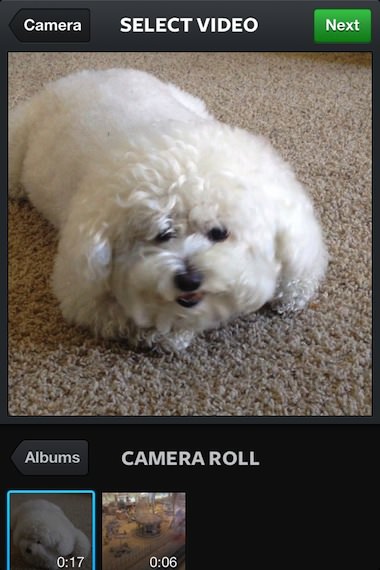
Instead of recording a new video, choose the image square to the right of the video control button. This will give you a view of the videos in your iPhone photo library. Notice the length of the video is shown. If you choose to use a video created outside of the Instagram app, you will be given the option to choose the area of square crop as well which part(s) of the video you wish to use.
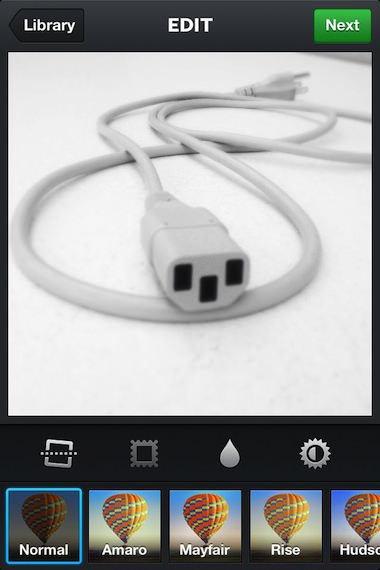
An additional feature in the Instagram update is the ability to straighten a photo. On the screen where you would normally add filters and frames, a new button has appeared to the far left. Just select the button to open the rotation feature.
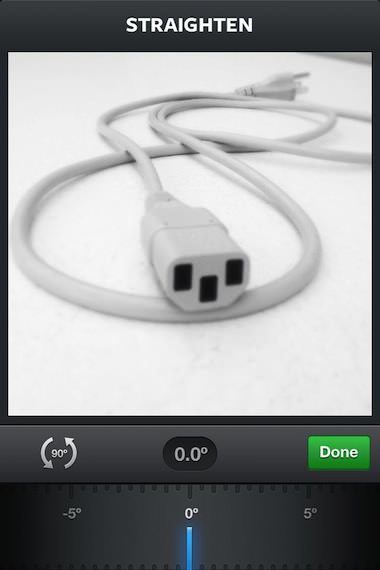
If you choose to straighten the image, you are presented with a number and adjustment dial/slider to make minor tweaks till the photo is turned as you like.
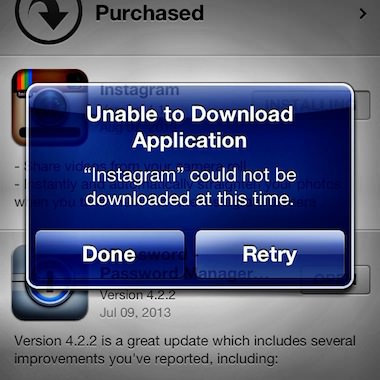
A bit of humor… right when I was attempting to download the update to Instagram through the iTune’s app, the download stalled and I received the below. Of course, I wondered what fun my friends where having with the updates while I waited for the iTunes issue to clear up.
Layering up your iPhone photos via Camera+ update
While there are powerful photo tuning apps available on the iPhone, talking with the tools folks around me us, they generally keep it simple. When time allows, a features of the advanced tools are great. I’m usually on the go so I hit the quick adjustment apps to bring out the message of the photo, share, and move on.
Camera+ is one of those quick go-to apps to do a few touchups without having to take a lot of time. It has a handful of full image filters and enhancements with a pre-view available to speed up choosing a path forward. While there are a few workflow adjustments I would like to make the app more efficient, it does what it promises very nicely.
This week, an update to Camera+ was introduced. There is a large enhancement to image processing flow via the addition of Enhancement Layering as well a few for-pay additions in filters and frames.
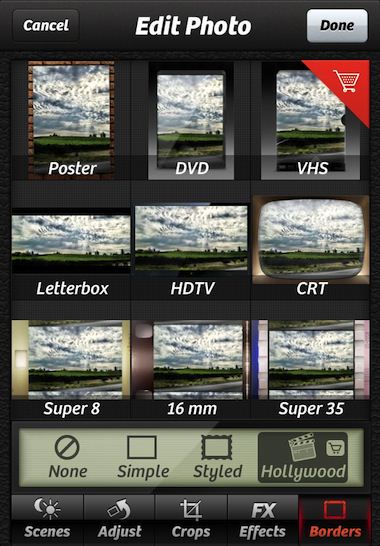
The ‘for-pay’ updates are wrapped in a new option called Hollywood. The package includes new Enhancement Filters and Frames to add the look and feel of yesteryear movies.

In the more robust photo editing apps, there is the option to layer effects over each other. With Camera+, until now, layering meant saving a photo with it’s enhancements, then re-importing to add another. Layers is now built into Camera+’s workflow. Allowing multiple effects to be added and adjusted quickly and easily. Well, easily when you understand where the feature is. After handing my iPhone off to several people to have them try the new feature and their stumbling around a bit, I thought I should cover the feature with a quick ‘how to’.
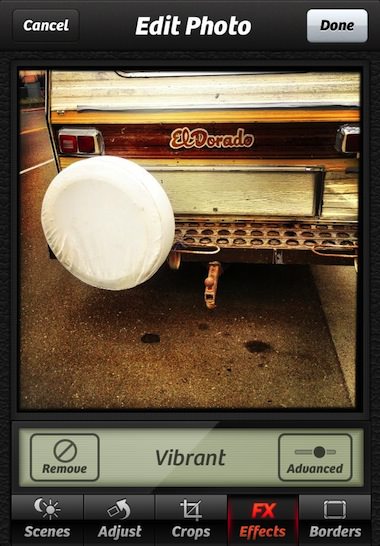
Like the earlier versions of Camera+, you can preview a thumbnail of any filter effect on the photo your working on (either taken with the app or imported from your iPhone photo library). Selecting a filter opens your photo in a larger view to see more detail. From this view, you can choose another option along the bottom of the screen to add ‘Scenes’ tuning, rotating, cropping and borders… or select Cancel to go back to no edits on the photo or Done to go to Save/Share screen.
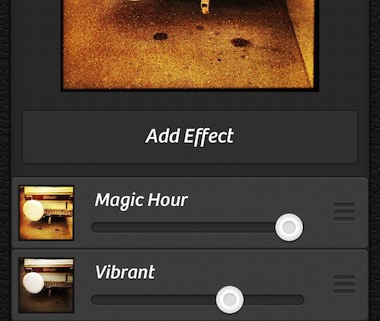
After adding an Camera+ enhancement Effect, choose the ‘Advanced’ button in the lower right corner. Along with the slider to adjust the percent of the filter being added is a new button “Add Effect”. Tap this button to be taken back to the Effects selector to choose another ‘layer’ of filter to be included with one already chosen. Buttons along the top are to through away the changes being made on the left and ‘save’ check on the right.
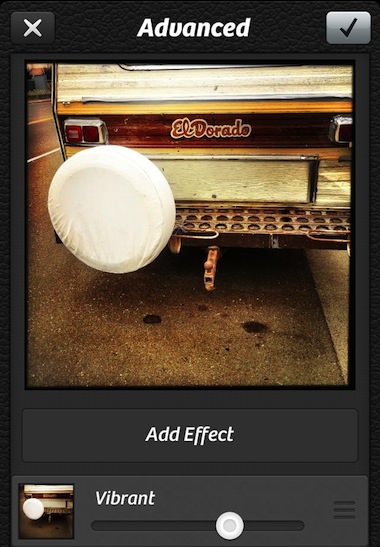
Each effect chosen to be used, stacks on the previous one in the list. The tuning adjustment bar is for each effect individually, changing the photo in real time.
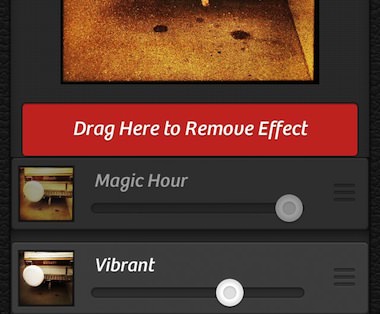
Oops, that additional enhancement isn’t getting what you want? No worries, if you use the right grabber and drag the filter up to the Add Effect button, the button changes to “Drag Here to Remove Effect”, just drop it there and the filter effect is removed. I found that after I used the new Camera+ layers and the adjusters on each filter, I may want to go back and rethink some of my earlier edits. Layering is now part of the workflow since Camera+ makes it easy and quick.
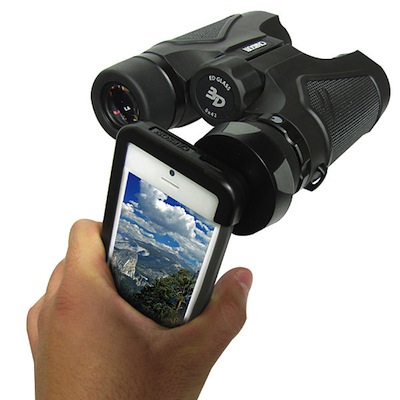
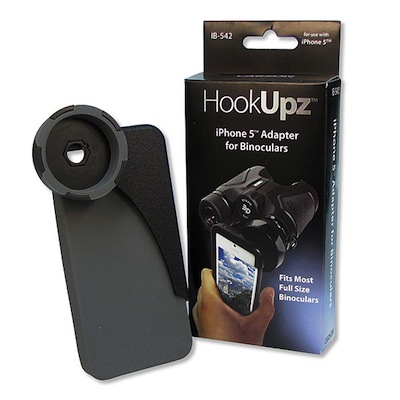
Using Binoculars As A Telephoto Lens For Your iPhone 5
Here is an interesting find I came across over on ThinkGeek’s Web site. No need to carry a special telephoto lens set up for your iPhone to get closer to those far away shots. A particularly handy option if you are vacationing and already carrying binoculars. The description says Included is an adapter for iPhone 4, 4S and 5… which I doubt. The thickness difference between the 4 and 5 bodies has meant that sleeves work on one of the other. Either they have gotten creative with their adapter, or the title is correct that this is for the iPhone 5, while the text was from an earlier product.
Either way, the idea is a great way to avoid having to haul a lot of extra equipment and still get photos in a wide variety of situations.
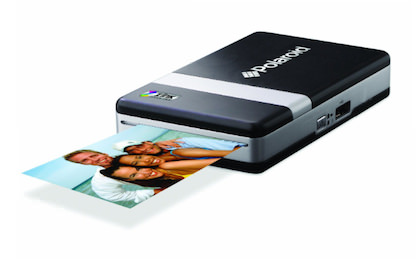
LG Introduces An iPhone Bluetooth Version Of The Polaroid ZINK Pocket Printer
I outlined the fun I’m having with the Canon wireless printer earlier (Canon SELPHY CP900 Wireless Printer and an iPhone is my modern Polaroid). While the printer is small and has an optional battery pack, it isn’t ‘pocket’ size. Polaroid introduced ink free printing with their ZINK paper. I played with it on my Polaroid Z2300 Camera/Printer… a boxy camera that has the option to print any photos you choose directly on paper cards inside of the camera. Polaroid also has a line of printers using the same technology, the CZA (often called the Pogo at local stores like BestBuy). Bad news for iOS device users is that the printer only supports Android devices.
In a magazine out of the UK, I noticed that LG said they were producing a line of ZINK based Pocket Printers. When I looked around, I found on Amazon two models available, the PD221 and PD233. Both of these printers claim they are for Android only, like the Polaroid manufactured version.
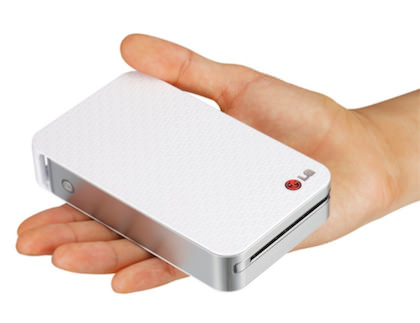
Visiting LG’s site, I found that LG is showing the PD233 now works with iOS devices via their free universal app! It would appear we can now send photos from our iPhones (and iPads) to the LG PD233 for printing via Bluetooth.
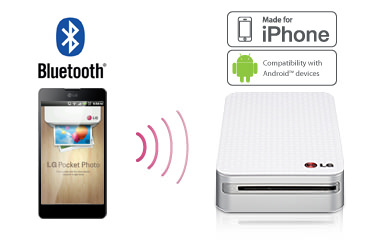
The iOS app does allow for some editing, stamps, sharing on Social sites, and adding QR codes. Uh, QR codes? Yup, use the app to upload a photo to Facebook, then print that photo with your LG Pocket Printer to include a QR code for people to jump from the Printed version to the online version.
A few facts from the LG Product page:
- Bluetooth – Yes
- Micro USB – Yes
- USB Host – Yes
- NFC Tag – Yes
- Resolution – 640 x 1224 pixels
- Print speed – 40sec/ Per paper
- Battery type – Li-Polymer(7.4V , 500mA)
- Charge time – 1 and 30 hour
- Print number – 20sheet (After fully charge, connect BT) 15sheet (After fully charge, connect USB)
- Printer size (W x H x D) – 72.4 x 120.9 x 24.0 mm
Androids have the ability to send to the printer via a tap using NFC, I wonder if iOS7 might get an upgrade to include the PD233 in their options to ‘send to’.
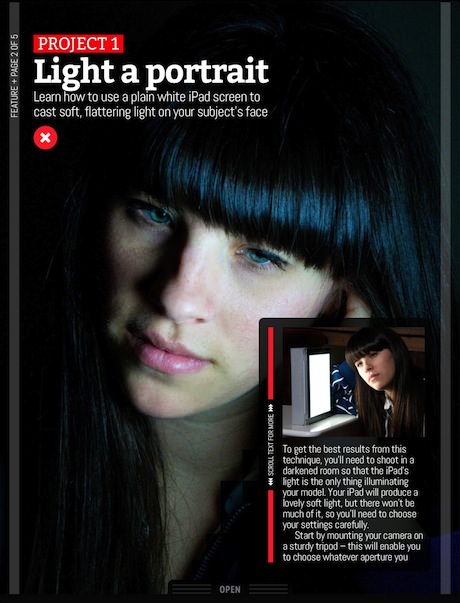
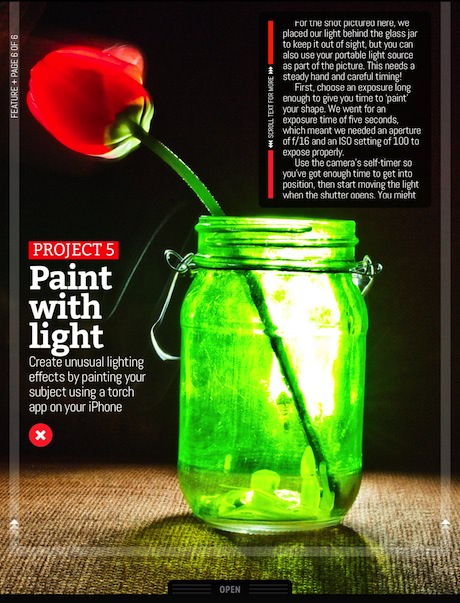
Photography Week, this week is the iPhone Photographer issue
There is a lot of chatter on the Internet from Pro Photographers explaining how an iPhone camera can never replace a high end DSLR in a Professional’s hands. I don’t try to put them all into one group. Even a smartphone camera in the right hands will result in photos ‘better’ than those produced by someone without the experience.
Rather than choose a side, why not explore the options to get the most out of a iPhone camera. There are going to be a lot of times opportunity presents it’s self and the full digital camera is sitting back on the kitchen table. Photography Week, a Universal app digital photography magazine is offering suggestions on getting more out of that iPhone camera that is always available in your pocket.
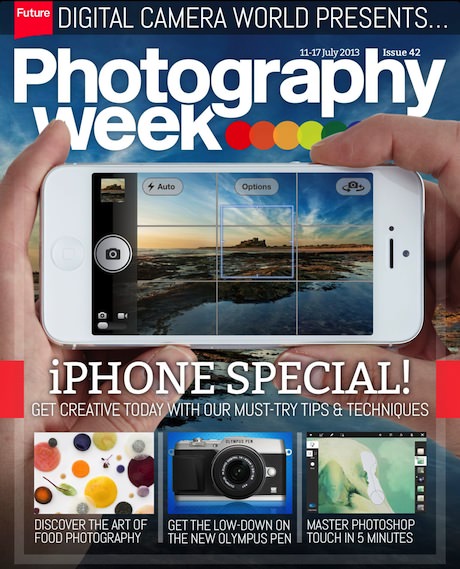
This week’s issue is an ‘iPhone Special’. There is a few apps covered, the usual group you have seen elsewhere (no new surprises), I enjoyed the articles they included on doing more with the iPhone than just photo adjustments. Lighting, angles, views, coloring and other interesting perspectives are covered.
EyeEm Social Share Updates With More Tags, Captions and Friends
EyeEm iPhone photo sharing service is up to their old tricks… adding more features and helping it’s users find others to view and share with. Kidding aside, the updates to the latest version of EyeEm isn’t about enhancing the actual photos. Instead, the service is looking for more ways people can relate through their photos. The service is one I enjoy visiting to see photos from around the world. Posts are all across the scale with street photography from a small village somewhere few of us have heard of, through to high school lunch snaps. The latest updates will help me find just what I’m interested in viewing, no matter my mood swings between visits.
After you snap a photo with the EyeEm app or import one from your iPhone’s photo library, enhance with the editing tools. Next, you can add your location with the name of the company location your at or city your in. New in this update is a step to add a caption to the photo and tagging friends to the photo.
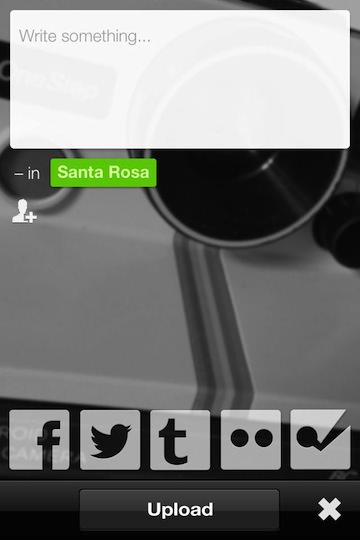
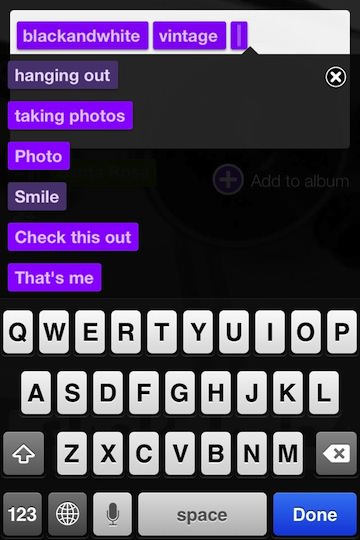
The original EyeEm had you set your location then add a tag. I noticed that some folks seem to have more than one tag. The trick to add more than one tag had been to post the photo, then ‘edit’ it, adding more tags. Now, by default, EyeEm lets you add up to four tags along with your caption. Just tap the ‘add’ and start typing, a list of tags others have used will appear to choose. Or, add your own so others can start posting to that tag too.
Postagram Update With More Text, More Photos and Free Postcards
What to do with all of your square format iPhone photos. Print and post mail to friends is one option, except post cards are generally not square. Postagram has been offering to print and mail iPhone photo postcards for some time now. Their way of handling the square photos is to print is on one half of the card, with cuts so the receiving party can pop the image out and use just it without the extra postcard size. I have used the solution a few times, generally more for Business Thank-You, but family members get a nice surprise from time-to-time too.
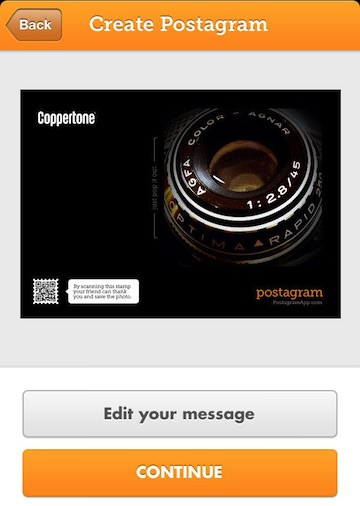
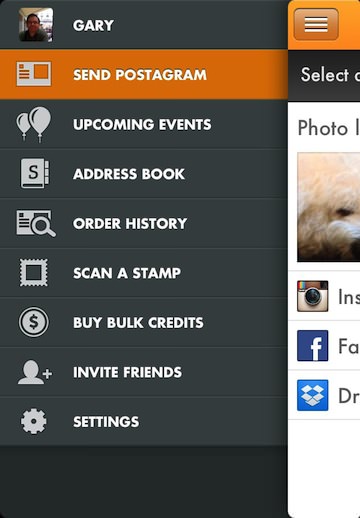
The recent update to Postagram has feature enhancements throughout the app. If you tie the free iPhone app to your Facebook account, you can be reminded of birthdays in advance to get a card sent. Also, along with being able to use photos you have on your iPhone, from Instagram and Facebook, you can now also access photos stored on your Dropbox account.
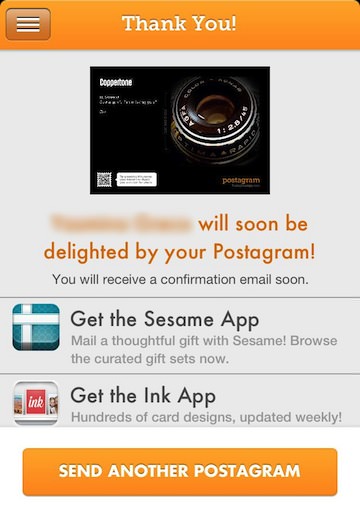
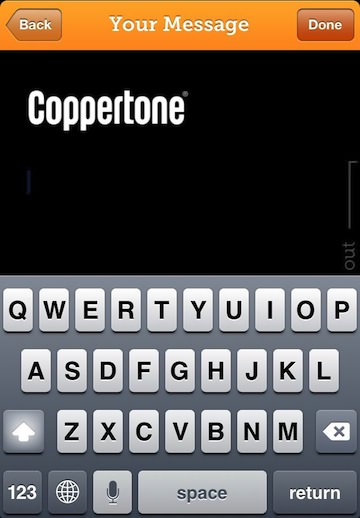
Normally, I pay 99 cents for the card to be printed and mailed to a US address (addresses outside of the USA are $1.99), but this summer Postagram is offering everyone 3 free postcards! As you can see, there is the addition of the large text Coppertone just above the area you enter your personalized text so it appears to be a sponsored ‘freebie’. The text area has increased in this update too, which is nice as the rest of the world keeps cutting us back to less text, shorter videos and smaller images. Thanks Postagram!
Postagram is actually part of the Sincerely family of iPhone photo solution apps. On your order confirmation page, there are options to download their other apps to created gifts or greeting cards on your iPhone using your own photos. Card print/sending can be scheduled now too so you don’t have to wait to the last second to remember to send a card. Mom will thank you!