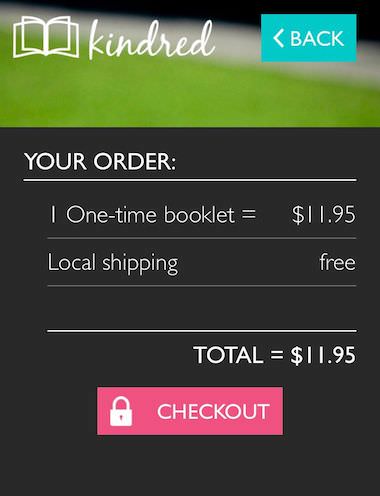
The list of companies offering to print photos taken with the iPhone continues to grow. Many have different offerings to set them apart from the others. Cards, iPhone cases, TShirts, mugs, photo books, magnets and postcards. The latest, from Kindred, is a print and mail service for a booklet of a dozen photos. The images are full bleed to the edge and each can have a bit of text added over the top of them.
Kindred’s free app lets you choose photos from any of your iPhone’s photo libraries, your social sites… or you can have the app auto choose photos that you have taken over the last week. After photos are chosen, a larger view is presented to assign a cover, sort, delete and add more.
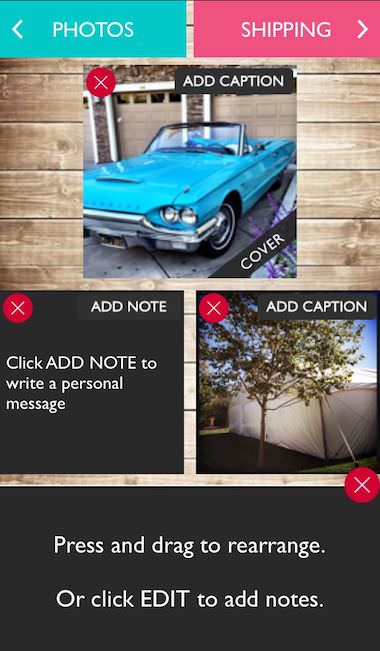
Kindred offers the page inside the front cover for extended text. From this thumbnails view, just drag/drop to adjust the order the images will appear in the booklet. No actual photo editing is available.
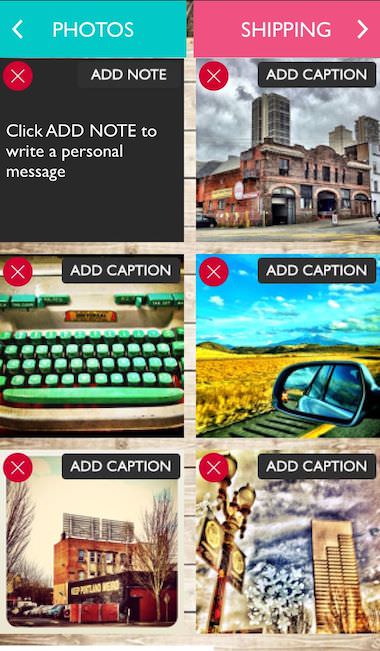
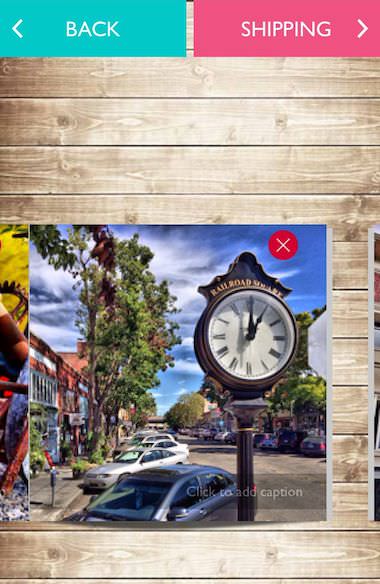
There is also a view options to see individual photos and how the photos will flow next to each other when printed. Deleting and adding text per photo is offered in this view.
When the photos are arranged as you like, enter an address to send the booklet to. Kindred would like you to subscribe to a monthly (free month if you sign up for the subscription service) photo booklet. If you don’t think you will have a couple minutes to put the booklet together each month, don’t forget the ‘auto’ create feature. The monthly booklet is $5, plus the monthly $4.95 subscription.

If you would rather not jump right in with a Kindred subscription, single booklets can be created, printed and mailed for $11.95 each. When you checkout, the app offers to let you take a picture of your credit card to remove the need to enter the info. If you do it, you still have to enter the expiration date and card’s code, so it is only saving the time to type in the card number.
Vintage Polaroid Cameras And Film In The Days Of The iPhone
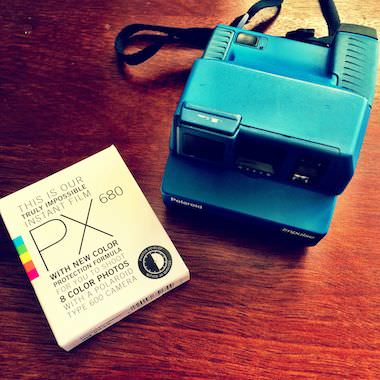
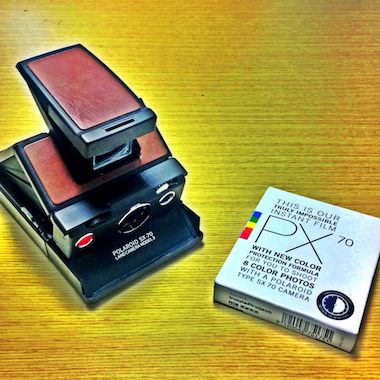
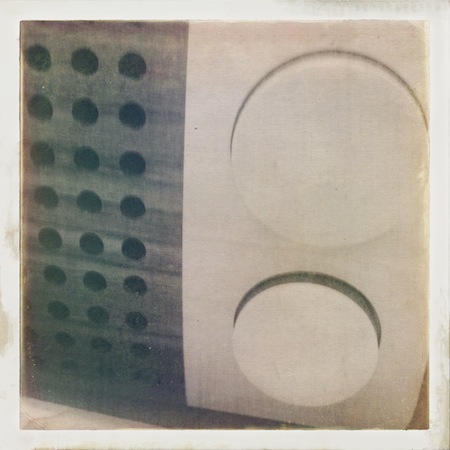
I am a collector of vintage cameras. No particular year or style, the cameras in my collection are only limited by my interest in the particular tech. When it is possible to locate film that will work, I actually take some out of the collection to shoot with. The fun of film is the planning and non-instant-gratification. For those times that I want to mix vintage with a instant view of my shots, I break out one of my Polaroids. Initially, this meant using expired film, then Impossible Project started producing Polaroid style film, but it had exposure issues (well, I had problems, others where happier). Recently, Impossible Project has added a coating to their film making the final results much better.
A few of my shooters –
Results vary, but when Luna will sit still long enough, she loves when the camera comes out –
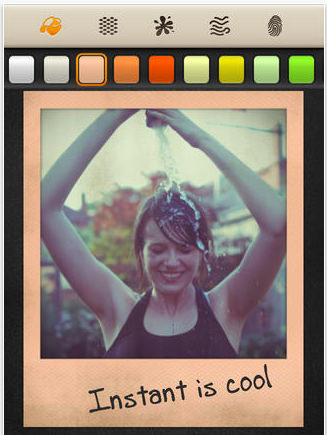
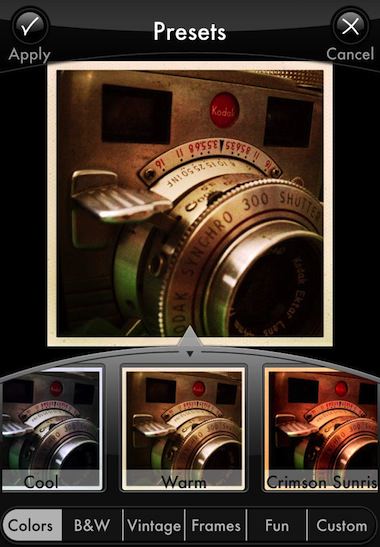
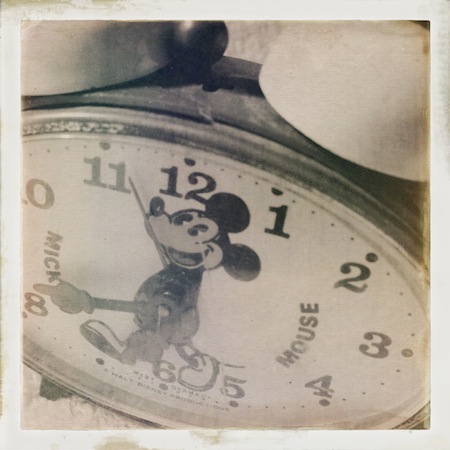
 Of course, there is an app for that too. Not just one Instant Polaroid effect iPhone app, but many many… many. Most are just ‘frames’ apps to wrap a photo in a Polaroid trademarked paper frame. Instant – The Polaroid Instant Camera is an app that I tend to play with when I want to add the realistic vintage effect when shooting with my iPhone.
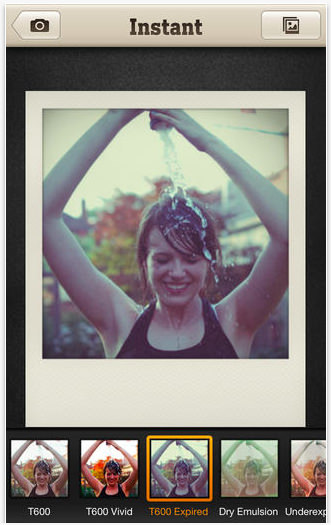
Along with the exposure/film type, Instant lets you add all of the particulars that make the photo deliver the message your looking for. Color the frame ‘paper’, and add wear via blotches, wrinkles and even finger prints. Then a bit of handwriting text for a final touch.
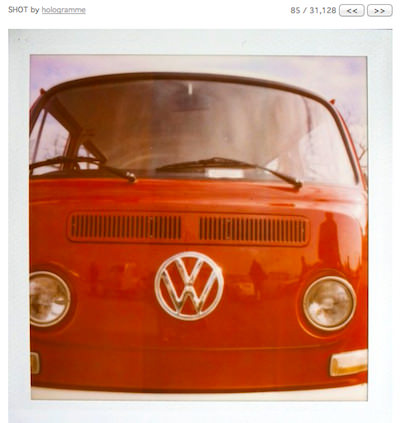
If the fun of vintage film photography is something you enjoy, narrowed down to Polaroid particularly, you may enjoy Polanoid.net . A site that has Polaroid camera users all over the world submitting their snapshots for you to enjoy.
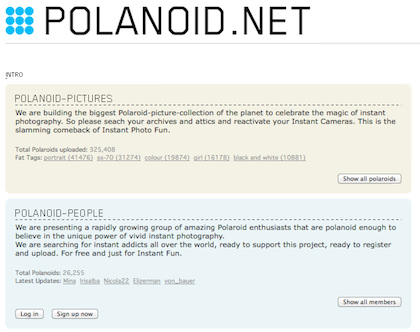
The Polanoid.net site has what seems like an endless list of Polaroid film captures. The images are grouped by camera type as well as photographer. Fun to see new and old photos and the creative work people do with instant photography.
Long Island HipstaPak No Longer Free, But Adds A Lens To The Film Bundle
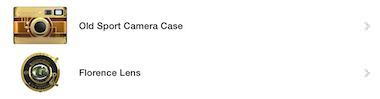
Towards the end of August this year, I mentioned stumbling upon a Free Pak available in the Hipstamatic iPhone Camera app. The ‘free’ Long Island HipstaPak offered a camera body (art) and BlacKeys Extra Fine Film (black and white). Now, the Long Island Pak has been re-introduced for 99 cents, with the addition of Florence Lens.

As I mentioned above, the Long Island HipstaPak still has the BlacKeys Extra Fine film and Old Sport Camera Case, with the addition of the Florence lens (Hipstamatic doesn’t go into what effect the lens creates, but basically it’s a 99 cent lens if you already have the earlier Free Long Island HipstaPak).

Pictures provided by Hipstamatic taken with the Long Island Pak.
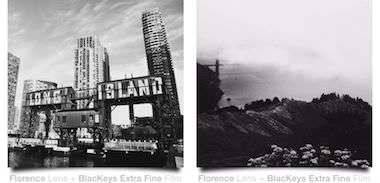
As promised when there is a lens, filter or film released that I mention, here are a few photos taken with the Long Island HipstaPak. For reference, here is the earlier post on the original (lensless) Long Island Pak.


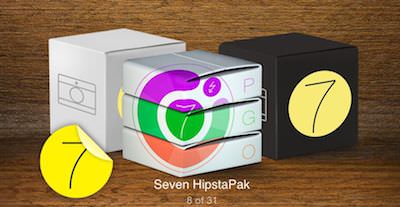
Hey… did anyone every get the iOS7 Pak for free from Hipstamatic? Right after iOS7 was released, the Hipstamatic app showed a color gel and a couple flat design cases as free. I never saw how to download then and now the Pak is 99 cents.
Leica Photo Magazine Comes To The iPhone
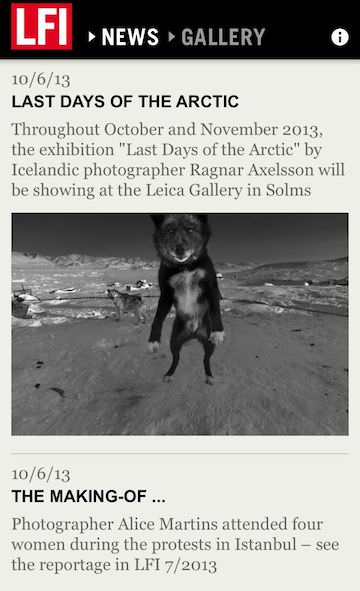
We all know of the Leica cameras. As well, the photographers and the photos they produce with those Leica cameras. Introducing, the Leica LFI Photografie International. A free ‘magazine’ app for the iPhone and iPad.
The app kicks off with dated News articles that are scrollable to view more.
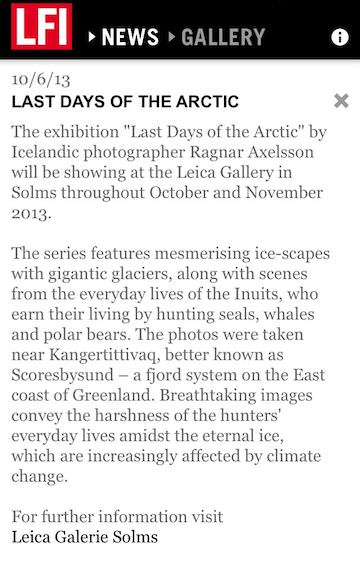
Tap on a News short or image to see a more of the article. This view is more, but I found that it isn’t ‘all’ of the article. Each article has a link to the online version of the full content. The content within the Leica fotografie app includes news, reviews, how-to and photographer’s experiences.
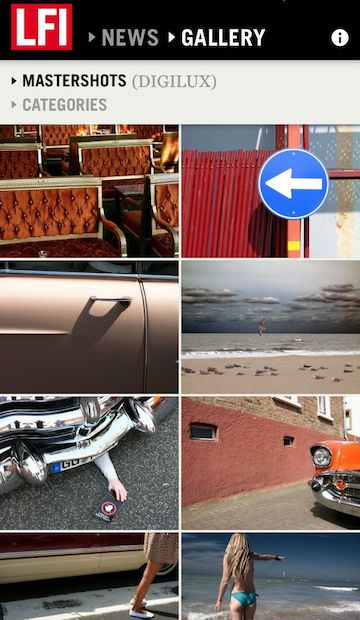
What Leica app would be complete if it didn’t include photos too? Just tap the Gallery text at the top of the page to view a scrolling thumbnail view of submitted photographs. A nice touch to get a fresh perspective on photography opportunities.
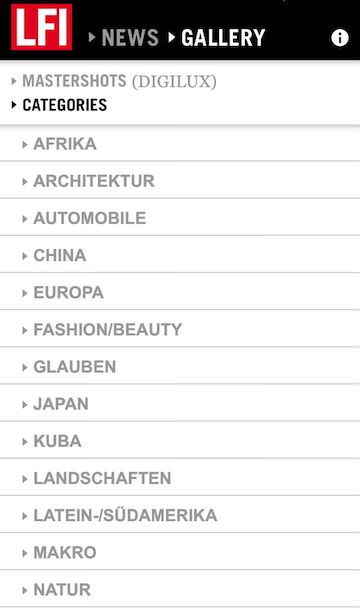
Images can be viewed broken down by categories too if there is a particular point of interest.
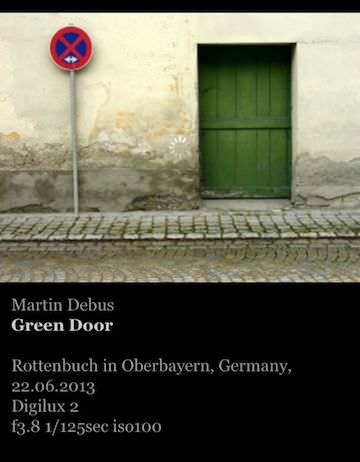
Tap an image to drill down a larger view. The Leica LFI ‘magazine’ also has more details on camera settings for each image. Talent is up to the photographer to bring.
Photogene Updated To Version 4, Includes Pro Features At No Extra Charge
Photogene is one of those iPhone photo editing apps that I use a bunch, back shelf for a while then ‘rediscover’ it again. Once again using it a lot as a single app that give the ability to do all the work in one app without silly clutter. Along with the update to the feature set in the new version 4, the app has also gone Universal so you can install it on your iPad for a larger view of your edits. The iPad interface is completely different, I’m only showing the iPhone version here.
Included in the version 4 update:
- Photogene is now a universal app for both iPad and iPhone.
- iOS 7 compatibility.
- New look for iPad user interface. New icon.
- The PRO package is now free! Everyone has been upgraded to PRO.
- Enhanced RAW support. RAW files are now opened in full resolution.
- Flickr export: can now choose a set.
- New feature for exporting XMP sidecars.
Now, onto actually enjoying the power of the app – After importing a photo, Photogene 4 has a quick access tool pop up wheel to get right in and editing.

First off, there is a nice group of pre-built overall picture filters. These can be applied in layers when in a rush…
Fun overall filters that are quick and tunable. The real power of Photogene 4 though is the specific photo area tuning tools. Notice that at this level, there is also a row of fuzzy undo/redo/restore buttons along the very bottom of the screen for those times you want to throw a bunch of changes out and rethink the image.

Each effect can be chosen to be applied to a very specific area of the photo. Photogene lets you save/undo/cancel and move onto the next effect. So, you can brighten an area, darken another part of the photos, blur a bit, burn some light… and so on. It’s easy to move from one alteration to the next so doing simple to more detailed edits is pretty quick. When using a tool, don’t miss the ‘Options’ button in the upper area for more adjustments available for that effect.
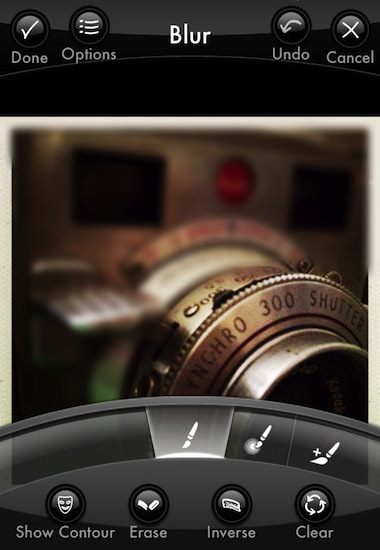
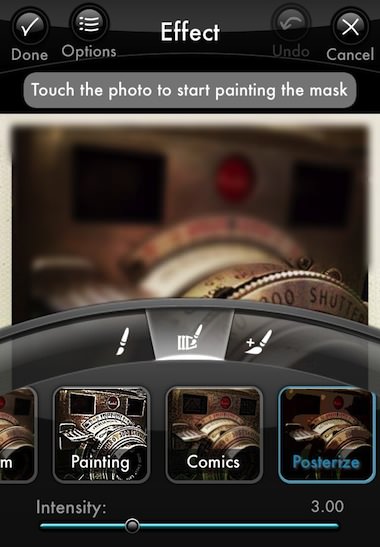
Each of the effects have additional options from the dial. Usually, these start with the basic brush head used to apply the change. Choosing other tools will result in a different sub group of effects within the top level group. Notice the slider along the bottom, Photogene 4 is not an all-or-nothing filter app.
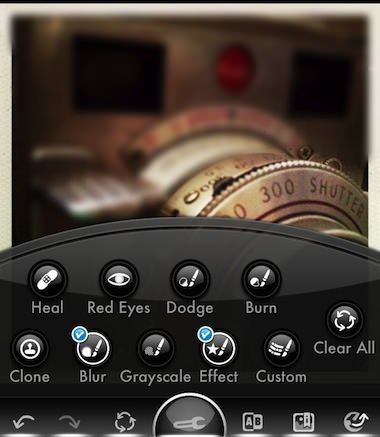
Every time you save adjustment, it is layered on top of the previous work. Returning to the work picker, notice that the features used have a check mark next to them. If you develop a workflow, this is handy to see where you are in the process and to assure all steps got covered.
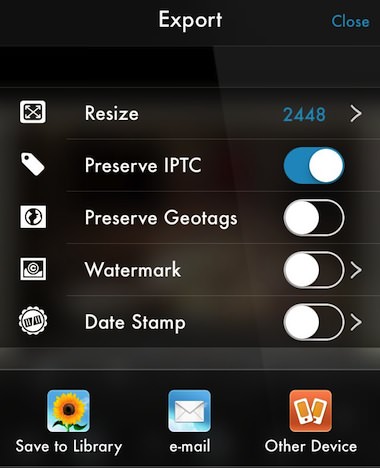
When the image is as you like visually, Photogene offers the ability to adjust pixels to best fit the way you will be using the photo. As well, you can review the photo tags, then share through a large variety of options. Speaking of all-in-one without clutter, notice that you can water mark the photo without having to go to another app also… high on my list since I found a recent photo of mine on over 85 sites with no credit.
iPhone Photographers Print Without The Need Of A Computer
After a photograph is captured with the iPhone, there are many ways to share the image with others via social share or cloud storage. While, it’s a very digital world now for photos, there is still a need to be able to print the photos too. Most people will sync their iPhone photo library to a computers which can then print, but that can be a limited line of thinking when the iPhone allows so much mobility.
I have covered a couple printers in the past that I have and use regularly. Along with physical mobile printing options, there are also online printing services available to use with the need of a computer. Everyone knows to think through both price and portability of the printing solution. First on my list though is the resulting image print. What the prints will be used for will impact the final choice.
Jumping right to the point, here is a snapshot of a few of the printing outputs available for the iPhone –

A: The wireless CP900 from Canon. The prints are the size of a postcard, with the option to print full bleed or with a boarder. The paper is either Canon Branded back or with a mailing postcard marking (text area, address area and stamp box). Printing involves the paper automatically passing through the printer 4 times to layer the colors and protective surface on.
B and B: Two examples of printing through the LG PD233. It is the most portable printer being barely larger than the iPhone, using bluetooth, and the ZINK active paper. Kids love being able to have a little print right away from something that fits in a pocket (takes about a minute). QR barcode can automatically be added if the image is also uploaded to a social share service.
C: Just for reference, a real Polaroid print from a OneTouch Land Camera.
D: Printic service printed. The service charges less than a dollar per print uploaded from the iPhone, the service prints and mails in a nice envelope. Text can be added to the photo via the app too. The quality is very nice, but it isn’t instant gratification.
E: StickyGram is an online printing service. This is an example of their Instagram magnets (9 different per sheet). It can be accessed via the iPhone browser. The magnets are only one of the many printings that are offered using a person’s Instagram photos.
F: Another ‘for example’, this is an print from the current Polaroid camera, like the Canon uses Zink paper.
G: Not shown, Prinstagram has an iPhone app (called Print Studio) to select the print size and format (small/large cards and small/large photo books) and photos. They offer as many print sizes and formats as there is examples above. Again, not for instant gratification but provides a nice quality product.
Rando is updated with ratings, app is back on the iPhone
Remember Rando? It’s that free snapshot photography app that is about anonymous two way sharing.
You snap a shot with the app and send it. The Rando app delivers the photo to someone without anything more about you than a location (city level map) and in return gives you back an anonymous photo someone else took and shared (not the same person that received your snap). There is no importing, filters, enhancements, it’s all about the quick snap shot.
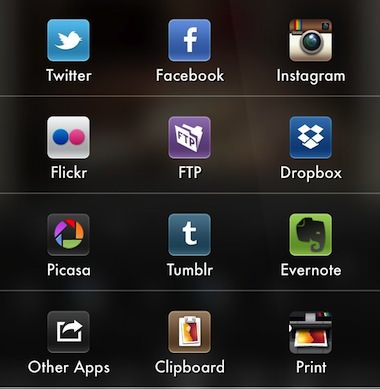
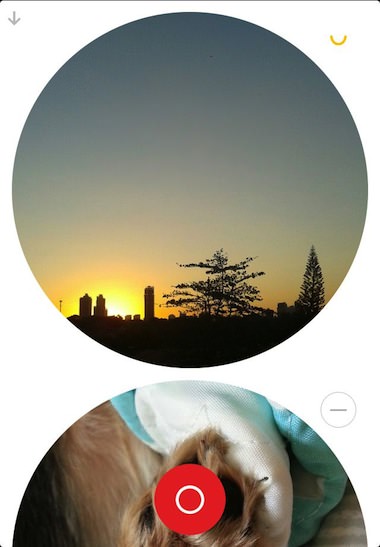
The Rando interface is simple. On the opening screen is images taken by others which can be scrolled through up/down. Swipe from right to left to see the images you took and shared. The shutter button is at the bottom (red circle) which takes the photo then gives the option to send or delete.

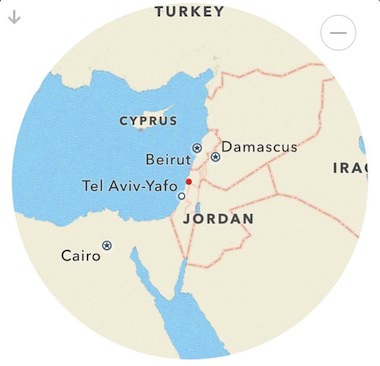
Tap an image to flip it over for a location – received images show where the photo was taken while tapping shots you took will show you where the photo was delivered to.
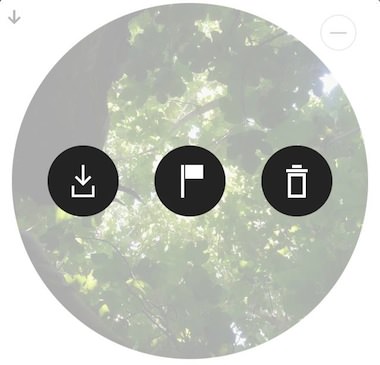
Double tap a Rando image you have received to Delete it, Flag it inappropriate or Download it to your iPhone’s photo library. The download option is an option I don’t like in the app, someone being able to save my snap shot shares puts a different angle on the shooting thoughts.
New in this update to Rando is a small circle with a line in it next to each photo. Tapping that will result in the image becoming a rating solution so people can now say they enjoyed or didn’t enjoy a photo back to the creator. On either side of the rating face is the close without saving edits ‘x’ and save check buttons.
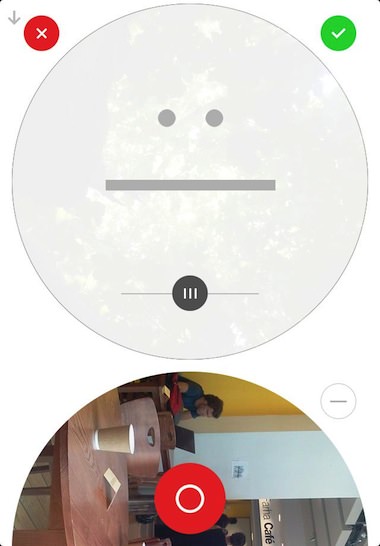
After you have rated a photo shared with you or someone has rated one of your photos, the small circle next to the image changes to what the rating is. Anything from a big happy smile to a very sad frown. Some folks may just hit the rating circle then the green check mark thinking they just gave a positive till they learn they have to adjust the face. It’s tricky to do an UX that is more than a Like or nothing solution. Now, I will know if someone likes my grapes shot or not. No idea who the person is, hope they are not allergic to grapes!
If I’m going to use a flash with my iPhone, it has to be cool, but still have warm light too
Alright, having a ‘must be seen with’, cool, flash isn’t really on my checklist. In fact, a little less cool on the light end and more towards ‘warm’ light would be nice.
What would this flash have to have?
Mobile – it has to be small enough to carry with me. I don’t carry a bag when buzzing around town and that is usually when a dark subject matter could use some fill in light.
Less wires – best would be wireless, at the minimum I need manageable wires that I don’t have to wind up and unwind constantly. The flash needs to be able to get away from the iPhone.
Warm light – not just a big bunch of dumb LEDs that blast the subject with white white light. A warmer light is what most of my shots could use. Maybe adjustable would be a bonus since warm isn’t always best, but definitely cold white is not a 100% solution.
Battery life – I don’t mind the iPhone sharing a bit of power if the flash has to be wired, but the flash can’t rob me of hours of iPhone battery time. Best would be the flash has it’s own battery, rechargeable without the need of a special charger/cable.
Price – Affordable. Since I will be traveling around with this flash in my every day life, I really don’t need a flash that is close to the price of my iPhone! I don’t mean ‘cheap’, I mean reasonably priced for the technology, not for the novelty.
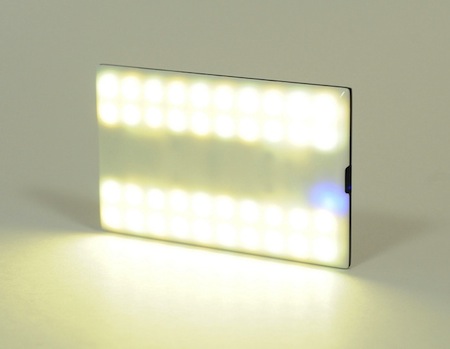
It’s a basic list, but the list is a tall order to fill it would appear since I have been challenged to find something that hits the whole list. Which brings me to the reason for this post, I seem to have stumbled on a hardware solution, the Nova. Take my above list and check everything as ‘included’, and towards the wish list side also, not just the minimum required.
Have not heard of the Nova? No, you wont find it at your local Photographers mall store, or even online. It’s one of those Kickstarter projects. Which means – while it’s cool and everything looks like it’s a must have, the earliest one will be in my hands will be early next year.
Mobile, it’s the outside dimensions of a credit card and thinner than a iPhone!

Less wires… it’s Bluetooth 4 wireless, working with iPhones and iPads.
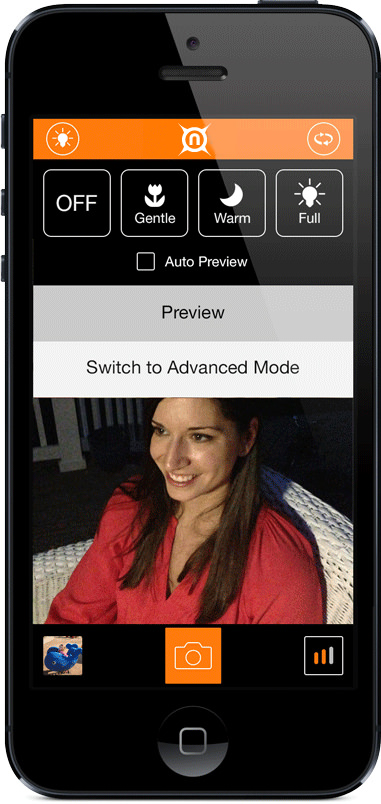
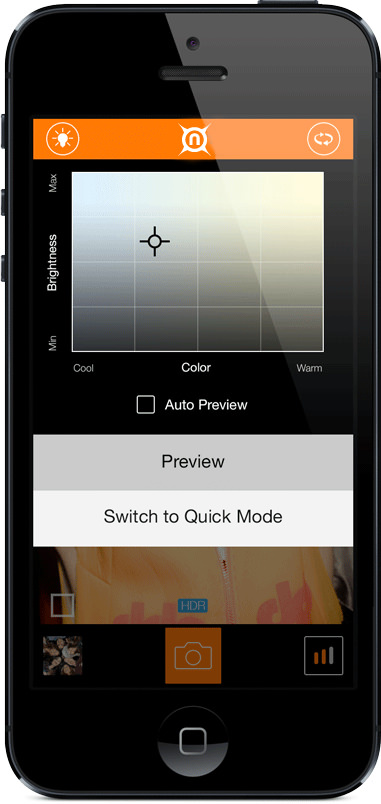
Warm light is available as is cold, the flash is actually adjustable via the free iPhone app. Which means that to use the Nova flash, you have to use a special app. While my first reaction was “how limiting”, a second thought was that it makes sense since the built-in camera app wouldn’t know to tell a Bluetooth device to strobe a light source.
Battery life is a surprise on the little Nova. The folks creating this solutions say that the lithium ion polymer battery is good for weeks of stand by, with up to 150 flashes. Win for me also is charging is done via a USB Micro B connector.
Finally, Price – when I discovered the project, all of the early adapter $49 priced options where used up. The Nova flash is now available for a $54 pledge. I wonder if this will be a stand alone solution or will others ‘see the light’ and start building similar. I’m looking forward to lessening the wish for more light when the subject calls for a bit of fill.
 All images in this post are credited to the creators of the Nova wireless iPhone flash
Creating Art With iPhone Photos Isn’t All Just Filters
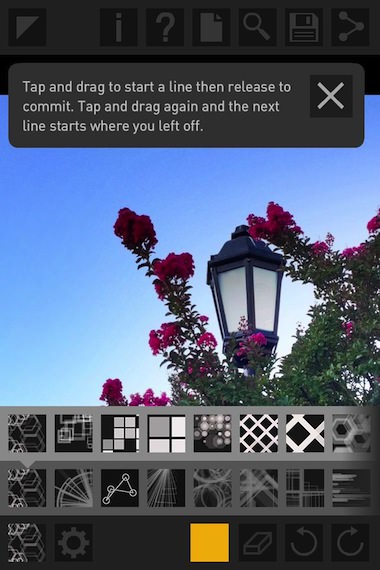
Ready for a change? A newer iPhone photo enhancement app… that ISN’T a bunch of filters. I still enjoy using filters effectively to expand on the emotion of a photo. But, this post is about the world outside of ‘enhancements’ and more about ‘art’. An app that fits the ‘art’ from iPhone photos is Deco Sketch. For me, it’s fun, but looking at the examples there are those that can use the app’s tools to make very memorable images.
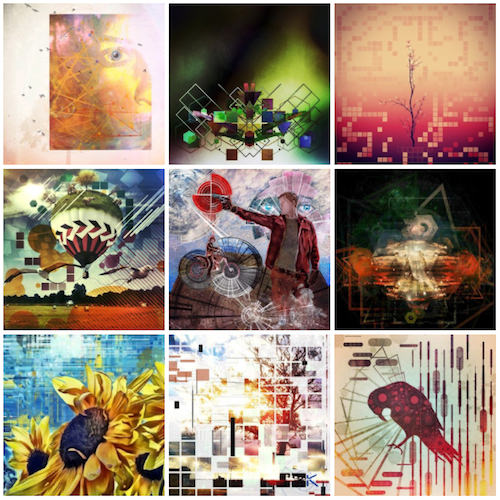
Deco Sketch is a geographic art tool to use on photos taken with the app or imported from the iPhone’s photo library. Art sketches are done via 10 brushes that can be adjusted for 130 different effects. The brush strokes can also be adjusted with 15 configurations. And, exporting is a full 8 MP (2448 x 3264).
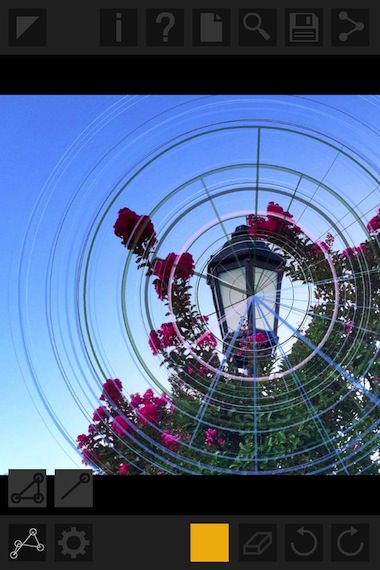
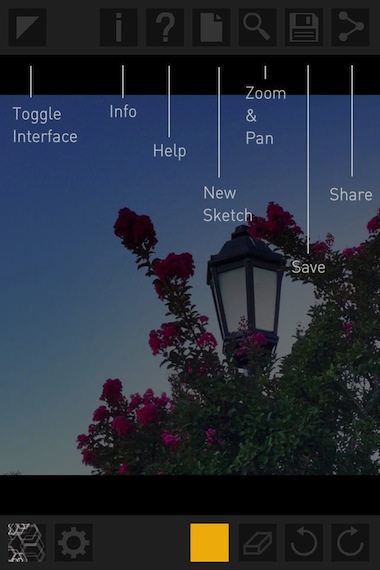
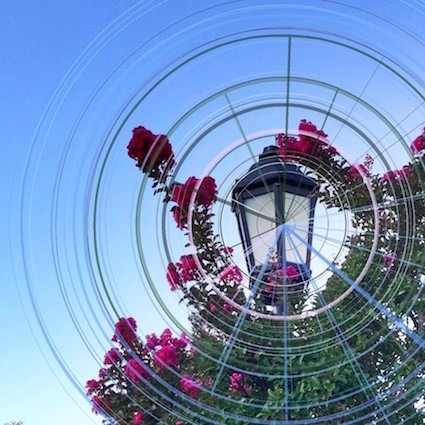
The tools buttons are well done with little explanation needed to know what it behind them. The application of an effect is more than selecting and applying a bunch of blotches. The geographical lines apply differently depending on starting points, movement of your finger and ending point.
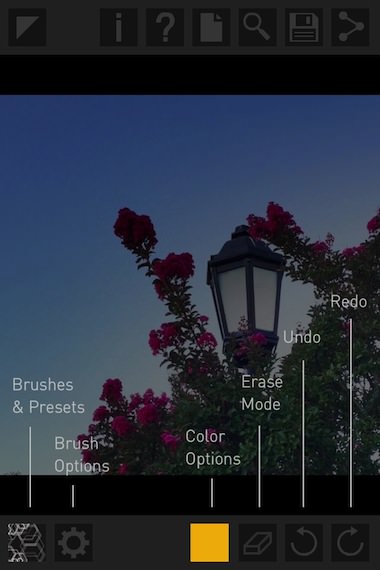
Choosing a different geographic option in the lower of the two rows, results in a new line of fine tuning options above it. Select one to apply. There is also a color picker to use for the lines. I found it fun to just blur the color object in the image. Below is one of the many ‘hint/tips’ that pop up when using Deco Sketch… while they can be turned off, I found them very useful to leave on.
 Using the magnifying glass, you can zoom in/out to get better precision. Also, using the button in the upper left corner removes all of the tools buttons for a clean work space.
 The finished Deco Sketch image can be shared out of the app via email, message, Twitter, Facebook, use as a photo for a contact, save to the iPhone photo library, print or ‘copy’ to open in another app.
Buenos Aires Square Format Photos Like My Instant Film Camera Takes
When out at the Antique Malls, there is almost always someone offering little square photos. They are fun to browse through, handy if you don’t have any family history, build your own for a couple bucks.
Interesting that many of the small square photos are actually from early Polaroid cameras. Before the iconic SX-70 and the auto developing photos buzzing out the square photos on a large lower lip print, there was the two part instant film. The early Polaroid cameras opened with an expanding front lens, the exposed film was pulled out the back, waved around for a bit then the two parts where separated to show a small lipped square photo. Fujifilm is now offering film for these early cameras so an older 180 model pulls in $700+. If you want to see the different cameras and film options, take a look at the The Land List.
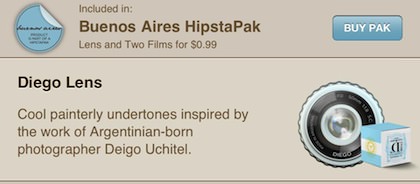
There are a few iPhone filter apps that make an attempt to match the real look of film photography. That is, film photography of yesteryear with 1940/50s or lomo cameras with simple lenses. Having a collection of those early cameras that actually work, it is fun at times to compare a filter to a shot I took with film. This week, Hipstamatic rolled out a new Buenos Aires film and lens pack.
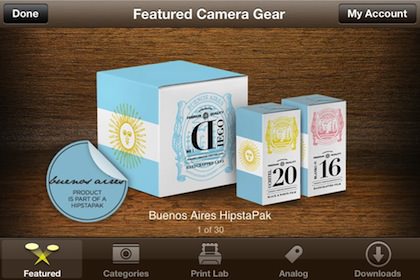
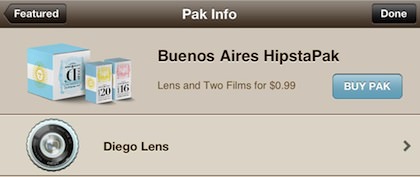
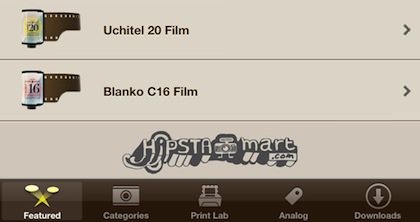
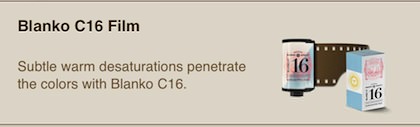
The HipstaPak is a single lens, Diego and two films, Uchitel 20 and Blanko C16.

As a reminder, Hipstamatic has you choose a lens, film and a flash (turn on/off) that you use to take a photo. Like early cameras and film, you can’t change that choice after you snap the photo. You tune the photo ‘later’. I have my selection of filter/enhancement apps I use, with Hipstamatic having it’s own place in my daily shooting… the fun of planning ahead instead of bulk snapping and tuning later.
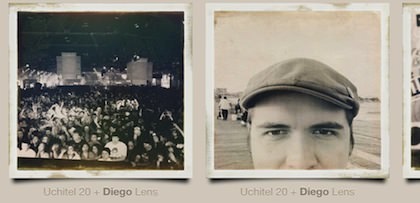
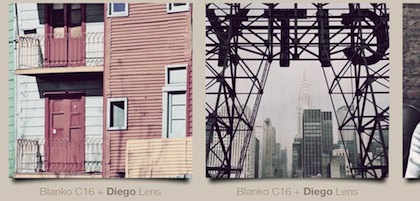
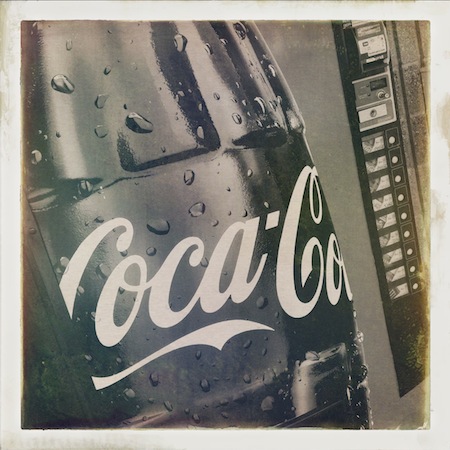
Here are a few shots of the lens/film options in the Buenos Aires Hipstapak, real world stuff:
Lens: Diego – Film: Uchitel 20
Lens: Diego – Film: Blanko C16

Lens: Diego – Film: Uchitel 20
For something to compare, here is a shot using the Diego lens and the Sussex film
Lens: Diego – Film: Uchitel 20
Lens: Diego – Film: Blanko C16