My Sketch gets True Color upgrade for iPhone photos

Holiday and event cards always provide a nice challenge when creating their cover art. Do you use typography or a photo? Is the photo just a shot you took or do you enhance it for the mood. While My Sketch isn’t an app I use all of the time, it is one that has gotten me passed being blocked a few times when I need a unique feel to a creative piece. Today it solved a blocking issue for me so I thought I would share my success, fun stuff.

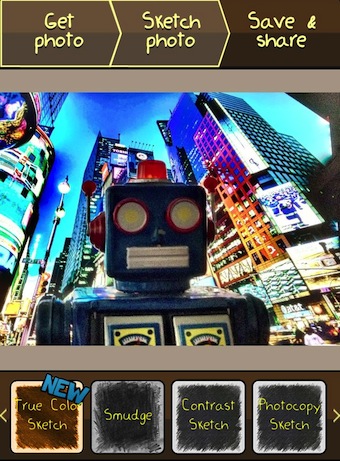
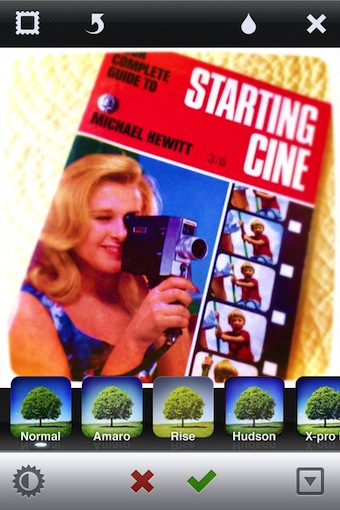
The app converts a photo, from your iPhone library or taken through the app, to what looks like a sketch. The My Sketch app offers 20 different sketch effects. This update includes True Color which is the effect I applied above. The new ‘sketch’ appears in the row of options you can swipe through below the photos.

The completed ‘sketched’ photos can be saved to the usual popular list of social friend sites. A step I always miss is the ‘Save’ button at the bottom. You must use the button for My Sketch to save your creation to your iPhone photo library. If you exit the app without doing that step, you lost your work as it wont be there when you re-launch.

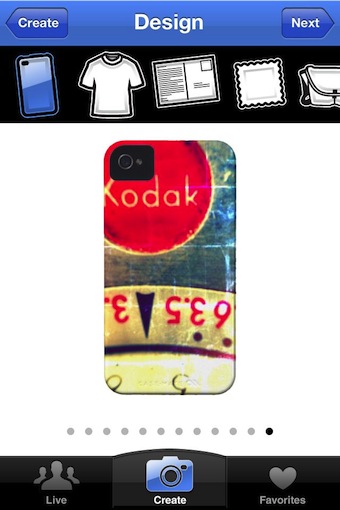
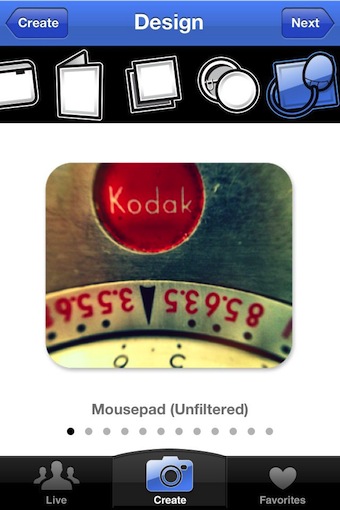
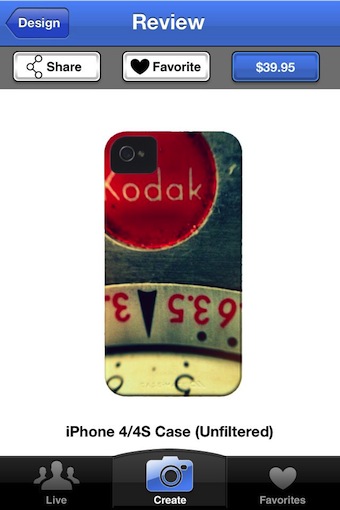
The Sincerely print ordering system is built into My Sketch. It cuts a trip to the print shop is you want to create and have them print the image on a variety of layout styles.

KLYP iPhone Accessories for the serious photographer

There are many fun accessories for the iPhone to give it help with photography. You can clip on lenses, add a case that protects the iPhone in all weather or clip on a edge so the iPhone can mount to a tripod. The KLYP package makes all of that look like entry level options.

When looking over the KLYP options, you may ask yourself if it would be easier to just carry a regular digital camera that has much of this built in. If you prefer using your trusty iPhone 4/4s, then these accessories will put the iPhone over the edge into the land of enhancements for noticeably better shots.

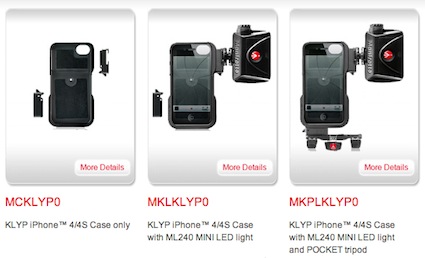
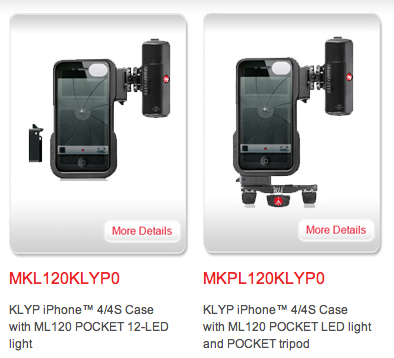
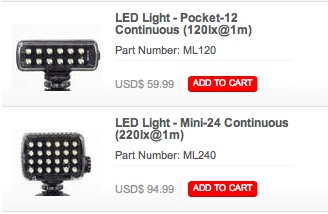
KLYP offers a case that has two mounting areas: one for a tripod and one for a light attachment. The tripod isn’t included in the packages so you have to add that one or use the one you already have. The lighting isn’t a flash, rather a high power LED group that comes in a variety of sizes (available separately or with the package).

Do you ‘need’ this set up? Most likely it is way more than the average snapshot needs. But, if your doing close ups or video, these should make a marked improvement. Price wise though, the parts add up pretty quickly… as does any professional camera equipment.

PhotoForge2 taking Retro Film and Flash for iPhone photos to the next level

Some people complain about using Hipstamatic because it takes the photo in a retro fashion which is set via choosing lens/film/flash combinations before the photo is taken. They would prefer taking a regular photo then editing it. While Hipstamatic takes the photography experience back to the days of choosing a physical camera/film/lens, I can understand where the ‘modern’ iPhone photographer may want to use the many options they have rather than the limitations of yesteryear.

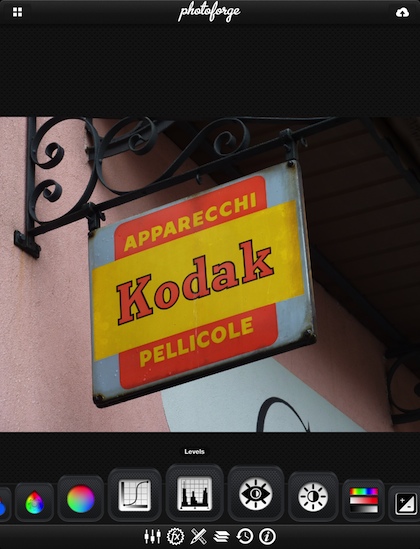
With the snap-and-edit-later photographer in mind, PhotoForge2 offers the usual filters/editing tools, but a large selection of retro film/flash/gels/papers to mix and match per the need of a particular photo. PhotoForge2 is a universal app so purchasing it will allow you to one the single copy on both devices. The interface is the same between the two, below I used screen shots from my iPad to see the options spread out more, making them easier to see.

The user interface for PhotoForge2 has all of the tools (except share and apply) across the bottom of the screen. Choose one of the icons to bring up the tools in that area. Then swipe from side to side to choose which to use.

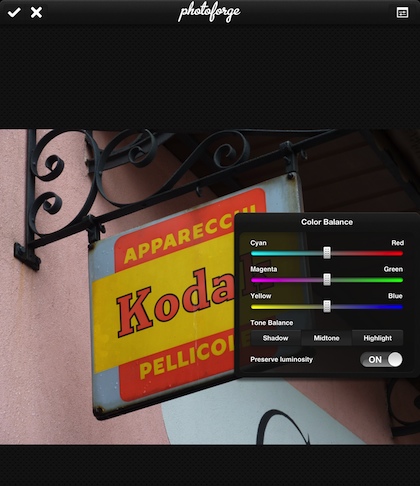
Some PhotoForge2 tools offer the ability to fine tune their impact. When in the edit mode, a check (accept/apply) and ‘X’ (do not apply changes) in the upper left corner takes you back to the tools overview screen. This allows as many adjustments to a photo to be applied as you need. Layers are also supported so you can separate the adjustments for easier editing as you go.

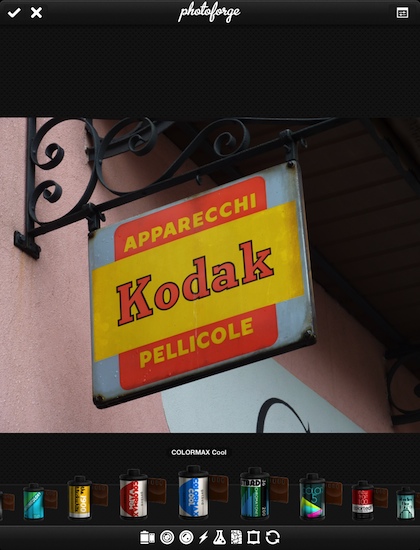
One of the choices in the ‘FX’ area is a camera icon for ‘Pop!Cam’. This selection changes the PhotoForge2 tools along the bottom to Film, Lens, Gels, Flash, Chemicals, Paper and Frames. The ‘Pop!Cam’ area will let you use the tools but in order to save the image with the effects applied they have an upgrade fee (currently $1.99). Since this is not a free app, it is nice that a person gets to play a bit to see if there is any value in the Retro options.

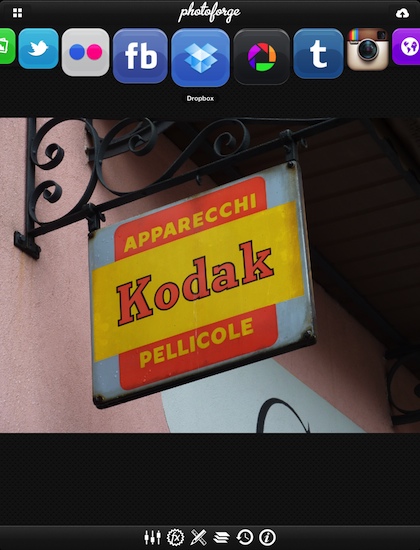
Saving and sharing your creations is done via cloud icon in the upper right corner. The usual Cloud storage services are supported, as are the photo sharing sites. If you know someone else with PhotoForge2 installed, there is even the option to ‘bump’ to transfer images between the two units.


Expanded Instagram iPhone Photo Effects with Instagenius

Most posts to Instagram via the iPhone are quick shots that have one of the Instagram free filters applied. For me, photos usually run through Camera+, Dynamic Light, Snapseed and/or PaintFX prior to upload. These apps are easy to use but are meant for more than simply adding filters to photos.

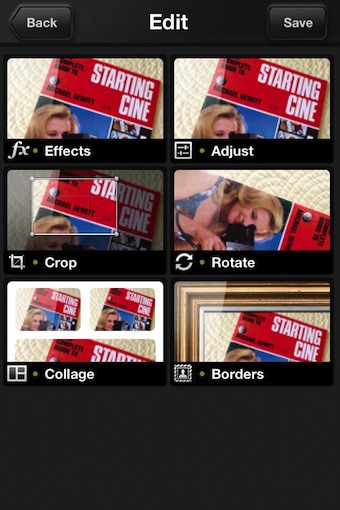
An app I was recommended to test, Instagenius, is similar to Instagram filter application but there are lot more options. Importing an image, Instagenius starts with giving you adjusting your photos with Effects filters, tuning with Adjust, Crop, Rotate, add a Border/Frames or create a collage (collages are small resolution 612 square).

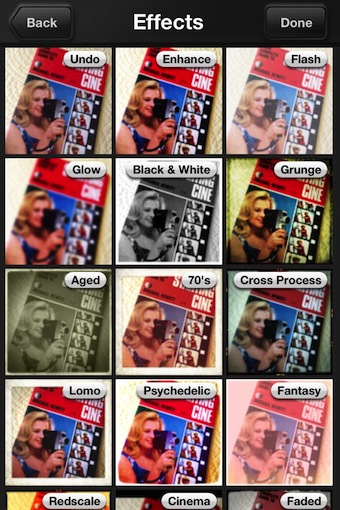
Selecting Effects results in thumbnail views of the photo with a variety of Instagram level filters applied for quick review.

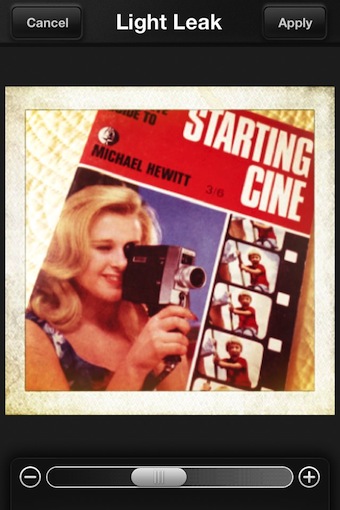
Just selecting an Effect does not alter the photo. Instagenius presents a preview of how the photo would look using the effect. Swiping left/right moves through the effects. Skip adding an effect through the ‘Cancel’ button or add using ‘Apply’.

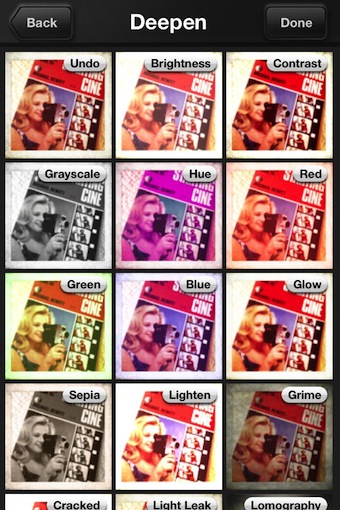
The ‘Adjust’ area also launches with thumbnails showing the adjustment applied. The list of options scroll up/down. If there are non you need to use, select the ‘Back’ button in the upper left corner to return to the Instagenius overview screen with the photo untouched.

The filters in the ‘Adjust’ area have sliders to tune the effect impact, select ‘Apply’ when done. Like the ‘Effects’ area, the app takes you back to the thumbnails of adjustments to apply another.

Selecting the ‘Done’ then ‘Instagram’ will launch Instagram with the photo loaded, ready to go through the normal steps. The images uploaded to Instagram are lower resolution than other apps that are less directed at Instagram. So while Instagenius adds more effects, the final image isn’t suited for many other uses.


Keepsy adds the ability to create photo print books on the iPhone

I have set up a couple print books using the Keepsy online Web service. It’s pretty easy to add photos, either from a photo library as well as photos I have on Instagram. My only complaint has been the feature where all of the chosen images are auto inserted into a photo book, that I then have to sort and shuffle. Bigger books can prove to be a fun juggling game. Overall though, the service is great for creating quality photo books that Keepsy prints and mails for me.

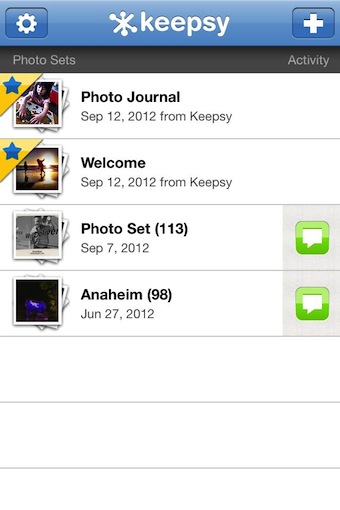
Yesterday, Keepsy released a free iPhone app version of their service. When you launch the app, it goes through the photos in the iPhone’s photo library and then divides those the apps sees as being able to be grouped. All of the rest of the images are still available to use in print books too.

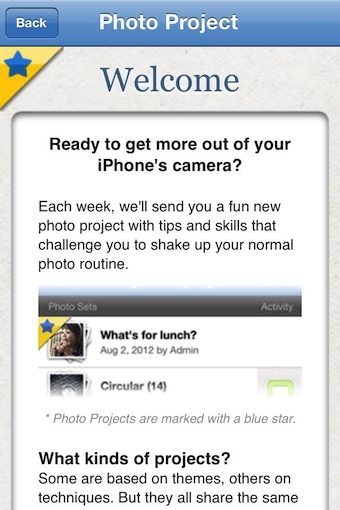
The first two ‘folders’ on the list are actually tools that make the creation of book groups easier. They offer suggestions as well button(s) to get a person started.

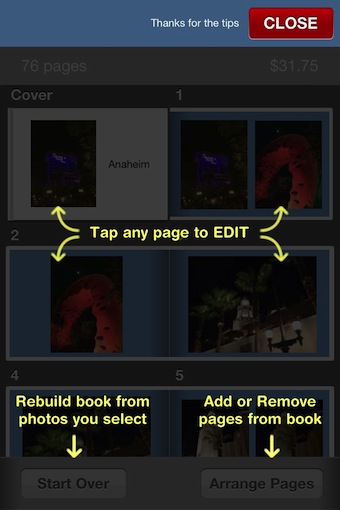
The additional areas on the list are the Keepsy app trying to group photos just to make it faster for the creation of print books. Anaheim in my case was actually photos I took at Disneyland. Opening a group, photos can be removed (good since if you have the iPhone HDR feature on, you have two copies of each photo), shared with other people so they can add photos too, then sent to print.

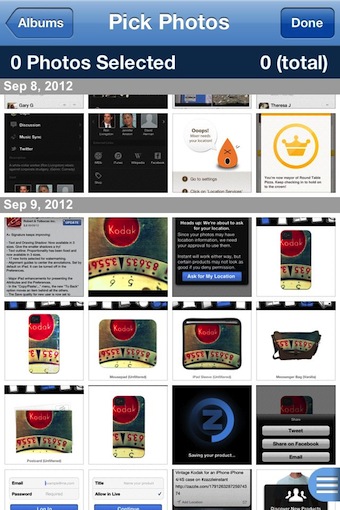
 Custom groups can be created from photos in the iPhone’s photo libraries. On the ‘simple things make me happy’, Keepsy groups the photos by date which makes it much easier to get through the 3200 photos I have to sort through when building a group for a print book.

The photos grouped together are automatically added to a digital version of the print book. Keepsy allows the photos to be moved around between pages as well more pages added since Keepsy attempts to keep page counts down to stay affordable.

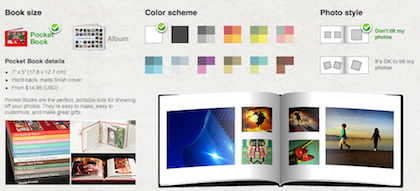
The Web site for Keepsy shows the options that the Pocket Book version of the print books have (notice that there is a base price, then a charge per page over that so smart grouping of photos on pages saves money):

Grab your iPhone and shoot some photos for your W Magazine contest entry

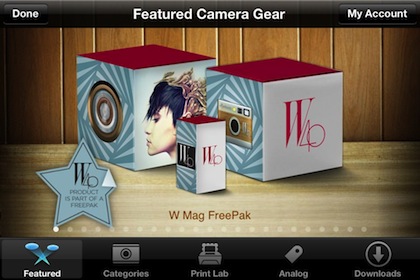
Last week I grabbed the latest film/lens pack for my Hipstamatic iPhone photography app. The Pak is free right now, through the end of this month. As usual, just launch the Hipstamatic app, tap the ‘cart’ icon and you should see the pack to download to start shooting right away.

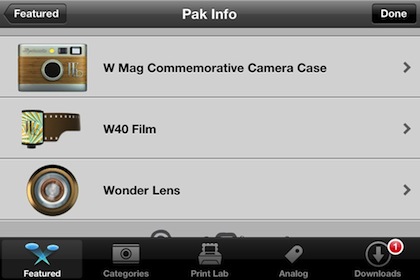
The W Mag Pak includes a nice ‘Magazine Photographer’ camera case… which doesn’t change the iPhone Camera action but maybe helps a person get into the fun of being a magazine photographer. Included in the Pak is the W40 Film and Wonder Lens, but no new Flash.

The resulting photos from the W Magazine Pak are right in line with one of my favorite photography retro look and feel.

Oh yes, the opportunity to have your iPhone photography creative work appear with the W Magazine! From the folks at Hipstamatic:

“Snap some fashion-forward photos and enter our contest for a chance to have your work showcased at a month-long, W-curated exhibition at the Ace Hotel in New York City! W Magazine will even select one overall winner to shoot a photo story for wmagazine.com. Learn more about the contest here.”


Snap the shot, create the product and sell… all through your iPhone

I have mentioned a few services that I use with the photos I have taken to share as well to create products for selling. One service that offers a lot of products that you can have your photos applied to is Zazzle. To help end-to-end, they offer a store you can set up where Zazzle will collect the money, assemble and ship without you having to do anything more than the initial product set up. The service pays you the percent you chose to mark up each product. Some of their offerings seem like people can get a great deal, others may appear a bit expensive and people may explore other options with no fault of your photo work.

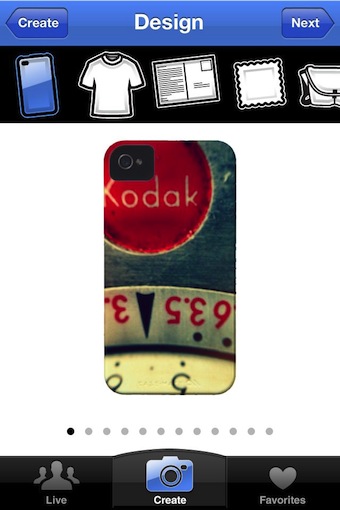
To help their service offerings expand, and to make it easier for you to create new products, Zazzle product creation can now be done via a free iPhone app (works in 2x on the iPad). Start by taking a photo via Zazzle Instant or importing from your iPhone’s photo library.

The only placement and sizing of an image is possible on the first import screen above. Once you have chosen ‘Choose’, Zazzle Instant will automatically place the image on the product. Moving the image around a bit like you can via the Web site interface would be nice. For now, a bit of experimentation via the move/scale screen is needed to get the image placement as you had envisioned.

There is a variety of filters available to apply to you image. Sweep left/right to see each effects impact on your photo. Normally, I would have the photo edited prior to getting to the point of using Zazzle Instant, but it’s a nice feature to make sure there isn’t a small tweak to get a bigger visual impact to the finished product.

Sweeping across the upper bar takes you to other products that can have the image applied to. The list is small compared to what your able to do via the Web site, but Zazzle Instant hits all the major product types. Select one to instantly see the product with your photo on it. Since you can’t move the image around the product within the app, some photos don’t work well with some products.

When you have the product as you like it, the ‘Next’ button makes it a reality. Zazzle Instant lets you share a link with others as well add it to your own ‘Favorite’ area on your iPhone for quick reference later.

The products you create on your iPhone do not need to live in a void, they can be added to your current Zazzle account. This way, products you create on the Web site or on your iPhone will all be grouped in the same Zazzle store with your ID. The product does appear pretty quickly on your site with a default mark up and category, you can edit on the Web site to better personalize the experience without causing the product link to change.

It’s the little things that make me happy! If you choose to share the news with others of your creation, the Zazzle Instant app lets you do it via Twitter, Facebook or an email. I like that you can edit the text prior to sending, other services just fire out what always appears to be an ad for their service rather than a call to action for your followers.

When finishing up your product design, Zazzle Instant allows you to ‘Allow in Live’. This is an area that is accessed through the left ‘Live’ button. Anyone using the app can sweep through a variety of creations from other users of the app. Both for inspiration and for purchasing opportunities.


EyeEm for iPhone goes 3.0 with new UI but stays true to quality over cute

No matter how you like to view and share your photos, there is a service available for you to do it just the way you like. EyeEm is a free social photo share service that I enjoy due to the type of people hanging out on the service. The service attracts photo uploads from folks that are leaning more towards creative photography rather than what they had for lunch. Of course, there is a little of everything, good and bad, but for the most part EyeEm attracts people interested in sharing work over fluff. Which means, there is no gamification involved. You don’t get extra likes because you liked someone else’s photos, you don’t get points because you commented on a photo of a washed out family photo… which means there is less quantity and more quality.

When I saw that EyeEm had done a complete UI rewrite, I was a bit afraid to launch the app. Happily, the business model has not changed, just the buttons and navigation through the app. The developers didn’t ‘sell out’!

In the original EyeEm, you had single line lists of different photo groups, based around two tag groups of where your at and what your doing:
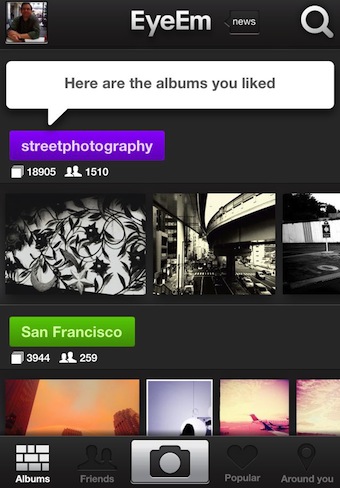
Launching EyeEm 3.0, the new app starts right off with a view of the photos recently uploaded by Friends. Notice the reduction from 5 to 3 buttons across the bottom of the screen. News access and Quick Navigation buttons are still across the top of the screen.

Similar to a feature very popular in Pinterest, depending on the direction of your scrolling, information on the screen changes. Scroll down and EyeEm 3.0 hides the navigation bars so you have more room to view the photos. Only the photo owner and tags show. Scroll up and the nav buttons re-appear.

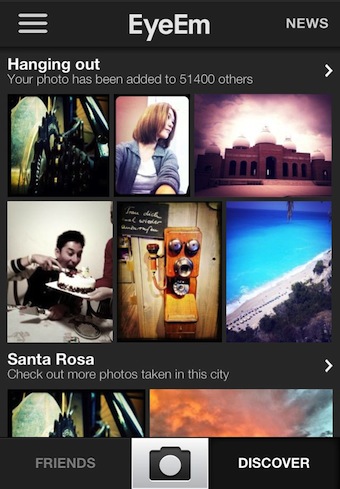
The groups of photos view has lost the colored header text box in favor of the name and quantity of photos in the group information. Scrolling up/down will still take you through the groups. The less ridged look of the Discover area is a small change that creates a whole new feel. The auto hide/show of the navigation buttons happens on this view too.
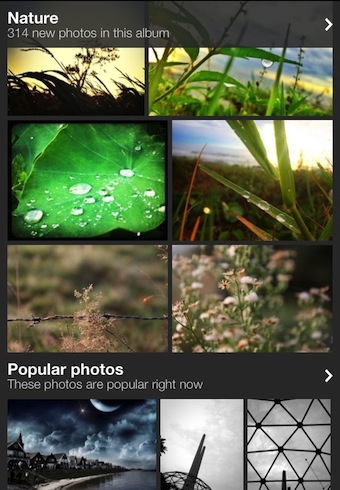
Click any group header to be taken to that area for viewing the photos specifically tagged to your interest. You can view in small thumbnails or full size views through the buttons in the upper right corner.
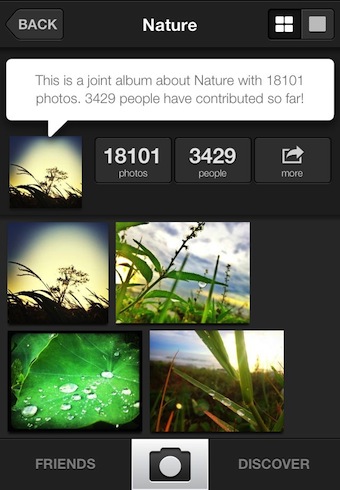
Settings and quick access to the different areas is via a slide out from the left – accessible via the button on the upper left corner on the Home screen. This shows the groupings of photos broken down to a particular area of interest. Note that if you use EyeEm a lot, you can go to the settings area and see/clear the cache of photos saved to your iPhone.

The ‘What’s new?’ area is still available to see the news from the EyeEm staff as well recent adds to the groups you follow and notification of others liking your photos. The layout doesn’t make it easy to see a whole bunch of people ‘liking’ your photos since the experience is about cross sharing with like interests rather than how many people tap the heart button.

Uploading an image has not changed. Choose the camera button at the middle bottom of the screen then snap a shot or upload one from your iPhone’s photo library. There are a few filters available to use, that isn’t the thrust of the service though. When you choose to upload, you are offered the ‘what are you up to’ and ‘where were you at’ tag pickers. To cut down on having to go to other popular social sharing sites to show off your creative work, there are buttons on the screen that will post from within EyeEm 3.0 for you.
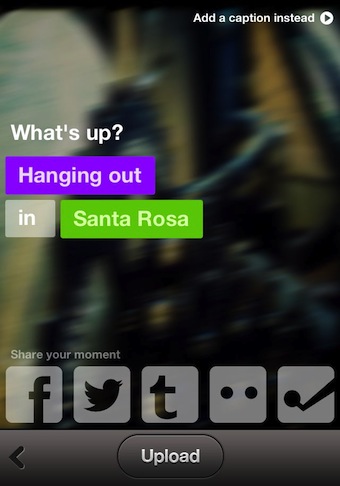
If you view your list of photo groups via the Discover button right after uploading a photo, the groups you added to will appear at the top of the list. Exiting the area and returning will have these intermixed with the rest of the areas, no longer at the top. EyeEm makes it easy to add multiple photos to an area, just go to the group via the arrow to the right of the header and add your photo.
 

Beware releasing your photo ownership via Terms of Service on the photo sharing sites

Just upload your photos and all of your friends can see and enjoy too. They can comment, and tell others about your fine photos. Maybe even rate, rank or purchase copies. Usually, the ability to share your photos online doesn’t require you to pay anything. Well, not any out of pocket cash, but you may be paying more in the form of ownership.
Every site that allows you to upload your photos to has a TOS that the site owners require you to agree to prior to letting you start posting. A quick glance, if you even take time to glance over the text, will show there is verbiage about you not sharing someone else’s photos as your own. What might get lost in the fine print is who owns your pictures after you upload to the site. A few friends of mine really dig into the text before they upload. I was surprised to learn about the bits they found regarding my photos being able to be used in ads without my knowledge. As well, one service that can sell copies of my photos… sharing the profit with me but not the photo credit.

Looking around for help with things in Terms of Service agreements that I should be concerned with, I found the site: “Terms of Service, Didn’t Read“. The site offers an A through E letter rating for sites across a wide range of things you should be concerned about. The site covers more than just photo sharing sites, anything with a TOS that the site has taken the time to review and rank… a lot of social and blog services are in the mix too.

An example of one site I was previously using got an overall ‘D’ rating (note the negative and positives) :

  •  Ownership
  •  The terms can change at any time
  • + The terms are easy to read
  •  Open only to individual photographers and graphic artists
  • × —– Store: your account can be terminated at any time
  •  Waiver of legal actions
  • × —- Store: Authorship
  • + Pseudonyms are allowed
  •  You are responsible for any claim and agree to indemnify them

An easier way of layering photos on the iPhone using Layover

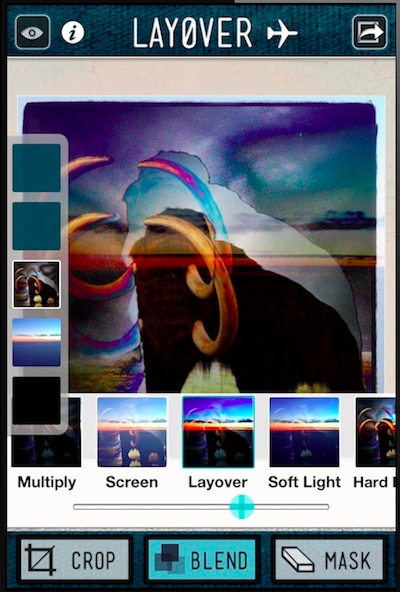
Many of the higher end photo editors on the iPhone and iPad let you add layers of photos over each other. Generally though, those apps require a bit of effort when moving layers around and are more positioned at creating very nice artist results. A ‘new to me’ app trying to make layers more usable for quick edits is Layover.

While Layover is easy to use, the universal app isn’t lacking any features. Think of Layover more on the Instagram side of editing than the Photoshop side. You can layer up to 5 photos into a single finished image. Included is 15 filters (Multiply, Screen, Layover, Soft Light, Hard Light, Color Dodge, Color Burn, Addition, Difference, Darken, Lighten, Hue, Saturation, Color and Luminosity) to apply to your images simply by dragging the photos to the filter.

These features would make Layover a great app to bring together many photos into a memorable finished image. But, there is another feature included to help bring out parts of photos and drop out other areas. Per the developer:

Mask
The Mask feature lets you erase specific parts of pictures to isolate elements, remove the background, and let different layers show through. Use the Mask slider to control how dramatic or subtle you want the erase marks to appear, and then swipe your finger across the areas you would like to erase.

When done, export to your friends on social sites or save to your iPhone’s photo library.