Category Archives: Editing

Editing pictures on the iPhone

What do you get and what can be done with a iPhone taken Photograph

“Yea, but that is just a phone camera, I used a real camera”. Living and traveling through tourist areas, I see a lot of cameras swinging from people’s necks. It’s fun to see what technology is actually being used and who is using it. Many times you sit at a lunch area to hear/see the table next to you that has a camera but is still a local. They just watch for the unusual.

I move about more with my iPhone in hand than taking my full size. It isn’t that I believe the images are just as good or that it is handy, mostly it is because it fits in my pocket. Sharing built in and it’s not an additional device is two strong point in the photography area too.

It brings up the question of what a person can do with the photos they take beyond posting to a social photography service.

First, the chart from the Web site Life in Lofi. They have put together a image showing what the  pixel output is across the many iPhone cameras. Below is the graphic but y0u will want to visit the article for more information;

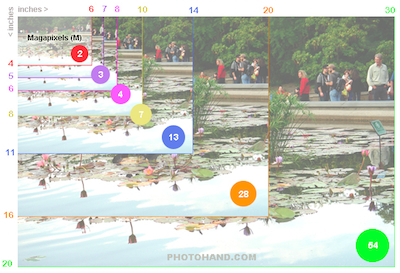
Life in Lofi also has a quick table of the max size per MP a photo can be printed. A more informative graphic is put out by Photohand. The Photohand creation shows a quick reference for megapixel vs print size and also includes handy information on file size. Again, jump to their site to get a deeper dive.

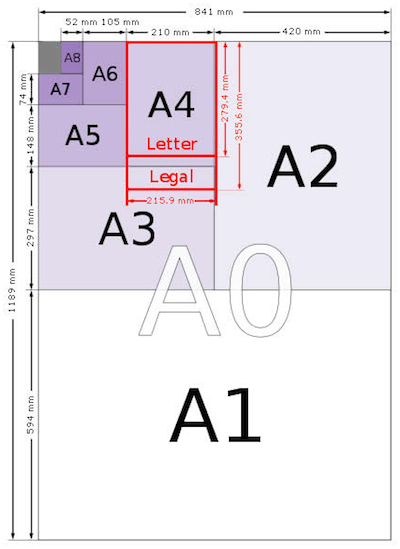
And finally, if you are going to print the photo yourself, it is handy to know information about the paper print sizes. Some programs give a choice to print to A4 or A6 sized paper. A Web site, PaperSizes, presents a very nice post about the different size papers, their identifiers, tolerances, formulas for calculating paper sizes, and even international information. Click to the papersizes site for the full run down.
 

Fine tuning how pictures are taken with the iPhone, before worrying about filters

In the film camera days, I spent time learning how to work with light, lenses, and film speed. All to produce an effect I was looking for. It took practice and a lot of film. Now, the default for most iPhone camera users is to snap a photo and apply a filter to get the look for maximum impact. I’m right in there, playing with filters and fine tuning color balance, etc to get just the right feeling.

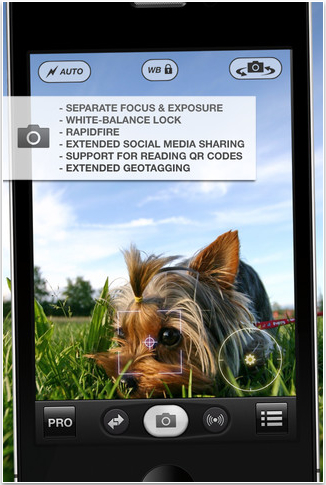
There are a couple app that actually enhance the action of taking a photo with the iPhone in the first place. One that keeps coming up amongst my iPhone Photo friends is Pro Camera. The app offers filters, sharing and Dropbox storage after the photos is taken like other solutions. What Pro Camera offers that few competing apps do is the pre shutter snap tuning.

For close up shots, Pro Camera offers a enhanced zoom, which used with the app’s Anti Shake creates very clear macro images. I use the app’s ability to separate out the Focus and Exposure spots most often to focus on a point yet keep it from being the dark area of a photo.

SelfTimer, RapidFire burst shooting, Virtual Horizon and QR Code handling are all great ‘other’ features that make Pro Camera stand out from the crowd.


Wow Camera for iPhone, Pro version is Free for limited time!

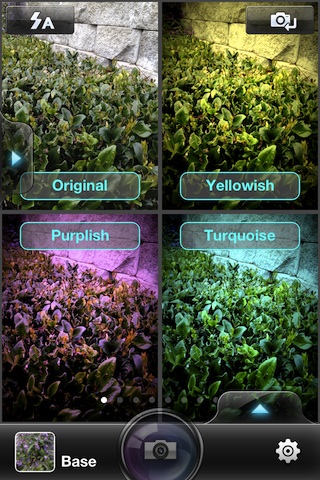
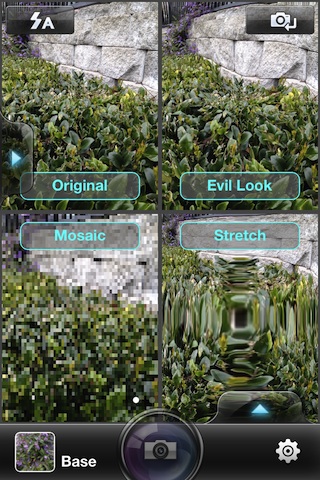
An app showing up for free this weekend got my attention first because of their different angle on taking pictures. Rather than depend on filters after the photo has been taken, Wow Camera Pro shows you what the image looks like with the effect they are offering.

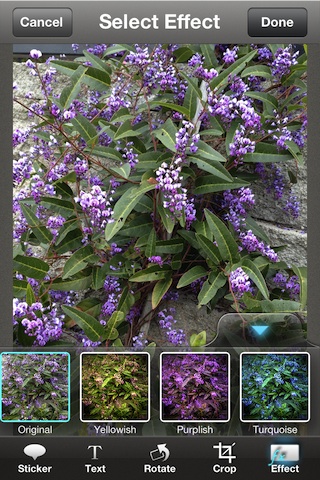
These are chosen from the small ‘up’ arrow in the lower right corner of the app, then choosing the effect group. While the flowers I was standing in front of don’t really lend themselves to needing these effect, you get the idea. From the left arrow, Wow Camera Pro offers a pull out menu offers photo taking assistants. Once the photo is taken, there is a series of filters that can be used along with the usual crop and rotate seen on many other camera app.

Adding text (many fonts, size and colors) and text balloons is also supported, a bit of a surprise with what at first appears to be a photo filter app. I will be shooting a few shots to learn the pre-capture effects so I can ‘see’ when a shot will be best suited with one. A bit of new fun, all from a free ‘Pro’ app.


Add Text, Handwriting and Stamps to your iPhone Photos, on the iPhone… Free this weekend!

You never know when the need might hit me. I need to write a annotation on a photo, add a watermark or stamp. Sounds like a simple need, but to do so has been possible through notes apps or a app per type of text I want to add. Finally, an all-in-one app that gets all my iPhone Photo notations handled. To make the app even better, the app A+ Signature is free through Feb 14th! This isn’t the ‘lite’ version, the free offering is for the full power app.

There is a lot more tuning available through the app than I want to go into on my simple blog. Color of text/ink, sizing, placement, editing, outlines, seemingly endless list of available fonts… and more… all in this one app.

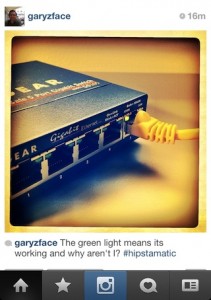
Update to Instagram for iPhone – changes you can really see!

The folks from Instagram (the social iPhone Photo service!) shot out an upgrade today. It’s full of what seems simple but will make a huge impact. A new filter, a new enhancement and a new UI!!

So, 2.1 includes the Lux photo enhancement. You may notice that it is very similar to Clarify in other apps I have mentioned before. It sharpens the colors and and brings the dark areas up to level with the lighter areas. There is also a new filter for your photos, called Sierra. It is a brighter, more colorful Earlybird.

Lastly, the Instagram buttons along the bottom have matured and the simplified look lightens up the whole experience. All fun stuff, looking forward to sharing my iPhone shots.

Selective color add and enhancing on iPhone Photos

I have run through a bunch of apps I use to tune images overall with contrast, brightness and saturation… as well a bunch of filter options. One item in my iPhone ‘camera bag’ is the ability to add/remove color from a iPhone Photo. For a long while, I have been using ColorSplash (more on it later, mentioned in another post here) to make areas of a photo pop with color while altering the rest of the photo to black and white.

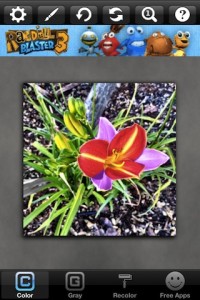
A new app, to me, is a free app (no way to remove on screen iAds) called Color Splurge. It offers a different and valuable set of photo coloring enhancements. After importing a photo, it is converted to gray, or rather, all color is removed. You can ‘paint’ with your finger which areas you want color to be returned to. What sets Color Splurge apart from many options is there is also a color picker to paint color back on. Color can be chosen through color number dials or three sliders. You aren’t able to adjust the saturation of the color but that ability can really change reality in a photo.

Previously, I have taken photos and only highlighted the areas of importance or where I want a element to cut out visually. With Color Splurge, I have been reversing the thinking where I use the color brush to recolor the whole photo then drop areas out of little importance by converting them to gray scale.

Creating Typographic Word Art on the iPhone

Will I be using this app everyday, no. Will I be saving my action shoots with this effect, not likely. What is very likely though is that the effect availability has opened up a whole new line of thinking around some photos.

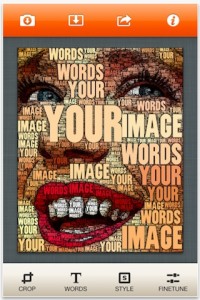
The WordFoto app takes an image on your iPhone and overlays words that you have chosen. It appears the size of the text varies a bit depending on the detail of a point in the image. There are 8 preset effects to start with; Romance, Color Classic, Gray Classic, Comic, Howling, Black Label, Blocky and Howling. Then, using the WordFoto adjusters, you can tune the highlights and shadows, saturation, contrast, brightness and even the edging. Cropping is also supported.

Sharing is done via email, saving to your iPhone or sharing on Facebook. Hmmm… Facebook… it might be fun to use the effect on my Timeline header. Meanwhile, I’ll try it on some photos I took of the building in San Francisco. I wonder what a Christmas Card might look like with the WordFoto effect…

Pixelating Parts of iPhone Photos Right On The iPhone

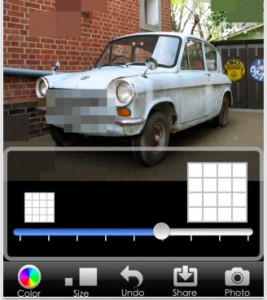
Popular in reality TV shows is the pixelate company logos of offensive images. You often see a person wearing a hat or tshirt where the logo is blurry. From time-to-time, a similar need might come to a photo taken with your iPhone. A license plate or someone in a window of a building that should not be there. Cloning or soft blur if you have the time is best, I’ll cover here shortly how best to do both of those. If your in a hurry though, a quick pixelation method is the app MosaicTouch.

You can select an area with two fingers or just swipe across with one finger to apply the pixelating effect. To lessen the impact of the area, there are 18 base colors to choose from as well you can adjust the size of the pixels. MosaicTouch is quick, simple, and even lets you share directly out to Facebook, Twitter, Tumblr, email or save to your iPhone’s photo album.

Fun to blur out friends at a party pictures too for a humorous ‘what stays in Vegas’ look.

The Science of Taking Low Light Photos with the iPhone

there are mixed opinions on if the latest iPhones are better in low light than previous models. The higher resolution, faster action and more capabilities to focus has gotten us to notice when our images are less than perfect. So, whether it’s a iPhone 3 or iPhone 4, photos taken in low light appear grainy at best.

One solution is to hold the shutter open longer to get as much of the available light into the iPhone’s camera. A new solution offers a different line of thinking… taking multiple pictures and merging them together. Both paths work best with the iPhone on a tripod or at a minimum on a solid surface. The solution, Average Camera Pro does as it’s name states, takes multiple images and averages them. Giving a brighter finished photo with stronger colors. Length of time and number of photos taken is adjustable.

Taking that a step further, when a iPhone camera is assembled, there are a few irregularities that show up in photos that are challenging. Average Camera Pro offers a solution to this problem too. Telling the app where the issues are, the app uses the info to correct those areas. “Telling the app” is as simple as taking a picture of a white piece of paper.

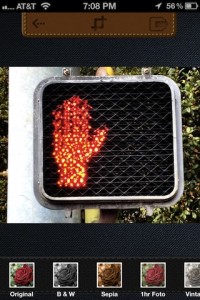
Creating photo mosaics on the iPhone… for free

Normally, mosaics are a job for the desktop computer. Software has to look at a photo, examine the bright/dark areas and finding pictures that reflect the right coloring. An app that does basic cropping and image filters also offers several levels of mosaics.

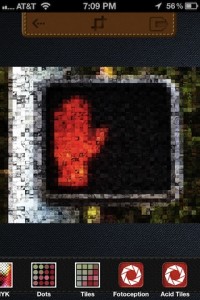
The app, Fotoyaki, is a free iPhone app that produces some very interesting effects. Like any specialty photo app, some pictures produce great results, others not so much. The free price of Fotoyaki means it’s on my iPhone that I toss pictures at to see what works.

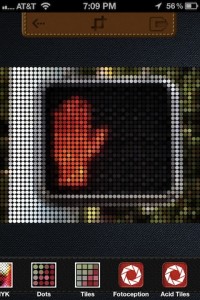
Along with the mosaics processing, there are also to levels of dot effects that can really be fun. The Fotoyaki dots have proven to work best on images I have taken with straight lines. Sharing the finished result is done by saving to the iPhone photo library, email, Twitter and Facebook.